CONTENT

The Importance Of Light In Photography

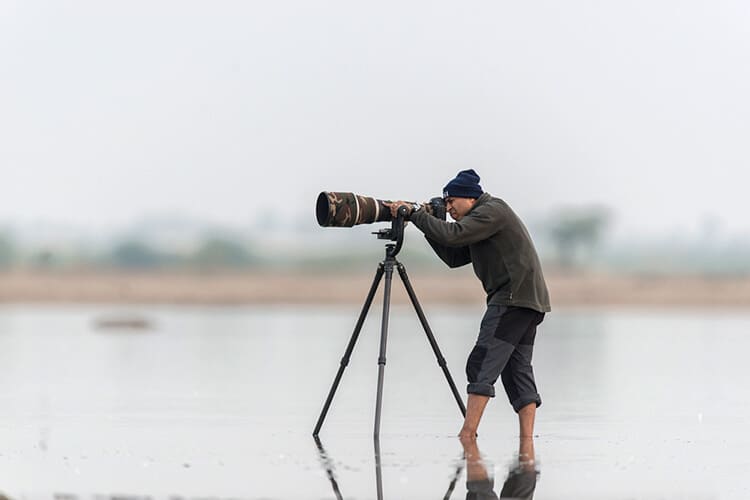
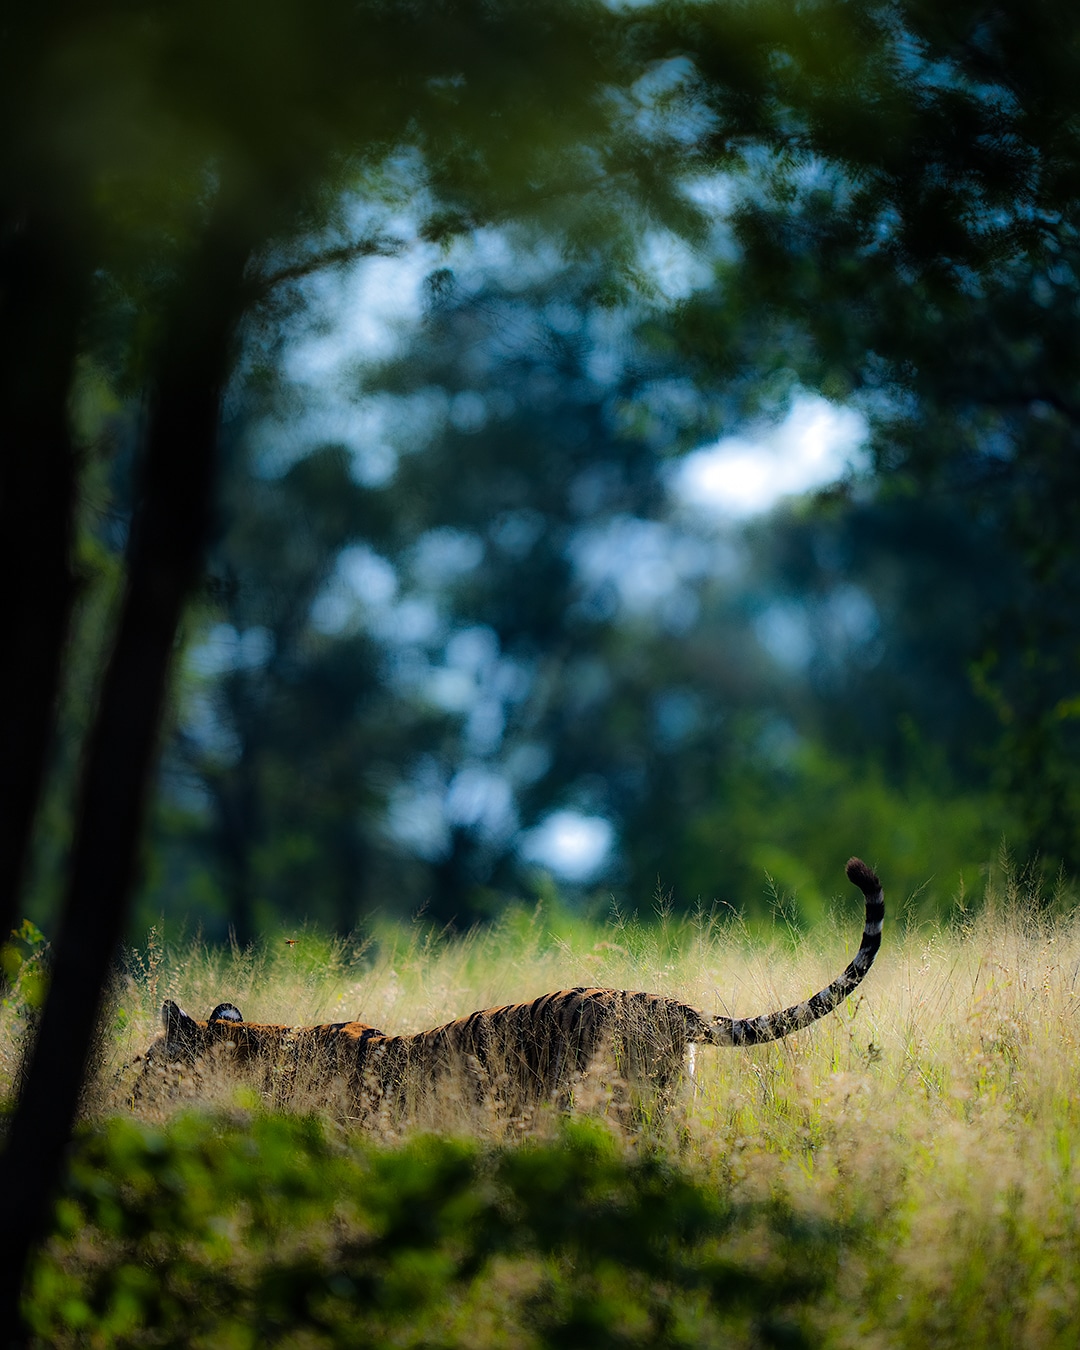
What Happens When The Light Strikes Right ?

One of the most radical upgrades in the progression of human artistic expression, photography is the art of capturing light using a camera. Over the years, the marvellous evolution of the photographic medium has come a long way. Along with the composition and timing of the shot, the surrounding lighting is an inevitable factor while capturing photographs. From positioning to shaping and manipulating, lighting adjustments determine the color, luminosity, vibrancy and texture of the subjects captured. The best shots largely depend on the lighting setting in which they were captured.

Let’s have a look at how lighting plays such an important role in photography !

spotted deer in backlight

The source of light for photography can either be natural or man-made. Different moods and atmospheres can be created for capturing shots as per the photographer’s imagination. These are the four main categories of light:

Natural Lighting

If you wish to capture a shot in natural light, you must have a clear understanding of the angle of the Sun and its prospective effects on the picture composition. Since natural lighting is softer than artificial lighting, try shooting in hours closest to sunrise and sunset. During these hours of the day, the brightness of the Sun is less extreme and it’s positioned off to a slight angle instead of being directly above your subject.

Front Lighting (or Flat Lighting)

If you place the light source directly in front of your subject and not at an angle, the result can be a limited amount of shadows. This lighting technique can be used to click amazing portraits because the light spreads evenly across the photograph. None of the sections is less or more exposed as compared to the others. If you’re planning to explore symmetry photography, the lack of shadows in front-lit shots will make both sides of your subject appear more symmetrical.

Royal Bengal tiger in the crisp front light

Backlighting

When the light source is placed behind the subject, you have ample room to play with the long shadows and silhouette in your shot. If you wish to see more details in your subject, pull your light diffuser for reflecting some light to the front of the subject from the background.

Backlight on Spotted Deer

Transmitted Lighting

Using transmitted light and white background is a great technique to bring out as many colors as possible. Translucent subjects such as leaves, flowers, and feathers are best shot with this lighting technique. Enhancing the dramatic mode of the subject, transmitted light photography produces a soft unearthly glow from the visible interior lighting.

This bestows the photographer with a visual perception of extended field depth. For capturing unusual and radiant images with this technique, the photographer and light source must face each other with the subject in between. For achieving optimum results, the backlight source and arrangement are critical factors.

Teak Wood leaf with transmitted light

Reflected Lighting

Unlike the transmitted light, reflected light penetrates just a small distance into the sub-surface of the subject. The directional difference of reflected light from the transmitted light in penetration depth is the reason behind the effects produced in both these techniques. Since the light is reflected off the surface of the subject, the shot is affected by the surface that the light bounces off from.

The reflection of light from the subject can either be specular or diffused. When light hits a surface and is reflected in multiple directions, it is referred to as diffused reflection. In specular reflection, light hits a smooth surface and gets reflected back at the same angle.

Northern Plain Langur under the reflected light

Hard Lighting

If you wish to capture shots in hard light, set up a single point of light that provides a high-contrast look to your photograph by casting distinct shadows. The sharp gradations between the light source and shadow add dimension, complexity, and depth to your subjects. A gritty and edgy look to the shot creates a sense of drama that renders a raw, hard-edged result.

Indian Peafowl shot in hard light

Soft Lighting

This kind of lighting arrangement needs to be created. For creating soft light, set up a light source in such a manner that light bounces off a reflector. You can even capture a soft light shot through a diffusion panel. Soft lighting is more natural-looking than hard light. This lighting arrangement makes your subject appear welcoming, warm, and moiré friendly. Capture portraits, fashion, food, and travel using soft light.

 Indian leopard

Loop Lighting

This lighting technique is especially suitable for portraits. It got its name because of the loop of shadow from the nose that forms on the cheeks. Universally flattering, this photography technique creates an intense yet less dramatic portrait.

Split Lighting

In this type of arrangement, the light source hits your subject straight at an angle of 90°. As a result, one side of your subject gets completely lit while the other side remains in complete shadow. If you intend to create dramatic portraits with a hard light as opposed to soft, split lighting photography is your go-to technique.

Elephant under the split light

Low Lighting Without Flash

When shooting in low light, you might come across challenging situations like large shadowy areas or bad weather conditions. For capturing desired shots in low light, keep the following in mind:

  • Set a high ISO in your camera. It is indicative of the sensor being very sensitive to the light and hence can be used when you have access to limited light.
  • Shoot in manual mode. This allows you to take control of your camera and manually set the ISO, aperture, and shutter speed. A slow shutter speed will cause less shaking in the camera; which will result in clearer photographs.
  • In low lighting, your camera might have trouble focusing on the subject. If you find it difficult to get a sharp focus owing to the low light conditions, look for areas where there is a little more contrast. An enhanced contrast makes it easier for the camera to focus on the subject.
Mottled wood owl

When it comes to capturing some mesmerizing shots, there isn’t a universal lighting technique. Different scenarios need to be lit differently in order to generate amazing results. The quality and positioning of the light source have a direct effect on the tone, emotion, and clarity of the final shot. Follow these tips while taking your best shots for adjusting the curves and angles in a way that your subject is illuminated and darkened as per your choice.

Want to master the art of lighting in photography? Enroll in our online photography courses TODAY!

Field Tips for Wildlife Photography

Path to Professional Photography

CONTENT

Land Rover Discovery Feb 2018 – Part I

Land Rover – Discovery With A Purpose Expedition to Assam and Arunachal Pradesh

Jaguar Land Rover India and Conde Nast Traveller India announced an initiative, ‘Discovery With A Purpose’, to spread awareness about India’s endangered wildlife. India has a great diversity of wildlife across several thousand species. However, many of them are under threat of extinction and thus need to be protected. The ‘Discovery With A Purpose’ initiative is aimed at bringing forth the species that face such a threat and thus create information and conversations around areas where our collective help and support may be needed.

31 Jan: Arrive in Dibrugarh
The entire team of Land Rover, the video and still crew and of course Environmental Writer and Photographer, Arati Kumar-Rao and Wildlife Photographer, Sudhir Shivaram arrived at Dibrugar on day 1 of the expedition.
Overnight at: Mancotta Heritage Chang Bungalow + Hotel Tea County

1 Feb: Flag-off and depart for Miao
We all met at Mancotta Heritage Chang Bungalow for a flag-off ceremony. JLR brand director Ankur flagged off the journey. We then departed for Miao (166km; 8 hrs).
Overnight at: Namdapha Jungle Camp + Tourist Lodge Miao

Late in the evening we reached Miao and spent the rest of the evening flaunting the all new Land Rover Discovery on the banks of the river.

2 Feb: Day-trip to the Namdapha forest reserve – I
Depart at 5.00am and drive to Deban Forest Camp (25km; 2 hrs). After breakfast, head for a guided trek into the forest. We kept our eyes peeled and fingers crossed for the red panda, but no luck. Later we return to Deban Forest Camp by 2pm for lunch. Departed for Miao at 3pm.
Overnight at: Namdapha Jungle Camp

3 Feb: Day-trip to the Namdapha forest reserve – II*
We followed the same schedule as above. Today, we took a different trail into the forest. Along the way, meet staff at the forest reserve + Phupla Sinpho, an elder from the Singpho clan and founder of SEACOW (Society for environmental awareness
and conservation of wildlife). We had a brief talk with him on their efforts and challenges of conservation in that area.
Overnight at: Namdapha Jungle Camp

4 Feb: School activity + Drive to Roing
After breakfast at 7am, we drove for around 10 minutes to a secondary school. Here, we handed over a set of textbooks + some stationery to the students. We spent 2 hrs with the students, engaging with them over wildlife and environment. Activities include a little drawing session, and a show-and-tell around wildlife photography and conservation.
We departed at 10am for Roing (150km; 7 hrs).
Overnight at: Yatri Niwas, Roing

5 Feb: Drive to Pasighat
We left at 8am for Pasighat (96km; ~5 hrs). The plan was to arrive by 1.30pm and spend the rest of the day at leisure. This was one of the most beautiful drives I have ever done. Arunachal Pradesh is absolutely beautiful. We need to be proud of our landscapes and the habitat and do whatever it takes to protect them for our future generations. The river crossing we did on the way was quite adventurous and we took some shots from the drone.
Overnight at: Hotel Serene Abode, Pasighat

6 Feb: Drive to Majuli
Leave at 7am for Majuli (295km; 9 hrs). Arrive before sunset and bed down for the night.
Overnight at: Dekasang Majuli

7 Feb: To Kokilamukh, then Kaziranga
We left at 6am for Kokilamukh (35km; 1 hr). A drive, a car ferry across the gigantic Brahmaputra and a 45-min walk later, we arrived to meet “Forest Man of India” Jadav Payeng, and visit the river island he has afforested. We had a long fruitful discussion with Payeng where he explained the issues of the current schooling system and emphasised about the need for better education on conservation awareness. We later departed for Kaziranga National Park (100km; 3 hrs) and arrived at Iora.
Overnight at: IORA-The Retreat, Kaziranga

8 Feb: Around Kaziranga, then Nameri
At 6am, we headed into the reserve on a jeep safari and explored the Eastern range of Kaziranga. At 11am, we departed for Nameri National Park (100km; 4 hrs). We then visited the pygmy hog conservation centre at the park.
Overnight at: Nameri Eco-Camp

9 Feb: Around Nameri, then Guwahati
We briefly headed into the park for bird sightings—the hornbill and the white-winged wood duck, potentially. Also visited the golden mahseer conservation centre. Later visited the Eastern Himalayan Botanic Ark set up by Balipara Foundation at Wild Mahseer lodge.
At 2.30pm, departed for Guwahati (175km; 4 hrs).
Overnight at: Radisson Blu, Guwahati

10 Feb: Depart for home
After a good night’s sleep, next morning we headed to the airport to catch the flight home. A trip I will cherish forever.

The lead instructors from Land Rover:

CONTENT

Land Rover Discovery Feb 2018 – Part II

You can read the Part I of the blog here

Here is the main video shot as a part of the 10 days expedition to Assam and Arunachal Pradesh in the all new Land Rover Discovery:

Here are all the other videos:
Discovery With A Purpose | Dibrugarh to Miao:

Discovery With A Purpose

Discovery With A Purpose | Majuli to Kaziranga

Discovery With A Purpose | Passighat to Majuli

Discovery with a Purpose | Miao to Roing

Discovery With A Purpose | People of Namdapha

Discovery With A Purpose | Forest Man of India

Discovery With A Purpose | Children of Namdapha

CONTENT

Condé Nast Traveller FB Live

In a run-up to the #ShareYourDiscovery event in collaboration with Land Rover, Condé Nast Traveller’s Salil Deshpande interviewed Sudhir live on Facebook. This engaging conversation had Sudhir talking about his most intriguing experiences in the wild and the valuable lessons learnt. About how his journeys to discover the wild invariably turn into enriching inward journeys of self-discovery.

A little more about it:

#ShareYourDiscovery is a unique adventure-conservation initiative by Land Rover in association with Condé Nast Traveller. This voyage of discovery aims to bring to the fore the challenges confronting the state of wildlife in India; specifically, the highly endangered red panda and black-necked crane and their habitat in northeast India.

Come January 2018, Sudhir drives through the hinterlands of India’s northeastern regions alongside other influencers in the wildlife/journalism space.

Condé Nast Traveller have set the ball rolling by asking their readers to share the most interesting, memorable, valuable discoveries they have made, out there in the wild. One among these will get the chance to accompany Sudhir on the journey of a lifetime.

The Jaguar Land Rover website carries their interview with Sudhir on his experiences in the wild and the lessons learnt therein. Here, Sudhir talks about his connect with India’s northeastern region, where he has travelled for his wildlife photography. He also talks about what he looks forward to, in this upcoming road trip.

Here’s an excerpt of Sudhir’s interview:

“The wild reminds you that only the fit will survive.

The northeast has always had a special place in my heart due to the rich biodiversity, the bird life, and the culture. It’s been a long time since I visited the region. I hope to meet the locals, talk to them, try to create awareness among the youngsters on the issues concerning our environment and finally to rediscover the beauty of the northeast.”

Here’s what Rohit Suri, President and Managing Director, Jaguar Land Rover India Ltd. (JLRIL), has to say about this initiative:

“India’s rich wildlife is battling extinction and needs our help. We need to care about it, but more than that, we need to act. During the ‘Discovery With A Purpose’ drive we intend to raise awareness on the need to preserve our wildlife. What better way to do this than to go into the wild with a known authority on the subject, Conde Nast Traveller, and tell a story with pictures and videos along with leading experts from this field. And we have a perfect companion for the journey as well, the soon to be launched, All-New Discovery.”

Divia Thani, Editor, Condé Nast Traveller India, is of the opinion that:

“Travel is all about discovering new things, so we are delighted to have the support of Land Rover on this initiative. During our seven years in India, Condé Nast Traveller has been a committed supporter of wildlife conservation and safari tourism. And we’re particularly passionate about travelling in the Indian Northeast, a region of incredible beauty, culture and nuance.”

Watch the video here:
Part 1 of #ShareYourDiscovery:

https://www.facebook.com/plugins/video.php?href=https%3A%2F%2Fwww.facebook.com%2Fcntravellerindia%2Fvideos%2F1632321003478976%2F&show_text=0&width=560

Part 2 of #ShareYourDiscovery:

https://www.facebook.com/plugins/video.php?href=https%3A%2F%2Fwww.facebook.com%2Fcntravellerindia%2Fvideos%2F1632356823475394%2F&show_text=0&width=560

CONTENT

5 REASONS WHY YOU SHOULD ATTEND SUDHIR SHIVARAM'S PHOTOGRAPHY LEARNING TOURS

Guest post by Camilla Malvestiti
www.tigersinthewild.org

A few years ago, the tiger changed my life. The call of the jungle, the sheer thrill of tracking the most elusive of cats and an innate stubbornness made me realize that it was time to leave my routine as a vegan chef in Paris and move to India. 

Sudhir Shivaram Photography
Junabai Cub at Tadoba Andhari Tiger Reserve

It all started with a personal project on writing and photography : Tigers in the Wild.

In January 2017 I saw my first wild tiger in Ranthambhore and got hopelessly hooked on both stripes and long tele lenses. 

Very soon, I was in one of Sudhir Shivaram’s photography learning tours in Tadoba Andhari Tiger Reserve. Little did I know that it would only be the starting point of a great learning experience with one of India’s most talented wildlife photographers and an amazing teacher. 

So why should you attend one of Sudhir’s workshops ? 

  • 1. Let out your passion for wildlife photography and get carried away
Sudhir Shivaram Photography

Sudhir started his professional journey after deciding to quit his corporate job to follow his passion for wildlife photography. 

Not only this passion shows, it’s also contagious. 

By signing up for one of his workshops you’ll surely end up with all the technical information on how to become a confident photographer, as well as getting inspired to follow your dreams. 

  • 2. Visit some of the country’s best wildlife destinations with experienced drivers and guides while making new friends
Sudhir Shivaram Photography Bandhavgarh Tiger Reserve
Sudhir with Gudda (Naresh Singh), one of the best drivers / naturalist at Bandhavgarh Tiger Reserve

Sudhir organizes intense learning workshops which require a lot of work but are also great fun. 

Believe me, you won’t mind the 4:30 am wake up call to be first in line in front of Bandhavgarh’s hottest gate for tiger spotting. Nor you’ll be able to withdraw from passionate evening discussions after having enjoyed amazing food. 

Sudhir Shivaram Photography Bandhavgarh
Always leave early to be the first in the line for the safari

While driving in the park, you’ll experience the skills of some of India’s most experienced drivers and guides. In their hands, the game of tiger tracking is as smooth as it gets. Let the magic of the forest unfold under your eyes and concentrate on making images.

Sudhir Shivaram Photography Kanha
Tigress MB3 with her cub at Kanha Tiger Reserve. Photo by Camilla
  • 3 – Learn how it works, but most of all start finding your style

One of Sudhir’s most famous catchphrases is “Move away from taking images to making images”.

Learn all about technical principles, the paradigm of photography theory, master the rules. Then break them. Experiment. Rules are there to be smashed. Just saying.

  • 4 – Step out of your comfort zone, in a safe environment

Learn how to critique an image and give valuable feedback. Sudhir organizes a healthy photo competition during each workshop. While finding time to review the images taken during the day might be a daunting task for those who tend to overindulge on the blasting of their shutterspeed, an honest peer-to-peer evaluation will give you invaluable insights on your photography.

Sudhir Shivaram Photography
A healthy competition is organised among participants of the workshop.
  • 5 – Be part of an active, benevolent online community

Let’s keep in touch. How many times have you heard or told this phrase but haven’t really followed up ? Life kicks in and with it all the time-consuming daily activities. Sudhir’s team devotes quite a huge part of their working hours to the animation and maintain of his online community. They encourage WhatsApp and Facebook groups, theme competitions and an overall active dialogue to clear all your doubts and help you continue learning even after the workshop has ended.

Voilà, these are reasons which have made me a big fan of Sudhir Shivaram’s photography learning tours!

https://www.sudhirshivaramphotography.com/photography-courses/photo-tour/

Guest Post By Camilla Malvestiti
www.tigersinthewild.org

CONTENT

Asian Photography Awards 2020

We are delighted to announce that Sudhir has been declared number 2 amongst the 10 Most Influential People in Asian Photography Awards.

For the 5th time, he has received the prestigious reward that consecrates him as one of the most successful people in the industry.

Amongst the most sought-after trophies in the field, the Most Influential People in Photography is part of the Asian Photography Awards ceremony. 

Sudhir Shivaram Photography
Bhavya Desai, Chief Editor of Asian Photography Magazine at the awards ceremony

The category is meant to give official recognition to the leading people and institutions in the photographic fraternity of India, including the MDs, CEOs, Country Managers, Business Heads of various companies (like Canon, Nikon, Sony, Tamron), photography institutes and individual photographers.

Sudhir Shivaram Photography

For this award, the jury really looks out for special exploits and accomplishments. 

The nominees are judged not only on the basis of achievements, but also on their contribution and impact towards the industry in the last year.

This is the demonstration that with passion and hard work anything can be achieved. 

Sudhir Shivaram Photography
Sudhir Shivaram receiving the award at the ceremony

We at Sudhir Shivaram Photography strongly believe that relentless dedication, courage and motivation are the key to attain any objective. 

After a career in the corporate world as an engineer, Sudhir decided that it was time to quit his job and follow his dreams. That’s when he became what he was always meant to be: one of India’s best wildlife photographers.

Sudhir Shivaram Photography
Sudhir with Dabboo Ratnani, who was awarded as the No.1 most influential person

As Sudhir likes to say “Life is not about what you couldn’t do so far, it’s about WHAT YOU STILL CAN. Life isn’t about finding yourself, Life is about CREATING yourself.”

Thank you to the jury and to all the people who follow Sudhir on social media and otherwise.

Your encouragement is of great importance to us to always continue excelling. 

Sudhir Shivaram Photography

Looking forward to a fantastic 2020.

CONTENT

The Definitive Guide To Post-Processing

There are many guides to learn about post-processing in photography.

Also there are many ways to post-process the images.

But when you know how to use the knowledge of them tactically, you can make a difference.

That is what you are going to get in my definitive guide of post processing in photography using ACR (Adobe Camera RAW) and Photoshop.

You are going to learn:

  • The very basics of post processing (both RAW processing and JPG processing).
  • Why post-processing is important
  • Dos and Don’ts
  • Which step in post processing affects what
  • How to do post-processing the right way

You are also going to find out whether post-processing is image manipulation or image correction.

Before we dive into the guide, go through my post-processing tutorial using Adobe Camera RAW.

Let’s start with knowing what post-processing actually is…

What is post-processing in photography?

Tiger

Post-Processing refers to image editing in photography. It is an integral part of digital photography. And understanding the basic workflow will help you get the best out of your captured images.

Why do we have to post-process an image?

Personally, for me, post-processing is not image manipulation but image correction. The digital cameras have limitations with the dynamic range and the colors/tonality/contrast it can capture. Our human eye is much more capable of viewing the objects.

So when we click images, the chances of getting images as they are for the human eye are less.

Hence post-processing is needed to match the image to what you saw in the field.

DON’Ts in post-processing

don'ts in post processing

I follow basic post-processing. But I do not digitally alter or manipulate my images. For me Post-Processing is – show what you saw in the field, nothing more and nothing less. Of course, you can enhance the image a bit. It is like doing makeup and going to an event or party, but do not get a plastic surgery done. Of course, if someone wants to manipulate the image to make it look more beautiful, it’s an individual choice and nothing wrong in that.

Things I avoid in post processing:

  • Images, where the subject has been cut out and placed in a different background,
  • Morphed images
  • Combining two images of the same subject into one
  • Adding elements that were not originally preset while shooting.
  • Removing elements from the image which originally existed.

Remember, I do not want to show what I did not see in the first place. I just work on showing others what I see with my eyes. This opens door to what we have to do in post-processing.

DOs in post-processing

Depending on the photographer expertise and experience, it may always not be possible to get everything right the first time in the camera. We may commit some minor mistakes while photographing. We need to correct them in post-processing. Basic post-processing which I follow would generally include the following:

  • Crop and Straighten
  • Colour Correction
  • White Balance
  • Exposure Correction
  • Contrast and Clarity
  • Sharpening
  • Levels adjustment

Let’s get into knowing where we use the above steps individually..

#1 Crop & Straighten

straightening the image in post processing

Even though we take great care while capturing an image, there are chances of not getting image as we want, especially the composition aspect.

This may result in getting unwanted pieces of information at the edges and the image may get titled a bit.
In that case, we crop and straighten the image to clean up and correct any issues with composition.

#2 Colour Correction

color correction

Sometimes we may not get the colour of the image as we want. In that case we need to make corrections though it needs some expertise.
In that case, we can correct any colour casts and ensure the image colour is as accurate as possible.

#3 White Balance

white balance

White balance is the colour temperature of that image and is one of the parameters responsible to get you good colours in your image. Generally a lot of photographers keep this setting in auto white balance and hope to correct it during post processing. It is not a good practice as I always advice to get it right the first time out of the camera.

But when the things don’t fall into the place as we want, we can always correct that while post-processing an image.

#4 Exposure Correction

Exposure Correction

In some cases, underexposed and overexposed images are not desirable. When the image is either underexposed or overexposed we make exposure correction while post-processing. We perform this step to bring the optimal variant of the image.

Exposure correction improves the overall tonality and dynamic range of the image.

#5 Contrast

contrast adjustment

While taking photos, sometimes we need to get sharp images. In that case, to get sharp images we increase contrast. This can be performed using various algorithms in photoshop editor.

To sum up the points we perform this step to bring back any missing punch and bring out emphasis and detail.

#6 Sharpening

sharpening the image

Sharpening the images gives them the professional finish. Because, we can display images at their best by sharpening. It more clearly reveals the details of an image.

So we sharpen the images where necessary to bring out any key details.

In photoshop editor, we make use of all the above things to show the image at its best. Now I will take you through the process that I follow to edit photos in ACR and photoshop. It is not necessary to apply all the changes suggested. You decide what makes sense for your image and make the corrections accordingly.

RAW processing using Adobe Camera RAW: How to edit photos professionally using Adobe Camera RAW

In this section, I will take you through the step by step process for RAW image processing. We are going to touch the image in all aspects(stated above) one at a time to bring its best version out.

Here are the steps to follow if you are using Adobe Photoshop CC. (there may be slight variation in the version you use)

Setting the White Balance:

First and foremost thing to consider is white balance. Set the White Balance to match the actual scene.

In Adobe Camera RAW you can use the drop down to choose one of the presets (Daylight, cloudy etc).


The best way is to use the temperature slider to choose the value to get the correct lighting / colours in your image.

In case there is a slight colour shift even after setting the correct WB, you can use the Tint slider to adjust it. It is present just below the temperature slider.


The other basic settings used to correct the image in Adobe Camera RAW:

The below image has the other basic settings that we need to adjust. It has sliders to set the desired value for getting an optimal image.(perfect image)


Exposure:

I talked about exposure in my article on histograms. This will give you a clear idea about underexposed and overexposed images.

Use the exposure slider in case you want to overexpose or underexpose your image.
When you are making changes using the slider, you need to keep a watch on the histogram which is displayed on top of the tools and ensure the graph stays within the extremes.

Contrast:

Use the contrast slider to give a better punch in the image. This slider increases the colour depth in your image.

Highlights:

If the Whites in your image are overexposed, you may use highlights slider to get back some details in the whites.

Shadows:

Shadows slider is the opposite of highlights. You can get back the details in the shadow or dark areas of your images by using this slider.

Whites:

Whites slider increases the brightness of only the whites in your image.

Blacks:

Blacks slider is also responsible for increasing the bit depth. This slider is very useful for landscape images which have a lot of haze.

Clarity:

Clarity slider brings out more details in your image. If your original image is pretty sharp, then avoid using this tool. Play around with it to get a feel.

Vibrance:

Vibrance slider increases the saturation of only the vibrant colours in your image and not everything. I always use this compared to Saturation.

Saturation:

I avoid using saturation slider. This increases the saturation of all the colours in your image. We don’t want to do that.
DO NOT overdo any of the above settings. Use them minimally to improve upon a good image.

Converting and saving in Adobe Camera Raw

In Adobe Camera RAW, you need to put the below settings before saving the image. Click on the link which is shown at the bottom of the ACR tool:

Converting and saving
In Adobe Camera RAW, you need to put the below settings before saving the image. Click on the link which is shown at the bottom of the ACR tool:


The key settings to keep before saving in ACR are:

  • Under the Color Space, Keep the space like ProPhoto RGB or Adobe RGB
  • The Depth can be set to
    • 8 bits/channel for any web-based posting (FB, Instagram, Flickr, etc).
    • 16 bits/Channel, if you are planning for print.
  • Under Image Sizing, keep Resize to fit as default (box unchecked)
  • You will have to set the image resolution based on your end requirement.
    • For web-based posting (Facebook, Flickr, Instagram, etc) keep the Resolution as 72 pixels/inch (honestly it does not matter for web).
    • For prints, you need to keep the Resolution at around 300 pixels/inch and keep the image dimension as per the print requirement.
  • Rest all the settings, keep to the default shown.

Note: All the above is using Adobe Camera RAW. Similar settings will be available in Canon DPP or Capture NX.

JPG Processing Using Photoshop

After doing necessary changes in Adobe Camera RAW, it is time for JPG processing in photoshop. We do the initial photo editing in ACR cause it’ll make further editing in photoshop easy. Here is the step by step process for editing image in photoshop.

Step 1: Photoshop Settings | JPG Processing Using Photoshop

Before proceeding on jpg processing using photoshop, it is important to make these one time settings in photoshop:

  1. From the menu, choose Edit->Colour Settings and enter the below values
  2. Enter these values:


I will breakdown the necessary things, you need to do here, for you. We need to customize only in the settings, working space and colour management policies.

  1. Settings: Use the drop-down menu and choose “Custom“. You can name these settings as you want to distinguish easily.
  2. Working Space:
    1. RGB: ProPhoto RGB (if you do not have that, then choose Adobe RGB (1998))
    2. CMYK: Leave it to U.S. Web Coated……
    3. Gray: Gray Gamma 2.2
    4. Spot: Dot Gain 20%
  3. Colour Management Policies:
    1. RGB: Convert to Working
    2. CMYK: Preserve Embedded Profile
    3. Gray: Preserve Embedded Profile
  4. Keep the rest of them to the default.

Color Management Policies:
RGB: Convert to Working
CMYK: Preserve Embedded Profile
Gray: Preserve Embedded Profile

Rest, keep it to the default.

Once the above values are entered, you need to save it (This is a one time setting). Click on Save, give any name you would like to save it as, then enter the description regarding this profile you are saving and that’s it.

Step 2: Cropping | JPG Processing Using Photoshop

  1. Open the image in Photoshop
  2. Go to the Crop tool.
  3. Enter the width and height to crop in pixels or inches (for web choose around 1920 pixels on the longer side for horizontal images and around 1200 pixels for vertical images). Be sure to enter as 1920px (without the px, by default it will be inches)
  4. Drag over the area to crop and hit enter.

Step 3: Level Adjustments | JPG Processing Using Photoshop

1. Go to Image->Adjustments->Levels


There are three triangles as you can see in the above image:

  • The left triangle is to adjust shadow details
  • Right triangle is to adjust highlights
  • The centre triangle is to adjust brightness/darkness

.

Drag the left triangle to adjust it with the start of the graph. That should deepen your image.

Check how good the image looks visually and adjust accordingly.

You need to hold down the key (or Option key for Mac users) and drag the left or right triangle to make adjustments.

When you use the slider, a small amount of details will start to appear and you need to stop there.
You can use the centre slider to darken or brighten up the image.

Step 4: Vibrance (or Saturation) | JPG Processing Using Photoshop

Go to Image->Adjustment->Vibrance to increase the vibrance.

In case you do not have vibrance, then use saturation.

If you have vibrance slider, keep it to 22 or below.
if you have saturation (instead of vibrance), keep the amount to below 13.

Note: DO NOT make the above correction if you have already done this as a part of your RAW processing.

Step 5: Sharpen Image | JPG Processing Using Photoshop

1. Go to Filter->Sharpen->Smart Sharpen
2. Enter the radius as 0.3 for web-based posting and 1.3 for print (processed at 300dpi)
3. Now, keep incrementing the amount based on how much sharpening you need. Typically an amount between 70-100 is fine depending on how sharp or unsharp your original image is.
4. Keep “Remove” drop-down option to Gaussian Blur.
5. Rest of the values – keep it to default.

Step 6: Saving for e-mail/Web | JPG Processing Using Photoshop

1. Once the image is ready, go to Edit->Convert to profile
2. Make the “Destination Space” profile: sRGB IEC61966-2.1
3. Keep the others to default.
4. Hit Ok.
5. Now File->Save As, give the file name, keep the Format to JPEG. Make
sure under colour, you see the ICC Profile as sRGB IEC61966-2.1, if you don’t create a convert profile, it will be your working profile, which is ProPhoto RGB or Adobe RGB.
6. Once you say ok, in the JPEG Options, change the quality to 12 depending on the Size which is displayed below.

The above are the steps which I have been following for editing images in photoshop. This is how you can edit photos professionally using Adobe Camera RAW and Photoshop.Which part of the process do you like the most? Did I miss something? Do you have any questions? Let me know by commenting below.

There are other ways to achieve the same results recommended by other photographers. Feel free to choose the steps comfortable for you.

Happy Processing!

CONTENT

Bandhavgarh Photography Tour Nov 2017

Moments from Bandhavgarh Photography Learning Tour – Nov 2017
This was the first photography learning tour for the season apart from the recently concluded parents & kids workshop. The previous workshop was a runaway success with kids and parents having a fantastic time at the workshop with loads of fun and Tiger sightings.
The expectations of this workshop were a bit high in terms of Tiger sightings as the previous group had some awesome sightings. In all our photography learning tours we hire the best driver and guides to maximize the opportunity of good photography, be it Tigers or the commoners.
The tour started off with a few participants arriving earlier as they had a long overseas travel. The couple John and Barbera had come all the way from the US and the day of the arrival was Barbara’s birthday. We made sure to make it a special day for her by arranging bush dinner and the tribal dance which we had organized for our kids group.
dinner in bandhavgarh
Day 1 of the tour was more of relaxing time for me as the participants started arriving through out the day as the parents/kids workshop participants left. Since a few of them arrived in earlier, we organized a safari in the afternoon to the buffer area. Typically our workshop starts on a Wednesday as the park is closed in the afternoon, and there is no rush to get onto the afternoon safari. But the buffer area is open for tourism and those who come in early have the option to go there.
The buffer area is quite beautiful with a number of streams.
buffer area in bandhavgarh
Later in the evening, we had the brief introduction session about the entire program and quick tips on the camera related settings for the next day. It was made clear to the participants that the workshop is going to be quite hectic. Though we cannot guarantee any Tigers, what we guarantee is great learning!
After the intro session, it was time for dinner. We always ensure to host our participants at the best of the places so that they are fully relaxed and pampered with top of the line accommodation and food. All our Bandhavgarh workshops are done at Kings Lodge from Pugdundee Safaris. It’s like a second home for me.
Kings Lodge
Kings Lodge
The fun started the next morning with wakeup call at 4:30am. The park opens at 6:15am and we try to be early to get the first glimpse of the Tiger.
Bandhavgarh safari timings are from 6:15am to 11am in the winters. This gives the participants long hours of learning on photography tips and trying out various experiments on lighting and composition. Typically the first 2 hours of the safari are spent tracking the Tiger, as that’s their most active time.
The other fun part of our safaris is the breakfast time at center point. Both Tala and Magdhi zones have center points where we take a break for our breakfast. Though we take good packed breakfast from the resort, the real breakfast we have is from the local small stall selling hot Maggi, samosa, pakodas, bread omelette, poha, coffee/tea and other quick eats.
Centre Point Breakfast
centre point breakfast
Maggi is my favorite fast food and my workshop participants know how crazy I am for Maggi. I make it a point to give more business for these local vendors as their livelihood depends on tourism and is an integral part of the larger picture of saving the forest and the Tiger.
Sudhir eating Maggie
After breakfast we continued with the safari and finally returnd by around 11:30am to the resort.
The participants got a brief rest and we assembled at the conference room for our photography learning. The session included classroom teaching where the core concepts were taught, and we stepped outside to get hands-on training of the same.
The core concepts of photography required for wildlife photography were dealt in-depth – mainly the auto focusing and the advanced concepts of focus point sensors (cross type, non-cross type, dual-cross type) and the focus points to be used for composition (single point, group AF, auto selection etc).
The field exercise gave the participants better confidence on the camera settings and how to use in real life scenario.
Post the session; we had lunch and a small power nap to get back the energy for the rest of the day. The afternoon safari timings were a bit short as it was winter, but we got ample opportunity to make our images.
Back from the safari, we took some rest and again assembled in the conference room for the evening session on photography. Though the workshops are quite hectic, we do have ample time for fun. In the evenings, we organized bush dinner and also local folk dance where the participants joined in for the dance.
local folk dance
The above exercise repeated for the next set of days. By the end of the workshop the participants had some amazing sightings. We saw at least 2 Tigers in every safari and 4 in some. Apart from the Tigers we also shot a lot of common species and landscape.
At the end of the workshop, the participants returned with great memories of the workshop and also made some new friends. Hope to see them back again.
participants of Bandhavgarh workshop
Here’s the group of the Nov 2017 photography learning tour and some moments from the workshop:
participants of Bandhavgarh workshop

CONTENT

Beginners Guide to Camera and Lens Buying

The one big challenge for any beginner in photography is – what camera / lens to purchase. There is nothing called as the best camera or lens. The best camera is the one which you can afford. It also depends on what you want to shoot. But as beginners, I am sure you may not have any specific genre in mind to shoot. You like to shoot anything and everything. Let me give you some brief inputs for choosing the right equipment for your purpose.
Different Genres of Photography:
Let us understand some of the genres of photography which we see around:
1. Wildlife
2. Birds
3. Landscape
4. Street
5. Portrait
6. Travel
7. Food / Product
8. Sports
9. Candid
10. Macro / close-up
11. Night
12. General (Beginners)
Depending on what you want to shoot, you will have to look at options available to buy the equipment. Obviously you have the camera + lens as a part of your buying option. I would recommend to put 80% of your budget on the lens and 20% on the camera.
CAMERA SELECTION:
Here are some inputs for camera buying.
Camera Types
The first step towards camera buying is to understand the two different kind of formats available in DSLR segment. You have the full frame sensor camera and the crop sensor camera.

Back in the film days, the size of the film or the negative was 24mm x 36mm. A full frame camera sensor is one whose size is same as that film. The crop sensor camera is usually referred by it’s crop factor. Canon, Nikon and other camera manufacturers have 1.5x, 1.3x, 1.6x or 2x and so on.
In simple terms, when you put a 100mm lens on a full frame camera, what you see through the view finder is the view of that 100mm lens. When you put a 100mm lens on a crop factor camera of say 1.6x, then the view you see through the view finder is that of a 160mm (100mm x 1.6 = 160mm) lens mounted on a full frame body.
When you are choosing a camera to buy, you need to keep the below points in mind:
1> Camera Resolution

You seriously do not have to worry about this unless you plan to submit your images to stock photography, doing commercial photography or plan to crop your images a lot. Megapixel does not have a major role for most beginners. Do not worry about this.
2> Frames Per Second

This feature is important in case you plan to do a lot of Wildlife / Action photography, sports or birds in flight kind of shooting. For most other genre of photography, this is not a feature you need to have.
3> Number of focusing points

The more number of focusing points you have (especially the cross type sensors), the better it is. Of course, this is quite helpful if you are mainly into Wildlife / Action, Sports or birds in flight as you have better control for composition. For most other genre of photography where the subject is static and not moving, having less focusing points is not an issue. The focusing sensors (cross type or dual cross type) plays an important role for your auto focusing, especially in low light situations. If you plan to do a lot of low light photography where your subject is moving, then you need to check the specification of your camera to find out what kind of focusing sensor it has. It is always recommended to go for Dual Cross type and then cross type.
4> ISO Performance

The higher the ISO, the more noise you get in your image depending on the sensor quality. Good ISO performance cameras are quite important if you are shooting in low light like Wildlife, Events, Wedding, Evening street photography and the likes. For all other genre of photography, this is of no concern. Of course, as long you are using a tripod to shoot still images in low light, then not to worry.
5> Full frame v/s Crop Sensor body

We have briefly seen the key difference between a full frame and crop sensor bodies. Full frame bodies are expensive compared to it’s counter part. In general, full frame sensor have better image quality and have better high ISO performance. With the crop factor body, you get the focal length magnification which is good to get better reach where you cannot afford the 500mm or the 600mm lens.
LENS SELECTION
This is the tough part. As I have said, put in 80% of your budget on lens buying.
Some of the important factors influencing the lens buying are:
1. Focal Length
2. Aperture
3. Lens Mount / Format
4. MTF Chart
5. YOUR BUDGET
The different types of lens available and their field of application are:
1. Ultra Wide Angle Lens

– These are of focal length 10mm, 14mm and so on.
– These lens are useful for photographing very wide perspective images from a close distance.
– These lens are also used to photograph landscapes using hyperfocal distance concept.
– Useful for home interiors, architecture, buildings etc.
2. Wide Angle

– A wide angle lens is one which is less than 50mm.
– A f2.8 or lower aperture wide angle lens is good for indoor hand held shooting. Cost is high.
– Wide angle lens are most useful for landscape photography, street photography, general events, family functions etc.
3. Standard

– A 50mm lens is called as a standard lens.
– The 50mm f1.8 lens from Canon / Nikon is a good option for budget buying costing around Rs 7,000 (USD $150)
– This is most useful for close-up portrait of people. This can also be used for landscape, street, product / food and advertising photography.
4. Short Telephoto Zoom

– Any lens of focal length longer than 50mm is called as a telephoto lens.
– A focal length of range 50-300 is most suitable for any beginner.
– The 55-250mm range focal length is the lens you should invest in if you are under tight budget.
– Your field of use includes Landscape, Street, Portraits, Close-ups, Product / Food, Wildlife (mammals), Birds (limited), Travel, Wedding / Events, Candid and for general photography.
5. Medium Telephoto Zoom

– A focal length of 100 to 400mm is your medium tele photo lens.
– Good for Street, portraits, close-ups, Wildlife, Birds (limited), Travel, Sports (limited), Candid photography.
– Of course the 400mm f2.8 is the most suitable lens for Wildlife and sports photography. Quite expensive.
6. Super Telephoto

– These are the biggies like 500mm, 600mm and the 800mm.
– These are best suited for Wildlife, Birds, Sports, Candid and even close-ups (shooting from far distance).
7. Zoom
– A zoom lens has the flexibility of multiple focal length and you can carry one lens compared to multiple lenses.
– Fixed focal length lens are supposed to be optically best in image quality compared to zoom lens.
– A zoom lens like the 70-200 f2.8 is one of the worlds best lens for street, landscape, wildlife (showing the habitat).
– The 100-400 or the 80-400 is most suited for general wildlife.
– The new set of lens in the range of 150-600 is what most people prefer now a days for wildlife.
8. Macro

Guide to buy camera and lens

– These are specialised lens which can focus at very close range and provide extremely good details.
– As the name says, this is best suited for macro photography.
Based on your budget, you need to choose the camera / lens suitable for you. Good luck!
Please do subscribe to our online photography tutorials to learn all the core fundamentals of photography and also be part of the community (advanced plan) to participate in various discussions, ask queries related to photography, post your images for review and critique and interact with Sudhir and his team.
online photography tutorials
We recommend Amazon India website for your online camera lens shopping. Visit below link to get onto Amazon India Website:
Amazon India Website – Camera and Accessories Shopping

CONTENT

5 Ways Learning Photography Can Help Your Children

It is the age of selfies, and most children are snap-happy; which is a good thing. Children today have easy access to a camera and clicking pictures is quite a norm among them. But there is so much to photography than just taking pictures.
When you encourage your child to take up photography, you are stimulating their self-confidence, their creativity.

When a child starts taking pictures, it does not matter what camera he is using – it can be a camera phone, a simple point, and shoot digicam or an entry-level DSLR.
What is more important is for you to encourage them to create a story around their subject, pick interesting subjects and explore settings.

Through their photographs let your children tell stories, evolve ideas and showcase their creative thinking.

Stimulate your child’s love for photography because…

#1: Photography is a great way to imbibe self-expression in your kids

It brings out the explorer and the experimenter in them. It is important as it helps your child in other aspects of his or her life – studies, sports, and even social interaction.

#2: Taking up photography boosts a child’s self-esteem

Once your child takes pictures that she or he is proud of, there is a high likelihood of sharing those amongst his or her peers, connecting with them, and thus improving social skills and self-confidence.

#3: Photography helps them explore their creative side

When you hand them a camera or even a phone with a good quality camera, you are encouraging your children to develop their own ideas; stimulating their creative thinking.

#4: Photography can give your child a better understanding of herself and her surroundings

It gives your child an opportunity to look at things in a whole new light. She or he can develop a sense of perspective and visualization.

#5: Photography improves observation and ideating skills in your child

Through photography, they can expand their thinking horizon. Some aspects of photography like working out angles, settings, etc. also help in improving decision-making skills. As your child matures in photography skills, encourage him or her to plan and present their work in a more professional way.

Encourage your children to get close to nature and try their hand at wildlife photography. Sign up for the Kids’ Special at Ranthambore, from 27th to 30th April 2018, with Sudhir and Swaroop.
Click below to sign up:

CONTENT

Photography – Passion to Profession

This image may evoke different emotions in different people, but if you are an aspiring photographer, that emotion is more than likely to be one of “envy.” And I know this because I have been on the other side of this image for the better part of my youth. I know what it is like to carry around a basic entry-level camera during a safari and drool at another photographer’s long lens.
Well, envy may be a good start to fuel your desire for more equipment; but to pursue photography as a profession you are going to need a lot more than that. As with most things in life, you do not succeed overnight. And it’s neither easy nor practical to quantify your efforts. Yes, it took me over 20 years to get somewhat close where I wanted to be; it may take the next person 10 years. But that’s hardly the point. For me, the ruling sentiment has always been, “profession or no profession, photography is what I want to do.” If you can be that passionate, if you are up for backbreaking hard work, if you are unfazed by minor setbacks and disappointments, then delve right in.
So let me cut straight to the chase and chart out the course to embracing photography as a profession.

Genre of Photography

The tendency in beginners is to shoot practically anything and everything. While this can be a good thing to start with, it is important to quickly figure out which genre of photography you want to focus on, eventually. By all means, be a Jack of all trades but also be a master of ONE. Be it street photography, wedding, product, fashion, landscape, or wildlife photography, each genre presents its own challenges. Consider the advantages and disadvantages and your own aptitude before you pick a genre.

Understanding the 4 Pillars of Photography


A solid grounding in what I call the four pillars of photography cannot be over emphasized. This will clearly raise the standard of your photography, several notches.
1.    Subject Knowledge
There is no undermining the importance of subject knowledge, regardless of the genre of photography. For instance, a good wildlife photographer needs to be a good naturalist first. A wedding photographer has to be familiar with the finer nuances involved in the wedding ceremonies. This is true of all genres. Once you have a sound understanding, you can visualize and plan your shots.
2.    Core Fundamental Concepts of Photography
The digital camera has, in a sense, over simplified photography. With superior technology being made affordable, ‘taking’ an image is no longer a challenge. ‘Making’ an image, on the other hand, requires a deeper understanding and a definite thought process. Sample this – there are at least 18 different parameters you need to work on, before you press the shutter release button. So take the time and effort to know the key settings inside out; work on and experiment with the guidelines of composition. It is important to get the basics right.
3.    Equipment and Shooting Technique
Equipment needs vary with the genre of photography. Understand your camera and lens, exploit their advantages and work around their limitations. Be aware of the various accessories that might aid your genre of photography. An optimal equipment set-up with the right shooting skills, and lots of practice will all contribute to superior image quality.
4.    Digital Post Processing
The fourth, and most often overlooked, pillar of photography is post processing. This usually carries a negative connotation and is largely considered ‘manipulation.’ I take great pains to clear the air in this regard. Post processing is the digital counterpart of the chemical processing of film rolls and is an integral part of digital photography. Aim to familiarize yourself with post processing techniques early on in your career, so as to create top-notch images.
Building your Portfolio/Social Presence
Having chosen your genre and mastered the four pillars of photography (although learning is a lifelong affair), it is now time for you to showcase your work.
Once you have a sizeable portfolio, you can either display it on one of the free content management systems available or get a professional to do it for you. A useful tip here would be to use your own name for your website, rather than fancy monikers. Over a period of time, this makes it easier for people to connect the domain name to you. I have used www.pixpa.com to host my portfolio (www.sudhirshivaram.com); it was a breeze to set up.
You should also harness the global reach of social media sites to display and promote your work. You can share and interact within a group of likeminded individuals and build a network for yourself. Facebook has been instrumental in shaping my decision to take up photography as a profession. Flickr, Google+, 500px, Nat Geo Your Shot are some other platforms where you can frequently post your images.
Business of Photography
Once you have tackled the nitty-gritties of your craft, it is now time to roll up your sleeves and attack the business end. I have outlined these points based on my personal experience.
Financial Independence
A hobby can become a passion; the passion can become your calling! While the bigger thoughts clearly are on doing what one loves, it is paramount to assess one’s financial requirements for sustenance, lifestyle and the rainy day. This is vital for a smooth transition from a salaried job to entrepreneurship.
Mspace Group” – An organization that focuses on helping individuals gain financial independence helped me acquire this important life-skill, and greatly bolstered my decision to quit my IT corporate job and get into photography as a full time profession.
Market Requirements
You may be your own boss now, but there’s no ignoring the client. Understand customer requirement and deliver accordingly, within the ambit of your business. Do your homework and be current on new trends and technologies. Obsolescence may prove bad for business.
Competition
There’s nothing like a little competition to spice things up. Healthy competition can actually be a good thing. It ensures that you do not get complacent; you learn to work hard, work smart. Study your competition, follow their work, and do not shy away from emulating them, cautiously.
Advertise your Business
This may seem like an extension of “Social Media Presence” that I touched upon earlier but the difference here is that you will need to pay to garner visibility for your business. Let the size and scale of your business determine your advertising/marketing budget. As for me, strategically planned advertising on social media sites has been the mainstay of my business.
Client Communications
Unable to stick to a timeline? Communicate. Goofed up on an assignment? Communicate. Forgot to call? Communicate. And apologize. “When in doubt, communicate” is a good life lesson; more so with clients. Timely communication is undoubtedly the key to business success.
Networking
“We’re all in it together,” is not just a happy thought but can make sound business sense too. Networking here refers not just to your Facebook friends and contacts but also to real-world connections. Networking with relevant people keeps you abreast of the goings on in the industry. Attend seminars, exhibitions, and other such events to network with individuals and companies. You will eventually learn when to collaborate and when to go solo.
Bookkeeping and Taxes
It is not all sunshine and roses. Before you know it, the taxman will come knocking. So keep a tab on your income/expenses and file your returns on time. There is no escaping this humungous mundane task.
Author’s Conclusion
I worked in the IT sector for almost 17 years before I jumped the boat to full-time photography. So, is it a good thing or a bad thing? Definitely a good thing, I would say. I owe most of my technical expertise to my academic background as an engineer. Most other management skills, I attribute to my long innings in the corporate sector.
If you have your heart set out on photography as a profession, do give it a serious thought. Ponder some more. Pepper your passion with wisdom. Patience and perseverance go a long way. If you are a student, my suggestion would be to complete your education, find the means to support yourself and your family, and in parallel pursue your passion. For those of you who are working elsewhere and are contemplating photography as a profession, here is a saying that moved me profoundly:
“Life is not about what you couldn’t do so far, it’s about WHAT YOU STILL CAN. Life isn’t about finding yourself, Life is about CREATING yourself.”
Good Luck!

CONTENT

Basics of Exposure Triangle

This should be a good read for photography beginners…
If you have bought a new camera and hear all these complicated photography jargons and start wondering what these means….STOP. As a beginner, you really do not have to worry too much about these.
All these complex jargons revolve around 3 important aspects in photography which are ISO, Aperture and Shutter Speed – Called as the Exposure Triangle.
Get your understanding of the exposure triangle right and rest will be very easy to follow.
Shutter Speed – It is the amount of time the shutter is open for the light to enter and hit the sensor. This is responsible for freezing the action or causing motion blur in your image. A fast shutter speed like 1/1000 or more freezes the action or a slow shutter speed like 1/30 or less creates motion blur in the images (though fast and slow shutter speed is very subjective and depends on the speed of movement of subjects).
Aperture – This is the lens opening and is also responsible for controlling the amount of light to enter the camera. Aperture is one of the parameters responsible for depth of field (other 2 are focal length of lens being used and camera to subject distance). Depth of field is that area in your photograph which is in sharp focus. A larger f number like f22 gives you larger depth of field (DOF) and a smaller f number like f2.8 ives you shallow DOF.
ISO – This is responsible for the sensitivity of your sensor to light. The lower the number (ISO 100), the less sensitive, the higher the number (ISO 3200) the more sensitive. A higher ISO allows you to shoot in low light conditions. ISO is also responsible for noise / grains in your image. Higher the ISO, more grains and the quality of the image may go down.
Let us put these to practical use based on the genre of photography:
1. Landscape : That’s a static scene. It’s not running anywhere. So take your time and think more from aperture point of view and decide how much of the image has to be in good focus and use the aperture value accordingly. Don’t worry too much about shutter speed unless there is movement happening in the landscape (water flowing, people walking, cars moving etc). Tripod definitely recommended here.
2. Wildlife : Depending on the subject being still or moving, you may have to think more about what shutter speed to use to freeze the subject or create motion blur (panning). Aperture also plays a role of how much of the subject you want in focus.
3. Macro / Close-up : If it’s a static subject, it does not matter if you shoot that at 1/10 or 1/1000 shutter speed. So you need to think more from aperture point of view. Decide what kind of DOF you need based on lens and subject distance. Tripod definitely recommended.
4. Candid Shots : Depending on subject moving or static, you need to think about what aperture / speed to use. You probably have got a hang by now about what takes priority for a give shot depending on what’s happening in the scene.
5. Events : When you are shooting events like stage plays, or low light photography, you need to watch out for shutter speed. You may have to increase the ISO to get a faster shutter speed.
6. Sports : As you have guessed by now, you need to work on your shutter speed for this genre of photography.
So, to summarise:
If there is movement in the scene – think more from a shutter speed point of view (giving emphasis to aperture as well for proper DOF)
If the subject is totally static like macro / product / monuments / landscape / portrait shots etc – You need to think more from aperture point of view to get the desired DOF.
For very low light photography and if there is movement happening in the scene, you may have to think about the combination of ISO and shutter speed.
Get this right and then we will learn about the other so called complex stuff.
Happy shooting.

Newsletter

The All New Community based Photography Learning App

Install the #1 Photography Learning App on your Android and iOS phones.

right-trans

Free Photography Courses

right-trans

Easy Access to all Courses and Progress Tracking

right-trans

Course Completion Certificate

right-trans

New Android & iOS App in real-time sync with Web

right-trans

Genre-Specific Groups to Post images, invite and offer critique

right-trans

& lots more

Get our mobile app

Top Posts

Categories

Events News Photo Photo Tour Photography Tips Product Product Reviews Uncategorized