CONTENT

Camera and Lens Choice for Beginners

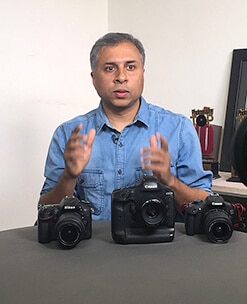
Which is the best camera and lens choice for photography beginners? I like to photograph Nature, Landscape, People, Wildlife, Monuments, etc. I do not have a very high budget and can spend up to INR Rs 50,000.
Sudhir’s Answer: This is one of the most common questions I receive through e-mails, Facebook / Instagram messages etc.
You may want to checkout this article to understand about camera and lens buying guide:
https://www.sudhirshivaramphotography.com/beginners-guide-camera-lens-buying/
Let us consider the various genres of photography and let me help you choose a beginner camera which can cater to most of the below mentioned genres:
Here are some of the common genres of photography:
1. Wildlife
2. Birds
3. Landscape
4. Street
5. Portrait
6. Travel
7. Food / Product
8. Sports
9. Candid
10. Macro / close-up
11. Night
12. General (Beginners)
The important point to remember is – It is the lens which is mainly responsible for the image quality followed by the camera body. Of course, your understanding of the core concepts of photography is equally important, but that’s for another day.
Depending on your budget, invest 80% of your budget on lens and remaining 20% on camera body. Typically, lens is for life and you can keep upgrading or changing the body as technology of the camera improves.
Let us look at various camera and lens options available for your total budget of Rs 30,000 to Rs 50,000 INR.
Note: We recommend that you check with your local dealer or other websites of your choice to know the price of the equipment. The recommended equipment below are in the range of INR Rs 50,000

CANON CAMERA AND LENS

1. Canon EOS 1300D 18MP Digital SLR Camera (Black) with 18-55 and 55-250mm IS II Lens
[Click here to buy the above camera / lens from Amazon]

This is the entry level Canon DSLR and is best suited for your low budget. This has 18MP APS-C CMOS sensor and DIGIC 4+ with 9-point AF with 1 center cross-type AF point. Standard ISO: 100 to 6400, expandable to 12800. This is quite capable of giving you good results depending on the lens you use and your skills. The features provided by this camera are good enough for the various genres I have listed above.
Let us look at the various key features and see how it fares for your photography:
i. Camera Resolution
Approx. 18.0 megapixels – This is decent enough for all the genres of photography. Do not expect to do a lot of crop with this resolution.
ii. Frames per second
Max. approx. 3.0 shots/sec – Do not expect to shoot any kind of action with this camera. Since the internal buffer is also limited, you will not be able to get 3 fps all the time.
iii. Focusing Points
9-point (Cross-type AF sensitive to f/5.6 with center AF point) – Though you have 9 AF points only the centre one has cross type AF point which means all the other 8 are non cross types and hence your auto focusing is going to be quite slow especially in low light conditions.
iv. ISO Performance
Standard ISO 100 – 6400 (expandable to 12800) – You cannot expect good quality images at high ISO from this entry level camera. You need to experiment and arrive at the “shootable” ISO for your camera and remember that in low light photography.

2. Canon EOS 700D 18MP Digital SLR Camera (Black) with 18-55mm IS II and 55-250mm IS II Lens
[Click here to buy the above camera / lens from Amazon]

The Canon 700D is just above the Canon 1300D and is preferred over the 1300D based on your budget. The EOS 700D offers a full and solid basic performance that is clearly one of the best in any entry level DSLR with its high image quality, various functions of Live View AF and movie shooting. The Vari-angle Clear View LCD II with capacitive touch screen capabilities as well as the new 360 degrees rotatable Mode Dial design and Creative Filters will definitely also expand inspiration and creative expression.
The 18-55 and the 55-250 lens which comes with this camera are good enough for all the genres of photography listed above.
Let us looks at the key features of this camera compared to the above Canon 1300D.
i. Camera Resolution
Approx. 18.00 megapixels – This is the same as the Canon 1300D and sufficient for any beginner. Image cropping is not recommended. Of course a bit of cropping in terms of 15-20% crop and retaining 80% of frame is reasonable.
ii. Frames per second
Max. approx. 5.0 shots/second – Much better than the Canon 1300D. If you want to try action photography, this is definitely a notch better than the Canon 1300D. 5 fps is still a limitation for good action photography.
iii. Focusing Points
Nine cross-type AF points (Cross-type AF sensitive to f/2.8 with center AF point) – This is a big plus point over the Canon 1300D. Canon 700D has 9 AF points and all of them are the cross type sensors, meaning your auto focusing is going to be much faster and better than the 1300D, especially for low light situation.
iv. ISO Performance
ISO 100 – ISO 12800 and ISO expansion to “H” (equivalent to ISO 25600) – The ISO range and the performance is much better than the Canon 1300D and helps in case of low light photography.
Additional features of Canon 700D:
Hybrid CMOS AF
The EOS 700D offers ‘Hybrid CMOS AF’, an advanced live-view autofocus technology that enhances the focusing speed while using the LCD (live view), for both still shooting and videos. Through the LCD monitor with that features a capacitive touchscreen (similar to smartphones), you can simply touch to set autofocus on a subject and release the shutter once focus is achieved. For Continuous AF, the subject is constantly tracked and focused in-frame until the shutter button is released.
7.62cm, articulated LCD with touch function
The EOS 700D features a 7.62cm capacitive touchscreen giving you a whole new dimension of usability and control. Touch control is seamlessly integrated into the camera menu system and offers unprecedented flexibility over camera controls such as viewing images, selecting AF points, touch capture, swiping through albums and pinching to zoom in.
Using the vari-angle capabilities simply twist and tilt the monitor for any shooting situation, while the display remains crisp and clear so that the composition can be checked. Shooting remains easy to manipulate even when on a tripod, when shooting vertically or when using a battery grip.

3. Canon EOS 750D 24.2MP Digital SLR Camera + 18-55 IS STM Lens
[Click here to buy the Canon 750D + 18-55 kit lens. Do get the 55-250mm lens separately]

The EOS 750D features a 24.2-megapixel CMOS sensor, and is specifically designed for casual photographers who prize excellent image quality, a simple and user-friendly interface. It offers creative freedom through its new features – 19-point all cross-type AF and creative filters and the new Hybrid CMOS AF III.
The EOS 750D features a stunning combination of the 24.2-megapixel resolution—the highest level ever in the history of EOS entry-level models—and the DIGIC 6 image processor which creates high image quality images that go beyond EOS entry-level model cameras.
If you have that extra budget, then this is highly recommended over the Canon 700D. Though it’s your skills which really matters in making good images, Camera technology does aid in making good images where the missed opportunities are reduced due to the camera technology and capabilities.
Let us look at the key features in this camera.
i. Camera Resolution
Approx. 24.2 megapixels – Better than the Canon 700D and gives you better flexibility when it comes to cropping.
ii. Frames per second
Max. approx. 5.0 shots/sec.
iii. Focusing Points
19 points (cross-type AF point: max. 19 points)
The Canon 700D has 9 AF points and all of them being cross type. The Canon 750D has 19 cross type AF points. This is a major advantage for action photography. With more number of focusing points you also get better flexibility in terms of composition, especially for moving subjects.
iv. ISO
100 – ISO 6400 and ISO expansion to “H” (equivalent to ISO 25600)
Additional Feature of Canon 750D
Hybrid CMOS AF III and Touchscreen LCD
Hybrid CMOS AF III features rapid autofocusing in live view while shooting stills or tracking subjects during movie shooting even when subject is off center of the frame. In combination with touchscreen LCD panel, advance movie recording is made accessible even for entry users.

NIKON CAMERA AND LENS

1. Nikon D3300 24.2MP Digital SLR + AF-P DX NIKKOR 18-55mm f/3.5-5.6G VR Lens + AF-P DX NIKKOR 70-300mm f/4.5-6.3G ED VR Lens
[Click here to get the above product from Amazon]

The Nikon D3300 will surprise you with stunning images that inspire creativity at the next level. Featuring the latest EXPEED 4 image-processing engine, 24.2 effective megapixels, Picture Control and 13 special effects modes in a lightweight, compact body that goes everywhere you do – the D3300 gives you the freedom to explore like never before.
Let us look at the key specifications of this camera:

i. Resolution
24.2 effective megapixels
Compared to the Canon entry level camera, this has a higher resolution and good enough for beginners. Yes, a bit of cropping can be done and yet retaining the quality of the image with this high resolution.
ii. Frames per second
Up to 5 fps – This is decent enough for any kind of action photography, though not great. The internal camera buffer rate will also matter on how long you will be able to shoot at 5fps.
iii. Focusing Points
Can be selected from 11 focus points. This is decent enough for most genres of photography, especially the still photography compared to action shots.
iv. AF-area mode
Single-point AF, dynamic-area AF, auto-area AF, 3D-tracking (11 points)
These are the basic AF modes available. Though not impressive, will do for most of the genres mentioned above, but will be a limitation for wildlife and sports / action photography.
v. ISO
ISO 100-12800 in steps of 1 EV. Can also be set to approx. 1 EV (ISO 25600 equivalent) above ISO 12800; auto ISO sensitivity control available. It is important to experiment on the ISO noise performance

2. Nikon D3400 Digital Camera Kit + Lens AF-P DX Nikkor 18-55mm f/3.5-5.6G VR + AF-P DX Nikkor 70-300mm f/4.5-6.3G ED VR
[Click here to get the above product from Amazon]

Take your first step into the world of DSLR photography with the new Nikon D3400 with SnapBridge*1 — the latest feature that automatically connects your pictures with the world. The D3400 captures every memory in stunning detail with ISO 100-25600, 24.2 megapixels, an 11-point autofocus system and features the ability to shoot Full HD 1080/60p videos. No matter the situation, whatever the occasion, the compact and lightweight D3400 is always ready to immortalise your most precious moments.
I would recommend the Nikon D3400 over the D3300 as it’s always good to go with the latest release of a camera model.
Let us look at the key features of this camera.

i. Resolution
24.2 megapixels – Similar to the D3300
ii. Frames per second
Up to 5 fps – Inline with the Nikon D3300
iii. Focusing Points
Can be selected from 11 focus points
iv. AF Area Mode
Single-point AF, dynamic-area AF, auto-area AF, 3D-tracking (11 points)
v. ISO
ISO 100 to 25600 in steps of 1 EV Auto ISO sensitivity control available.

3. Nikon D5300 24.2MP Digital SLR Camera(Black) with AF-P 18-55 and AF-P DX NIKKOR 70-300mm f/4.5-6.3G VR Kit
[Click here to get the above product from Amazon]

Image quality, connectivity and creative control come together in this lightweight, full-featured DX-format DSLR. The new EXPEED 4 is our fastest image processor to date and complements the 24.2-megapixel CMOS. With its 39-point autofocus, improved white balance and wide sensitivity range, the D5300 lets you shoot stunning photos and Full HD movies. It’s our first DSLR to feature a built-in Wi-Fi®, so you can instantly transfer your photos*. Its GPS function saves location information to your images. A crystal-clear 3.2-inch LCD vari-angle monitor lets you shoot at any angle. With so many innovative features, the D5300 adds new dimensions to photography.
The D5300 is quite impressive and I would highly recommend the D53** series over the entry level model if you can stretch your budget a bit.
Let us look at the key features of this camera.

i. Resolution
24.2-megapixel
ii. Frames per second
Up to 5 fps (JPEG and 12-bit NEF/RAW) or 4 fps (14-bit NEF/RAW)
iii. Focusing Points
39 focus points (including 9 cross-type sensor)
iv. AF Area Mode
Single-point AF, 9-, 21-, or 39- point dynamic-area AF, 3D-tracking, auto-area AF
v. ISO
ISO 100-12800 in steps of 1/3 EV. Can also be set to approx. 0.3, 0.7, or 1 EV (ISO 25600 equivalent) above ISO 12800; auto ISO sensitivity control available

4. Nikon D5500 DX-format Digital SLR + AF-P 18-55mm VR + AF-S 55-200mm VRII Kit Lenses
[Click here to explore Amazon website to buy this product]

The D5500 is thoughtfully designed with an intelligent eye sensor, vast improvements in image review, and a versatile touch screen vari-angle monitor to make it even easier for you to chase your creative pursuits. Its 24.2-megapixel image sensor without an optical low-pass filter (OLPF), is complemented with a powerful EXPEED 4 image-processing engine, all packed in a compact, lightweight body that offers a stronger, more secure grip. Built-in Wi-Fi® allows you to upload your impressive images seamlessly, so you can share your passion for photography with other like-minded enthusiasts.
The D5500 is quite impressive and this is my camera of choice for beginners. It is packed with a lot of useful features and it’s learning curve is a bit steep.
Let us look at the key features of this camera.

i. Resolution
24.2-megapixel
ii. Frames per second
Up to 5 fps (JPEG and 12-bit NEF/RAW) or 4 fps (14-bit NEF/RAW)
iii. Focusing Points
39, Can be selected from 39 or 11 focus points
iv. AF Area Mode
Single-point AF, 9-, 21-, or 39- point dynamic-area AF, 3D-tracking, auto-area AF
v. ISO
ISO100–, 25600, in steps of1/3EV, Auto ISO sensitivity control available

What combination is good?

You can choose the combination of lens + camera from the above list based on your budget. Typically the overall cost will be less when you buy them together as a part of kit lens. Any of the above combination will give you good results. Remember, more than the equipment it is the skills that matter and your understanding of the core concepts of photography – like exposure triangle, metering modes, focusing modes and points etc. The art of composition also comes into picture making. Finally, a good hold on post processing gives you the finishing touches for your image.
Please do subscribe to our online photography tutorials to learn all the core fundamentals of photography and also be part of the community (advanced plan) to participate in various discussions, ask queries related to photography, post your images for review and critique and interact with Sudhir and his team.

online photography tutorials
Best camera and lens choice for beginners

The product finder link on Canon India website is a good place to choose your Canon equipment:
Camera:
http://www.canon.co.in/personal/productfinder?productfinder=personal-eos&languageCode=EN
Lens:
http://www.canon.co.in/personal/products/interchangeable-lens-camera/lenses?languageCode=EN
To explore the Nikon Cameras, please see the Nikon website link below:
http://www.nikon.co.in/en_IN/products/categories/dslr?
To explore the Nikon lens, please visit the below link:
http://www.nikon.co.in/en_IN/products/categories/nikkor?

CONTENT

Beginners Guide to Camera and Lens Buying

The one big challenge for any beginner in photography is – what camera / lens to purchase. There is nothing called as the best camera or lens. The best camera is the one which you can afford. It also depends on what you want to shoot. But as beginners, I am sure you may not have any specific genre in mind to shoot. You like to shoot anything and everything. Let me give you some brief inputs for choosing the right equipment for your purpose.
Different Genres of Photography:
Let us understand some of the genres of photography which we see around:
1. Wildlife
2. Birds
3. Landscape
4. Street
5. Portrait
6. Travel
7. Food / Product
8. Sports
9. Candid
10. Macro / close-up
11. Night
12. General (Beginners)
Depending on what you want to shoot, you will have to look at options available to buy the equipment. Obviously you have the camera + lens as a part of your buying option. I would recommend to put 80% of your budget on the lens and 20% on the camera.
CAMERA SELECTION:
Here are some inputs for camera buying.
Camera Types
The first step towards camera buying is to understand the two different kind of formats available in DSLR segment. You have the full frame sensor camera and the crop sensor camera.

Back in the film days, the size of the film or the negative was 24mm x 36mm. A full frame camera sensor is one whose size is same as that film. The crop sensor camera is usually referred by it’s crop factor. Canon, Nikon and other camera manufacturers have 1.5x, 1.3x, 1.6x or 2x and so on.
In simple terms, when you put a 100mm lens on a full frame camera, what you see through the view finder is the view of that 100mm lens. When you put a 100mm lens on a crop factor camera of say 1.6x, then the view you see through the view finder is that of a 160mm (100mm x 1.6 = 160mm) lens mounted on a full frame body.
When you are choosing a camera to buy, you need to keep the below points in mind:
1> Camera Resolution

You seriously do not have to worry about this unless you plan to submit your images to stock photography, doing commercial photography or plan to crop your images a lot. Megapixel does not have a major role for most beginners. Do not worry about this.
2> Frames Per Second

This feature is important in case you plan to do a lot of Wildlife / Action photography, sports or birds in flight kind of shooting. For most other genre of photography, this is not a feature you need to have.
3> Number of focusing points

The more number of focusing points you have (especially the cross type sensors), the better it is. Of course, this is quite helpful if you are mainly into Wildlife / Action, Sports or birds in flight as you have better control for composition. For most other genre of photography where the subject is static and not moving, having less focusing points is not an issue. The focusing sensors (cross type or dual cross type) plays an important role for your auto focusing, especially in low light situations. If you plan to do a lot of low light photography where your subject is moving, then you need to check the specification of your camera to find out what kind of focusing sensor it has. It is always recommended to go for Dual Cross type and then cross type.
4> ISO Performance

The higher the ISO, the more noise you get in your image depending on the sensor quality. Good ISO performance cameras are quite important if you are shooting in low light like Wildlife, Events, Wedding, Evening street photography and the likes. For all other genre of photography, this is of no concern. Of course, as long you are using a tripod to shoot still images in low light, then not to worry.
5> Full frame v/s Crop Sensor body

We have briefly seen the key difference between a full frame and crop sensor bodies. Full frame bodies are expensive compared to it’s counter part. In general, full frame sensor have better image quality and have better high ISO performance. With the crop factor body, you get the focal length magnification which is good to get better reach where you cannot afford the 500mm or the 600mm lens.
LENS SELECTION
This is the tough part. As I have said, put in 80% of your budget on lens buying.
Some of the important factors influencing the lens buying are:
1. Focal Length
2. Aperture
3. Lens Mount / Format
4. MTF Chart
5. YOUR BUDGET
The different types of lens available and their field of application are:
1. Ultra Wide Angle Lens

– These are of focal length 10mm, 14mm and so on.
– These lens are useful for photographing very wide perspective images from a close distance.
– These lens are also used to photograph landscapes using hyperfocal distance concept.
– Useful for home interiors, architecture, buildings etc.
2. Wide Angle

– A wide angle lens is one which is less than 50mm.
– A f2.8 or lower aperture wide angle lens is good for indoor hand held shooting. Cost is high.
– Wide angle lens are most useful for landscape photography, street photography, general events, family functions etc.
3. Standard

– A 50mm lens is called as a standard lens.
– The 50mm f1.8 lens from Canon / Nikon is a good option for budget buying costing around Rs 7,000 (USD $150)
– This is most useful for close-up portrait of people. This can also be used for landscape, street, product / food and advertising photography.
4. Short Telephoto Zoom

– Any lens of focal length longer than 50mm is called as a telephoto lens.
– A focal length of range 50-300 is most suitable for any beginner.
– The 55-250mm range focal length is the lens you should invest in if you are under tight budget.
– Your field of use includes Landscape, Street, Portraits, Close-ups, Product / Food, Wildlife (mammals), Birds (limited), Travel, Wedding / Events, Candid and for general photography.
5. Medium Telephoto Zoom

– A focal length of 100 to 400mm is your medium tele photo lens.
– Good for Street, portraits, close-ups, Wildlife, Birds (limited), Travel, Sports (limited), Candid photography.
– Of course the 400mm f2.8 is the most suitable lens for Wildlife and sports photography. Quite expensive.
6. Super Telephoto

– These are the biggies like 500mm, 600mm and the 800mm.
– These are best suited for Wildlife, Birds, Sports, Candid and even close-ups (shooting from far distance).
7. Zoom
– A zoom lens has the flexibility of multiple focal length and you can carry one lens compared to multiple lenses.
– Fixed focal length lens are supposed to be optically best in image quality compared to zoom lens.
– A zoom lens like the 70-200 f2.8 is one of the worlds best lens for street, landscape, wildlife (showing the habitat).
– The 100-400 or the 80-400 is most suited for general wildlife.
– The new set of lens in the range of 150-600 is what most people prefer now a days for wildlife.
8. Macro

Guide to buy camera and lens

– These are specialised lens which can focus at very close range and provide extremely good details.
– As the name says, this is best suited for macro photography.
Based on your budget, you need to choose the camera / lens suitable for you. Good luck!
Please do subscribe to our online photography tutorials to learn all the core fundamentals of photography and also be part of the community (advanced plan) to participate in various discussions, ask queries related to photography, post your images for review and critique and interact with Sudhir and his team.
online photography tutorials
We recommend Amazon India website for your online camera lens shopping. Visit below link to get onto Amazon India Website:
Amazon India Website – Camera and Accessories Shopping

CONTENT

Basics of Exposure Triangle

This should be a good read for photography beginners…
If you have bought a new camera and hear all these complicated photography jargons and start wondering what these means….STOP. As a beginner, you really do not have to worry too much about these.
All these complex jargons revolve around 3 important aspects in photography which are ISO, Aperture and Shutter Speed – Called as the Exposure Triangle.
Get your understanding of the exposure triangle right and rest will be very easy to follow.
Shutter Speed – It is the amount of time the shutter is open for the light to enter and hit the sensor. This is responsible for freezing the action or causing motion blur in your image. A fast shutter speed like 1/1000 or more freezes the action or a slow shutter speed like 1/30 or less creates motion blur in the images (though fast and slow shutter speed is very subjective and depends on the speed of movement of subjects).
Aperture – This is the lens opening and is also responsible for controlling the amount of light to enter the camera. Aperture is one of the parameters responsible for depth of field (other 2 are focal length of lens being used and camera to subject distance). Depth of field is that area in your photograph which is in sharp focus. A larger f number like f22 gives you larger depth of field (DOF) and a smaller f number like f2.8 ives you shallow DOF.
ISO – This is responsible for the sensitivity of your sensor to light. The lower the number (ISO 100), the less sensitive, the higher the number (ISO 3200) the more sensitive. A higher ISO allows you to shoot in low light conditions. ISO is also responsible for noise / grains in your image. Higher the ISO, more grains and the quality of the image may go down.
Let us put these to practical use based on the genre of photography:
1. Landscape : That’s a static scene. It’s not running anywhere. So take your time and think more from aperture point of view and decide how much of the image has to be in good focus and use the aperture value accordingly. Don’t worry too much about shutter speed unless there is movement happening in the landscape (water flowing, people walking, cars moving etc). Tripod definitely recommended here.
2. Wildlife : Depending on the subject being still or moving, you may have to think more about what shutter speed to use to freeze the subject or create motion blur (panning). Aperture also plays a role of how much of the subject you want in focus.
3. Macro / Close-up : If it’s a static subject, it does not matter if you shoot that at 1/10 or 1/1000 shutter speed. So you need to think more from aperture point of view. Decide what kind of DOF you need based on lens and subject distance. Tripod definitely recommended.
4. Candid Shots : Depending on subject moving or static, you need to think about what aperture / speed to use. You probably have got a hang by now about what takes priority for a give shot depending on what’s happening in the scene.
5. Events : When you are shooting events like stage plays, or low light photography, you need to watch out for shutter speed. You may have to increase the ISO to get a faster shutter speed.
6. Sports : As you have guessed by now, you need to work on your shutter speed for this genre of photography.
So, to summarise:
If there is movement in the scene – think more from a shutter speed point of view (giving emphasis to aperture as well for proper DOF)
If the subject is totally static like macro / product / monuments / landscape / portrait shots etc – You need to think more from aperture point of view to get the desired DOF.
For very low light photography and if there is movement happening in the scene, you may have to think about the combination of ISO and shutter speed.
Get this right and then we will learn about the other so called complex stuff.
Happy shooting.

CONTENT

Understanding Exposure Using Histogram

“Shoot to the right” – Now how many of us have heard this? This is a statement which many a photographers have made and explained on the internet and various tutorials. Let me try to simplify it by using some examples.
Here is a typical histogram for an image. It can be seen in your camera LCD when you playback an image and click info button in Canon and by pressing the down part of the circular button in Nikon (depends on camera model)
A typical Histogram

The right side of the histogram shows the highlights (bright) data, the left side shows the shadow (dark) data and the center part shows the mid tone data. Normally for a properly exposed image (no over or under exposure) the above is what we get. Of course, it purely depends on what kind of image it is. The curve starts and ends before the two extremes of the highlights or the shadow area.
Histogram representing an underexposed image.
If any part of the image is underexposed, this is what happens:

As you can see, on the left side the black part of the graph has gone beyond the vertical line, which means some part of the image is underexposed.
Histogram representing an overexposed image.

If any part of the image is overexposed, this is what happens:The right side of the graph has gone beyond the vertical line which means some part of the image is over exposed.
If your intention is not to over or under expose any part of the image, then typically the complete graph should be between the two extremes.
Now, lets try to understand what “Shoot to the right” means.
– The graph represents the data in your image. Consider an example where the graph ends much before the two extreme verticals, say 2 cm gap on either side.
– For that scene, when you overexpose by say 1 stop, the whole graph moves to the right (say on the right side the gap is now 1cm and on the left side the gap is 3cm)
– Now go back to zero exposure compensation and underexpose that same scene by 1 stop. The original graph would move to the left and you may have 1cm gap to the left and 3cm to the right)
You can get the same final image (wrt colours, exposure and other processing) from all 3 of the above images where we used different exposure settings.
One of the main advantage of shooting to the right is that the noise in the image is less if there are any dark areas in your frame. But does it make sense in Wildlife photography? May be, may not be. It is debatable.
You need to remember two things:
– Shooting to the right results in getting lesser shutter speed (depends on shooting mode)
– And shooting to the left results in a faster shutter speed for the same aperture + ISO, but at the cost of noise in image.
The above method of reading the histogram helps in getting a correct exposure for your images. That said, it is extremely critical to get the right exposure in the field.
Camera decides the exposure.
In real life example, here is what happens when you shoot in auto mode and let the camera handle the exposure:
The camera exposes the subject as a medium toned subject and the shutter speed and exposure goes for a toss. Look at the histogram (shown in levels in photoshop) and the shutter speed on the top right of the image.This has resulted in over exposed image and a very slow shutter speed, in turn causing image blur.
The Photographer decides the exposure.
Using the correct technique of exposure, if you under expose the image, this is what you get:
Note: If your monitor is not properly calibrated, you will see everything dark and no details in black.But check the histogram, the graph ends well with in the left side vertical line, which means we have good exposure where we can see details in the black area. Also check the shutter speed. Because of correct exposure you have got a higher shutter speed in turn getting a sharp image
Of course, by using level adjustment in photoshop, you can get more details in black by increasing the brightness of the image by sliding in the right part of levels.
Another important aspect of digital photography is the correct usage of ICC profiles. If your image is not properly tagged, then there is no guarantee on the colours what you saw on your monitor and what is seen by others in their monitors.
Missing ICC profile for an image.
Normally when you open an image in PS (with some advanced colour settings) if there is no ICC profile tagged, this is what happens:
missing-profile

The above is a topic for another article. But I hope the above was helpful in making you understand about histogram and what role it plays in image making.
Learn More about all these concepts by subscribing to our online photography tutorials. Click below to subscribe:

Newsletter

The All New Community based Photography Learning App

Install the #1 Photography Learning App on your Android and iOS phones.

right-trans

Free Photography Courses

right-trans

Easy Access to all Courses and Progress Tracking

right-trans

Course Completion Certificate

right-trans

New Android & iOS App in real-time sync with Web

right-trans

Genre-Specific Groups to Post images, invite and offer critique

right-trans

& lots more

Get our mobile app

Top Posts

Categories

Events News Photo Photo Tour Photography Tips Product Product Reviews Uncategorized