CONTENT

Beginners Guide to Camera and Lens Buying

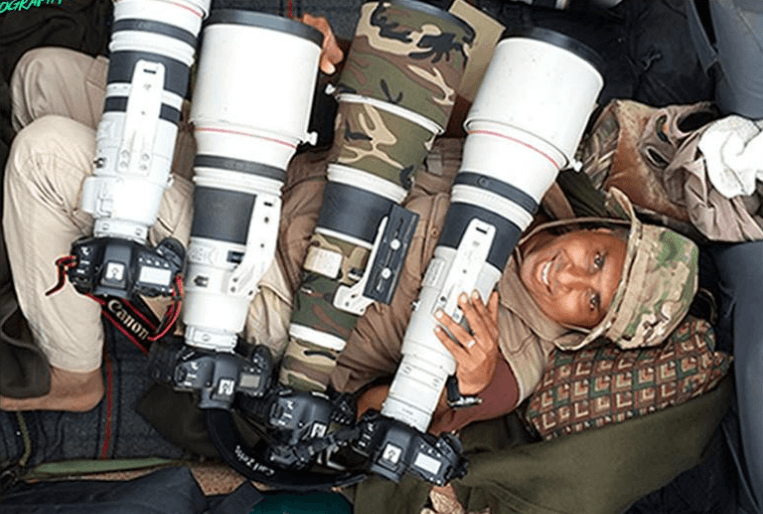
The one big challenge for any beginner in photography is – what camera / lens to purchase. There is nothing called as the best camera or lens. The best camera is the one which you can afford. It also depends on what you want to shoot. But as beginners, I am sure you may not have any specific genre in mind to shoot. You like to shoot anything and everything. Let me give you some brief inputs for choosing the right equipment for your purpose.
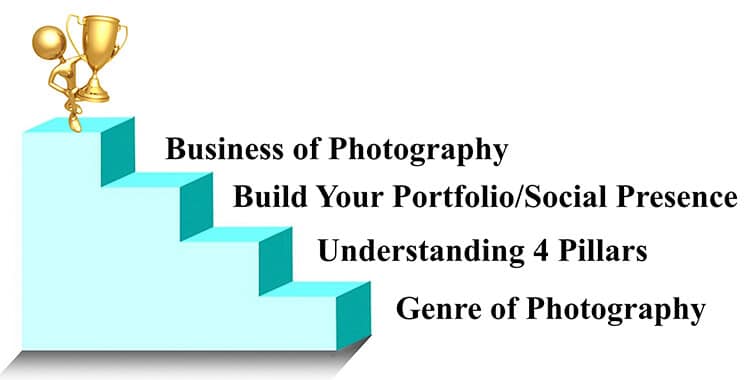
Different Genres of Photography:
Let us understand some of the genres of photography which we see around:
1. Wildlife
2. Birds
3. Landscape
4. Street
5. Portrait
6. Travel
7. Food / Product
8. Sports
9. Candid
10. Macro / close-up
11. Night
12. General (Beginners)
Depending on what you want to shoot, you will have to look at options available to buy the equipment. Obviously you have the camera + lens as a part of your buying option. I would recommend to put 80% of your budget on the lens and 20% on the camera.
CAMERA SELECTION:
Here are some inputs for camera buying.
Camera Types
The first step towards camera buying is to understand the two different kind of formats available in DSLR segment. You have the full frame sensor camera and the crop sensor camera.

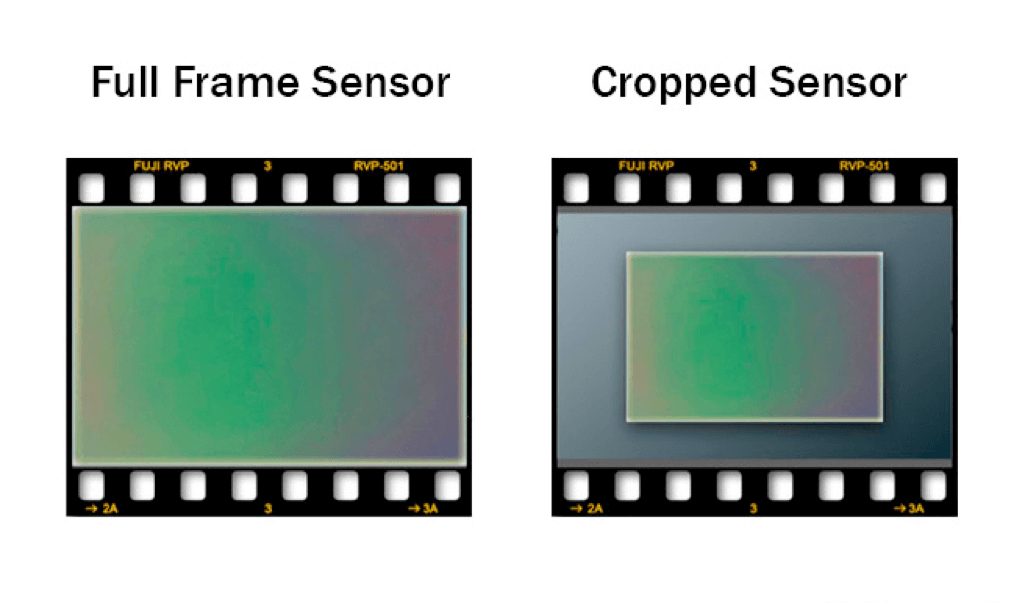
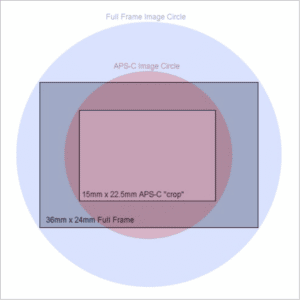
Back in the film days, the size of the film or the negative was 24mm x 36mm. A full frame camera sensor is one whose size is same as that film. The crop sensor camera is usually referred by it’s crop factor. Canon, Nikon and other camera manufacturers have 1.5x, 1.3x, 1.6x or 2x and so on.
In simple terms, when you put a 100mm lens on a full frame camera, what you see through the view finder is the view of that 100mm lens. When you put a 100mm lens on a crop factor camera of say 1.6x, then the view you see through the view finder is that of a 160mm (100mm x 1.6 = 160mm) lens mounted on a full frame body.
When you are choosing a camera to buy, you need to keep the below points in mind:
1> Camera Resolution

You seriously do not have to worry about this unless you plan to submit your images to stock photography, doing commercial photography or plan to crop your images a lot. Megapixel does not have a major role for most beginners. Do not worry about this.
2> Frames Per Second

This feature is important in case you plan to do a lot of Wildlife / Action photography, sports or birds in flight kind of shooting. For most other genre of photography, this is not a feature you need to have.
3> Number of focusing points

The more number of focusing points you have (especially the cross type sensors), the better it is. Of course, this is quite helpful if you are mainly into Wildlife / Action, Sports or birds in flight as you have better control for composition. For most other genre of photography where the subject is static and not moving, having less focusing points is not an issue. The focusing sensors (cross type or dual cross type) plays an important role for your auto focusing, especially in low light situations. If you plan to do a lot of low light photography where your subject is moving, then you need to check the specification of your camera to find out what kind of focusing sensor it has. It is always recommended to go for Dual Cross type and then cross type.
4> ISO Performance

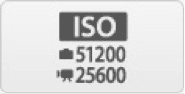
The higher the ISO, the more noise you get in your image depending on the sensor quality. Good ISO performance cameras are quite important if you are shooting in low light like Wildlife, Events, Wedding, Evening street photography and the likes. For all other genre of photography, this is of no concern. Of course, as long you are using a tripod to shoot still images in low light, then not to worry.
5> Full frame v/s Crop Sensor body

We have briefly seen the key difference between a full frame and crop sensor bodies. Full frame bodies are expensive compared to it’s counter part. In general, full frame sensor have better image quality and have better high ISO performance. With the crop factor body, you get the focal length magnification which is good to get better reach where you cannot afford the 500mm or the 600mm lens.
LENS SELECTION
This is the tough part. As I have said, put in 80% of your budget on lens buying.
Some of the important factors influencing the lens buying are:
1. Focal Length
2. Aperture
3. Lens Mount / Format
4. MTF Chart
5. YOUR BUDGET
The different types of lens available and their field of application are:
1. Ultra Wide Angle Lens

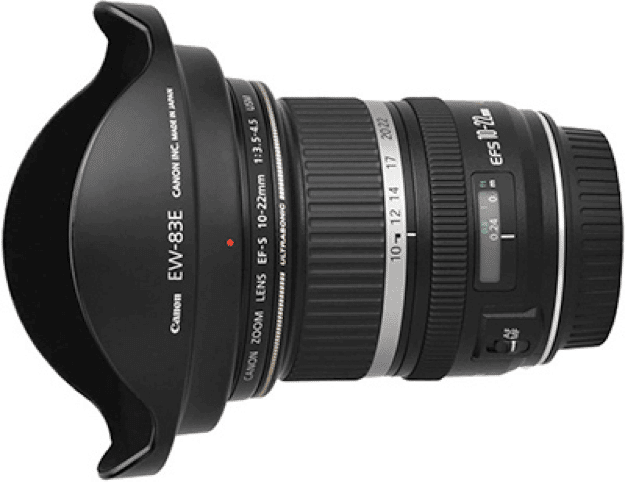
– These are of focal length 10mm, 14mm and so on.
– These lens are useful for photographing very wide perspective images from a close distance.
– These lens are also used to photograph landscapes using hyperfocal distance concept.
– Useful for home interiors, architecture, buildings etc.
2. Wide Angle

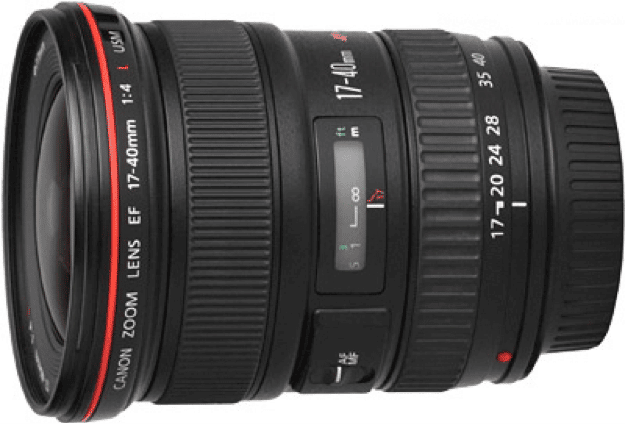
– A wide angle lens is one which is less than 50mm.
– A f2.8 or lower aperture wide angle lens is good for indoor hand held shooting. Cost is high.
– Wide angle lens are most useful for landscape photography, street photography, general events, family functions etc.
3. Standard

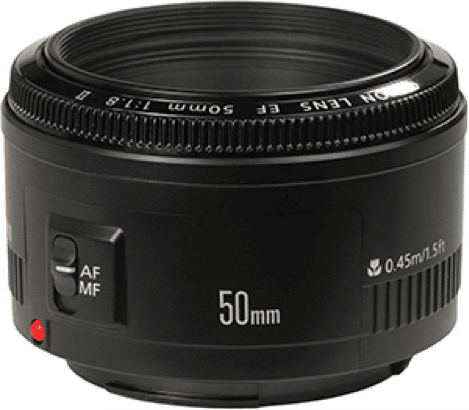
– A 50mm lens is called as a standard lens.
– The 50mm f1.8 lens from Canon / Nikon is a good option for budget buying costing around Rs 7,000 (USD $150)
– This is most useful for close-up portrait of people. This can also be used for landscape, street, product / food and advertising photography.
4. Short Telephoto Zoom

– Any lens of focal length longer than 50mm is called as a telephoto lens.
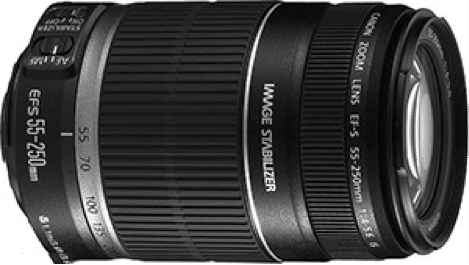
– A focal length of range 50-300 is most suitable for any beginner.
– The 55-250mm range focal length is the lens you should invest in if you are under tight budget.
– Your field of use includes Landscape, Street, Portraits, Close-ups, Product / Food, Wildlife (mammals), Birds (limited), Travel, Wedding / Events, Candid and for general photography.
5. Medium Telephoto Zoom

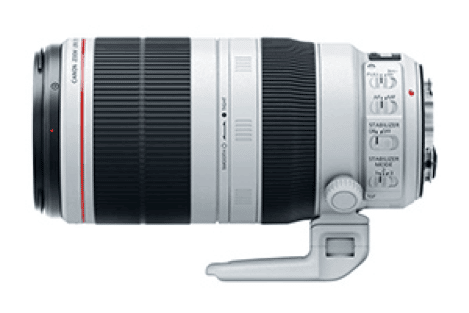
– A focal length of 100 to 400mm is your medium tele photo lens.
– Good for Street, portraits, close-ups, Wildlife, Birds (limited), Travel, Sports (limited), Candid photography.
– Of course the 400mm f2.8 is the most suitable lens for Wildlife and sports photography. Quite expensive.
6. Super Telephoto

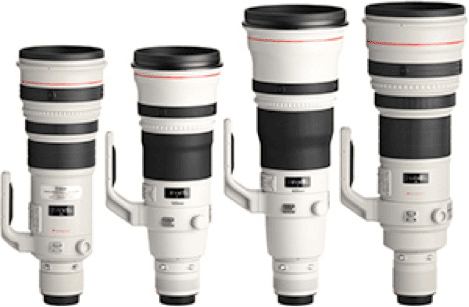
– These are the biggies like 500mm, 600mm and the 800mm.
– These are best suited for Wildlife, Birds, Sports, Candid and even close-ups (shooting from far distance).
7. Zoom
– A zoom lens has the flexibility of multiple focal length and you can carry one lens compared to multiple lenses.
– Fixed focal length lens are supposed to be optically best in image quality compared to zoom lens.
– A zoom lens like the 70-200 f2.8 is one of the worlds best lens for street, landscape, wildlife (showing the habitat).
– The 100-400 or the 80-400 is most suited for general wildlife.
– The new set of lens in the range of 150-600 is what most people prefer now a days for wildlife.
8. Macro

Guide to buy camera and lens

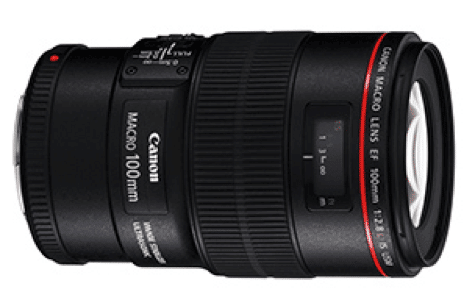
– These are specialised lens which can focus at very close range and provide extremely good details.
– As the name says, this is best suited for macro photography.
Based on your budget, you need to choose the camera / lens suitable for you. Good luck!
Please do subscribe to our online photography tutorials to learn all the core fundamentals of photography and also be part of the community (advanced plan) to participate in various discussions, ask queries related to photography, post your images for review and critique and interact with Sudhir and his team.
online photography tutorials
We recommend Amazon India website for your online camera lens shopping. Visit below link to get onto Amazon India Website:
Amazon India Website – Camera and Accessories Shopping

CONTENT

5 Ways Learning Photography Can Help Your Children

It is the age of selfies, and most children are snap-happy; which is a good thing. Children today have easy access to a camera and clicking pictures is quite a norm among them. But there is so much to photography than just taking pictures.
When you encourage your child to take up photography, you are stimulating their self-confidence, their creativity.

When a child starts taking pictures, it does not matter what camera he is using – it can be a camera phone, a simple point, and shoot digicam or an entry-level DSLR.
What is more important is for you to encourage them to create a story around their subject, pick interesting subjects and explore settings.

Through their photographs let your children tell stories, evolve ideas and showcase their creative thinking.

Stimulate your child’s love for photography because…

#1: Photography is a great way to imbibe self-expression in your kids

It brings out the explorer and the experimenter in them. It is important as it helps your child in other aspects of his or her life – studies, sports, and even social interaction.

#2: Taking up photography boosts a child’s self-esteem

Once your child takes pictures that she or he is proud of, there is a high likelihood of sharing those amongst his or her peers, connecting with them, and thus improving social skills and self-confidence.

#3: Photography helps them explore their creative side

When you hand them a camera or even a phone with a good quality camera, you are encouraging your children to develop their own ideas; stimulating their creative thinking.

#4: Photography can give your child a better understanding of herself and her surroundings

It gives your child an opportunity to look at things in a whole new light. She or he can develop a sense of perspective and visualization.

#5: Photography improves observation and ideating skills in your child

Through photography, they can expand their thinking horizon. Some aspects of photography like working out angles, settings, etc. also help in improving decision-making skills. As your child matures in photography skills, encourage him or her to plan and present their work in a more professional way.

Encourage your children to get close to nature and try their hand at wildlife photography. Sign up for the Kids’ Special at Ranthambore, from 27th to 30th April 2018, with Sudhir and Swaroop.
Click below to sign up:

CONTENT

Photography – Passion to Profession

This image may evoke different emotions in different people, but if you are an aspiring photographer, that emotion is more than likely to be one of “envy.” And I know this because I have been on the other side of this image for the better part of my youth. I know what it is like to carry around a basic entry-level camera during a safari and drool at another photographer’s long lens.
Well, envy may be a good start to fuel your desire for more equipment; but to pursue photography as a profession you are going to need a lot more than that. As with most things in life, you do not succeed overnight. And it’s neither easy nor practical to quantify your efforts. Yes, it took me over 20 years to get somewhat close where I wanted to be; it may take the next person 10 years. But that’s hardly the point. For me, the ruling sentiment has always been, “profession or no profession, photography is what I want to do.” If you can be that passionate, if you are up for backbreaking hard work, if you are unfazed by minor setbacks and disappointments, then delve right in.
So let me cut straight to the chase and chart out the course to embracing photography as a profession.

Genre of Photography

The tendency in beginners is to shoot practically anything and everything. While this can be a good thing to start with, it is important to quickly figure out which genre of photography you want to focus on, eventually. By all means, be a Jack of all trades but also be a master of ONE. Be it street photography, wedding, product, fashion, landscape, or wildlife photography, each genre presents its own challenges. Consider the advantages and disadvantages and your own aptitude before you pick a genre.

Understanding the 4 Pillars of Photography


A solid grounding in what I call the four pillars of photography cannot be over emphasized. This will clearly raise the standard of your photography, several notches.
1.    Subject Knowledge
There is no undermining the importance of subject knowledge, regardless of the genre of photography. For instance, a good wildlife photographer needs to be a good naturalist first. A wedding photographer has to be familiar with the finer nuances involved in the wedding ceremonies. This is true of all genres. Once you have a sound understanding, you can visualize and plan your shots.
2.    Core Fundamental Concepts of Photography
The digital camera has, in a sense, over simplified photography. With superior technology being made affordable, ‘taking’ an image is no longer a challenge. ‘Making’ an image, on the other hand, requires a deeper understanding and a definite thought process. Sample this – there are at least 18 different parameters you need to work on, before you press the shutter release button. So take the time and effort to know the key settings inside out; work on and experiment with the guidelines of composition. It is important to get the basics right.
3.    Equipment and Shooting Technique
Equipment needs vary with the genre of photography. Understand your camera and lens, exploit their advantages and work around their limitations. Be aware of the various accessories that might aid your genre of photography. An optimal equipment set-up with the right shooting skills, and lots of practice will all contribute to superior image quality.
4.    Digital Post Processing
The fourth, and most often overlooked, pillar of photography is post processing. This usually carries a negative connotation and is largely considered ‘manipulation.’ I take great pains to clear the air in this regard. Post processing is the digital counterpart of the chemical processing of film rolls and is an integral part of digital photography. Aim to familiarize yourself with post processing techniques early on in your career, so as to create top-notch images.
Building your Portfolio/Social Presence
Having chosen your genre and mastered the four pillars of photography (although learning is a lifelong affair), it is now time for you to showcase your work.
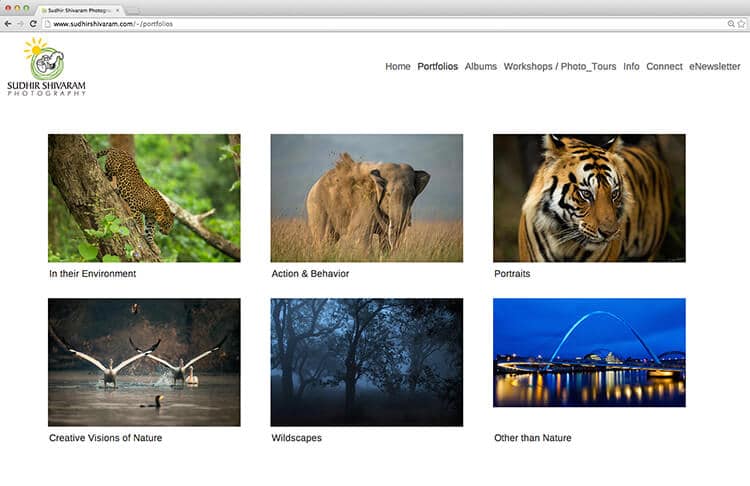
Once you have a sizeable portfolio, you can either display it on one of the free content management systems available or get a professional to do it for you. A useful tip here would be to use your own name for your website, rather than fancy monikers. Over a period of time, this makes it easier for people to connect the domain name to you. I have used www.pixpa.com to host my portfolio (www.sudhirshivaram.com); it was a breeze to set up.
You should also harness the global reach of social media sites to display and promote your work. You can share and interact within a group of likeminded individuals and build a network for yourself. Facebook has been instrumental in shaping my decision to take up photography as a profession. Flickr, Google+, 500px, Nat Geo Your Shot are some other platforms where you can frequently post your images.
Business of Photography
Once you have tackled the nitty-gritties of your craft, it is now time to roll up your sleeves and attack the business end. I have outlined these points based on my personal experience.
Financial Independence
A hobby can become a passion; the passion can become your calling! While the bigger thoughts clearly are on doing what one loves, it is paramount to assess one’s financial requirements for sustenance, lifestyle and the rainy day. This is vital for a smooth transition from a salaried job to entrepreneurship.
Mspace Group” – An organization that focuses on helping individuals gain financial independence helped me acquire this important life-skill, and greatly bolstered my decision to quit my IT corporate job and get into photography as a full time profession.
Market Requirements
You may be your own boss now, but there’s no ignoring the client. Understand customer requirement and deliver accordingly, within the ambit of your business. Do your homework and be current on new trends and technologies. Obsolescence may prove bad for business.
Competition
There’s nothing like a little competition to spice things up. Healthy competition can actually be a good thing. It ensures that you do not get complacent; you learn to work hard, work smart. Study your competition, follow their work, and do not shy away from emulating them, cautiously.
Advertise your Business
This may seem like an extension of “Social Media Presence” that I touched upon earlier but the difference here is that you will need to pay to garner visibility for your business. Let the size and scale of your business determine your advertising/marketing budget. As for me, strategically planned advertising on social media sites has been the mainstay of my business.
Client Communications
Unable to stick to a timeline? Communicate. Goofed up on an assignment? Communicate. Forgot to call? Communicate. And apologize. “When in doubt, communicate” is a good life lesson; more so with clients. Timely communication is undoubtedly the key to business success.
Networking
“We’re all in it together,” is not just a happy thought but can make sound business sense too. Networking here refers not just to your Facebook friends and contacts but also to real-world connections. Networking with relevant people keeps you abreast of the goings on in the industry. Attend seminars, exhibitions, and other such events to network with individuals and companies. You will eventually learn when to collaborate and when to go solo.
Bookkeeping and Taxes
It is not all sunshine and roses. Before you know it, the taxman will come knocking. So keep a tab on your income/expenses and file your returns on time. There is no escaping this humungous mundane task.
Author’s Conclusion
I worked in the IT sector for almost 17 years before I jumped the boat to full-time photography. So, is it a good thing or a bad thing? Definitely a good thing, I would say. I owe most of my technical expertise to my academic background as an engineer. Most other management skills, I attribute to my long innings in the corporate sector.
If you have your heart set out on photography as a profession, do give it a serious thought. Ponder some more. Pepper your passion with wisdom. Patience and perseverance go a long way. If you are a student, my suggestion would be to complete your education, find the means to support yourself and your family, and in parallel pursue your passion. For those of you who are working elsewhere and are contemplating photography as a profession, here is a saying that moved me profoundly:
“Life is not about what you couldn’t do so far, it’s about WHAT YOU STILL CAN. Life isn’t about finding yourself, Life is about CREATING yourself.”
Good Luck!

CONTENT

Basics of Exposure Triangle

This should be a good read for photography beginners…
If you have bought a new camera and hear all these complicated photography jargons and start wondering what these means….STOP. As a beginner, you really do not have to worry too much about these.
All these complex jargons revolve around 3 important aspects in photography which are ISO, Aperture and Shutter Speed – Called as the Exposure Triangle.
Get your understanding of the exposure triangle right and rest will be very easy to follow.
Shutter Speed – It is the amount of time the shutter is open for the light to enter and hit the sensor. This is responsible for freezing the action or causing motion blur in your image. A fast shutter speed like 1/1000 or more freezes the action or a slow shutter speed like 1/30 or less creates motion blur in the images (though fast and slow shutter speed is very subjective and depends on the speed of movement of subjects).
Aperture – This is the lens opening and is also responsible for controlling the amount of light to enter the camera. Aperture is one of the parameters responsible for depth of field (other 2 are focal length of lens being used and camera to subject distance). Depth of field is that area in your photograph which is in sharp focus. A larger f number like f22 gives you larger depth of field (DOF) and a smaller f number like f2.8 ives you shallow DOF.
ISO – This is responsible for the sensitivity of your sensor to light. The lower the number (ISO 100), the less sensitive, the higher the number (ISO 3200) the more sensitive. A higher ISO allows you to shoot in low light conditions. ISO is also responsible for noise / grains in your image. Higher the ISO, more grains and the quality of the image may go down.
Let us put these to practical use based on the genre of photography:
1. Landscape : That’s a static scene. It’s not running anywhere. So take your time and think more from aperture point of view and decide how much of the image has to be in good focus and use the aperture value accordingly. Don’t worry too much about shutter speed unless there is movement happening in the landscape (water flowing, people walking, cars moving etc). Tripod definitely recommended here.
2. Wildlife : Depending on the subject being still or moving, you may have to think more about what shutter speed to use to freeze the subject or create motion blur (panning). Aperture also plays a role of how much of the subject you want in focus.
3. Macro / Close-up : If it’s a static subject, it does not matter if you shoot that at 1/10 or 1/1000 shutter speed. So you need to think more from aperture point of view. Decide what kind of DOF you need based on lens and subject distance. Tripod definitely recommended.
4. Candid Shots : Depending on subject moving or static, you need to think about what aperture / speed to use. You probably have got a hang by now about what takes priority for a give shot depending on what’s happening in the scene.
5. Events : When you are shooting events like stage plays, or low light photography, you need to watch out for shutter speed. You may have to increase the ISO to get a faster shutter speed.
6. Sports : As you have guessed by now, you need to work on your shutter speed for this genre of photography.
So, to summarise:
If there is movement in the scene – think more from a shutter speed point of view (giving emphasis to aperture as well for proper DOF)
If the subject is totally static like macro / product / monuments / landscape / portrait shots etc – You need to think more from aperture point of view to get the desired DOF.
For very low light photography and if there is movement happening in the scene, you may have to think about the combination of ISO and shutter speed.
Get this right and then we will learn about the other so called complex stuff.
Happy shooting.

CONTENT

Understanding Exposure Using Histogram

“Shoot to the right” – Now how many of us have heard this? This is a statement which many a photographers have made and explained on the internet and various tutorials. Let me try to simplify it by using some examples.
Here is a typical histogram for an image. It can be seen in your camera LCD when you playback an image and click info button in Canon and by pressing the down part of the circular button in Nikon (depends on camera model)
A typical Histogram

The right side of the histogram shows the highlights (bright) data, the left side shows the shadow (dark) data and the center part shows the mid tone data. Normally for a properly exposed image (no over or under exposure) the above is what we get. Of course, it purely depends on what kind of image it is. The curve starts and ends before the two extremes of the highlights or the shadow area.
Histogram representing an underexposed image.
If any part of the image is underexposed, this is what happens:

As you can see, on the left side the black part of the graph has gone beyond the vertical line, which means some part of the image is underexposed.
Histogram representing an overexposed image.

If any part of the image is overexposed, this is what happens:The right side of the graph has gone beyond the vertical line which means some part of the image is over exposed.
If your intention is not to over or under expose any part of the image, then typically the complete graph should be between the two extremes.
Now, lets try to understand what “Shoot to the right” means.
– The graph represents the data in your image. Consider an example where the graph ends much before the two extreme verticals, say 2 cm gap on either side.
– For that scene, when you overexpose by say 1 stop, the whole graph moves to the right (say on the right side the gap is now 1cm and on the left side the gap is 3cm)
– Now go back to zero exposure compensation and underexpose that same scene by 1 stop. The original graph would move to the left and you may have 1cm gap to the left and 3cm to the right)
You can get the same final image (wrt colours, exposure and other processing) from all 3 of the above images where we used different exposure settings.
One of the main advantage of shooting to the right is that the noise in the image is less if there are any dark areas in your frame. But does it make sense in Wildlife photography? May be, may not be. It is debatable.
You need to remember two things:
– Shooting to the right results in getting lesser shutter speed (depends on shooting mode)
– And shooting to the left results in a faster shutter speed for the same aperture + ISO, but at the cost of noise in image.
The above method of reading the histogram helps in getting a correct exposure for your images. That said, it is extremely critical to get the right exposure in the field.
Camera decides the exposure.
In real life example, here is what happens when you shoot in auto mode and let the camera handle the exposure:
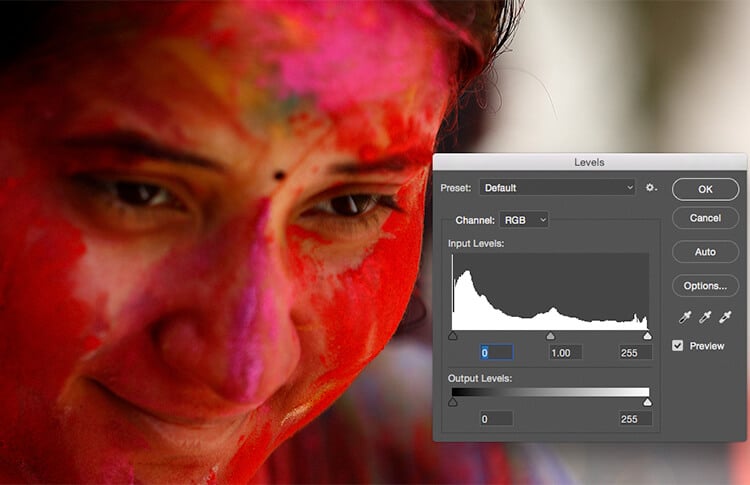
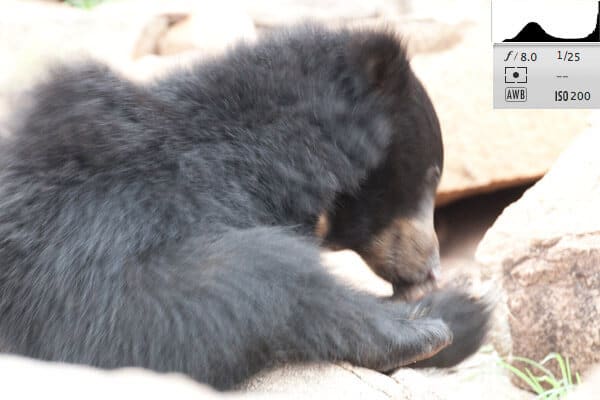
The camera exposes the subject as a medium toned subject and the shutter speed and exposure goes for a toss. Look at the histogram (shown in levels in photoshop) and the shutter speed on the top right of the image.This has resulted in over exposed image and a very slow shutter speed, in turn causing image blur.
The Photographer decides the exposure.
Using the correct technique of exposure, if you under expose the image, this is what you get:
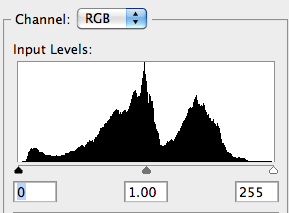
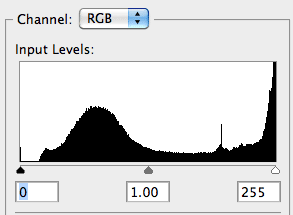
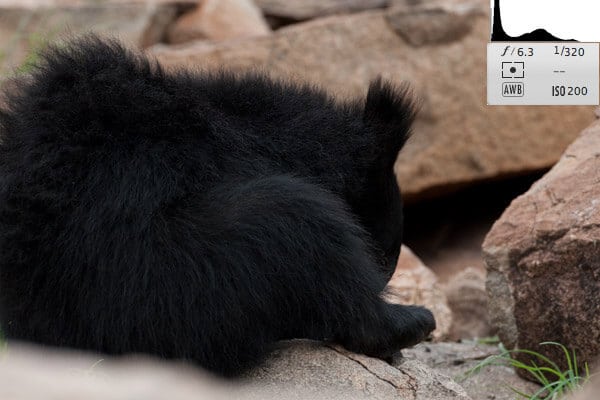
Note: If your monitor is not properly calibrated, you will see everything dark and no details in black.But check the histogram, the graph ends well with in the left side vertical line, which means we have good exposure where we can see details in the black area. Also check the shutter speed. Because of correct exposure you have got a higher shutter speed in turn getting a sharp image
Of course, by using level adjustment in photoshop, you can get more details in black by increasing the brightness of the image by sliding in the right part of levels.
Another important aspect of digital photography is the correct usage of ICC profiles. If your image is not properly tagged, then there is no guarantee on the colours what you saw on your monitor and what is seen by others in their monitors.
Missing ICC profile for an image.
Normally when you open an image in PS (with some advanced colour settings) if there is no ICC profile tagged, this is what happens:
missing-profile

The above is a topic for another article. But I hope the above was helpful in making you understand about histogram and what role it plays in image making.
Learn More about all these concepts by subscribing to our online photography tutorials. Click below to subscribe:

Newsletter

The All New Community based Photography Learning App

Install the #1 Photography Learning App on your Android and iOS phones.

right-trans

Free Photography Courses

right-trans

Easy Access to all Courses and Progress Tracking

right-trans

Course Completion Certificate

right-trans

New Android & iOS App in real-time sync with Web

right-trans

Genre-Specific Groups to Post images, invite and offer critique

right-trans

& lots more

Get our mobile app

Top Posts

Categories

Events News Photo Photo Tour Photography Tips Product Product Reviews Uncategorized