CONTENT

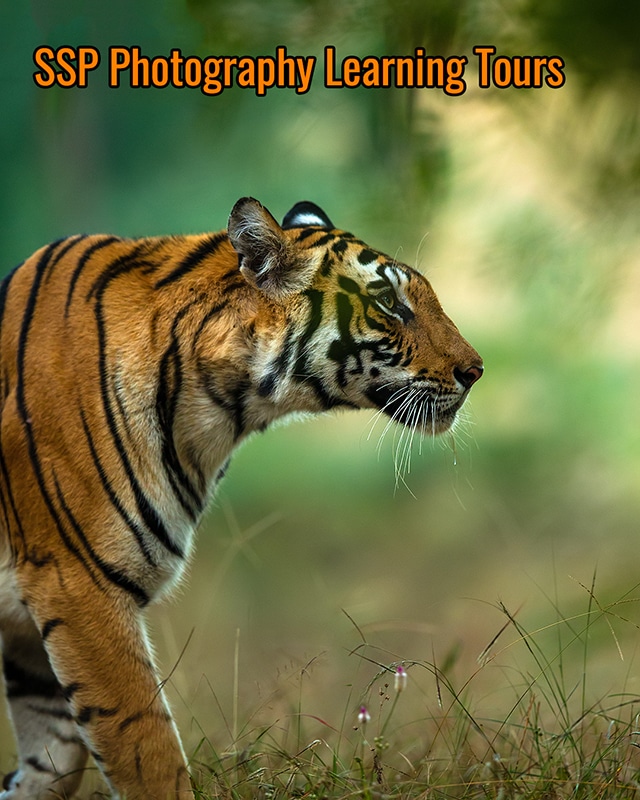
Field Tips for Wildlife Photography

Traditionally identified as an unconventional profession, photography has found novel glory and fame with the advent of web 2.0 and social media. They serve as a global platform to learn, explore and get your skills polished & certified. Online photography courses by experts have the ability to elevate amataur skills born out of a hobby into professional finesse. 

Whether you want to find your footing in the realm of wildlife photography or want to find tips & tricks to polish your existing skills, these expert tips are sure to add a lot of value to your craft.

Tiger/ Ranthambore
Tiger From Ranthambore National Park

Experiment with the ISO 

The native ISO of professional cameras can range from 100 to 6400. And, in some it can go as low as 25. Do not be afraid to play around with the different ISO settings under different lighting conditions for breathtaking results. A good rule of thumb for wildlife photography is to set your ISO around 400 to 800. This range allows for the perfect shutter speed to capture swiftly sprinting animals in the wild. Be wary of the fact that higher ISO tends to introduce more noise into your shot, giving it a more pixelated appearance. This noise can be removed in post-production.

Reddy Shelduck
Ruddy Shelduck shot at ISO 400

Depth of Field

Balancing your depth of field between f2.8 and f4 can render noise free photographs. Some of the most striking wildlife portrait shots have been captured with the depth of field ranging from f2.8 to f5.6. This range gives a shallower depth of field creating the coveted blurry background. The shorter the camera-subject distance, the shallower the depth of field. 

Manipulating your angles to create more distance between the subject and the background can also create a beautifully blurred effect. For example, clicking your subject from a lower angle close to the ground extends the background behind the subject. While clicking them from a top angle the ground becomes the background, thereby, reducing the distance. Resultantly, it fails to bring in the blurred out effect.  

Spotted Deer
Spotted Deer shot using 400mm at f 2.8

Increasing the focal length of your lens can is also a tried and tested method of creating a blurry background with a shallow depth of field. On the other hand, to shoot in landscape, go for a deeper DOF ranging from f8-16.0.

Adjusting the light settings

While shooting with the high key technique, make sure the midtones and shadows are not dominant in the scene. Depending upon how much of your image you’re trying to capture in the high-key mode, control the overexposure accordingly. Keep the ISO of your camera at 100 or below. 

High-key photography, although a technique best used in controlled environments, creates stunning photographs in the wildlife. An overcast day is perfect for trying out high-key photography in the wild. With maximum pixels concentrated in the shadow area, opt for an appropriate spot or partial metering mode. Choose your subject carefully for this technique. Animals with darker tones and patterns make for great subjects. 

High key image of Indian Peafowl
High Key Image of Indian Peafowl

Camouflaging during wildlife photography

A lot of times, in order to get closer to your subject, your profession will need you to blend in with the environment that you’re shooting. Invest in camouflaging gears like:

A lot of times, in order to get closer to your subject, your profession will need you to blend in with the environment that you’re shooting. Invest in camouflaging gears like:

  • Bag Hide
  • Lens Coat
  • Travel Hoods
  • Fingerglass Gloves
  • Camera Body Skins
  • Tripod Leg Protectors
  • Camera Rest Bean-bag
  • Camo Patterned tent
  • Classic Khaki Photographer’s Vest

A photo blind also allows you to camouflage and photograph wildlife in its natural habitat. Locate your blinds in places like holes, dens and food sources.

Lenses to opt for:

While choosing lenses for wildlife photography, go for the ones with a focal length of 300 mm or above. In case you’re shooting with a DSLR, lenses with a focal length ranging from 70-300 mm would also serve you the purpose. Mirror-less camera lenses provide advantages of autofocusing with moving subjects. With no need for lens calibrations, these lenses have a silent shooting mode while maintaining fast frame rates. With an in-body stabilization (IBIS) feature, mirror less camera lenses track the camera’s lateral motion and shift the sensor according to the motion.

Composition

You’ll not want to scare your subject away by going too close, isn’t it? Choose a lens which has a higher degree of magnification, so you can shoot from a distance without disturbing the animals. Lenses also help you to isolate the landscape details, alongside providing image stabilization.

For capturing a shot that has an impact, use the rule of thirds. Focus on the elements that you want to keep in the composition and the ones you want to be left out. Avoid tight photography composition to refrain from making the subject appear suffocated.

Composition/ Indian Peafowl
Indian Peafowl

To enhance your knowledge about everything, from wildlife photography gears to techniques that help you capture best shots, enrol for courses at Sudhir Shivaram Photography. 

About SSP

5 REASONS WHY YOU SHOULD ATTEND SUDHIR SHIVARAM’S PHOTOGRAPHY LEARNING TOURS

https://www.facebook.com/sudhirshivaramphotography/
https://www.facebook.com/sudhirshivaram
https://www.instagram.com/sudhirshivaram/
https://twitter.com/sudhirshivaram
https://www.youtube.com/sudhirshivaramphotography
https://www.linkedin.com/in/sudhir-shivaram/

CONTENT

Talk @ National Academy of Direct Taxes, Nagpur

It’s not exactly pleasant news when the taxman asks you to speak up. But Sudhir did speak up, addressing not one but a whole class of in-training taxmen. The prestigious National Academy of Direct Taxes at Nagpur is the apex training institution of the Indian Revenue Services. Sudhir was invited to be a part of their annual cultural fest, ANUBHUTI 2017.

Anubhuti 2017
National Academy of direct taxes

He conducted a photography workshop for the numerous photography hobbyists and enthusiasts there who were keen to learn some tricks of the trade from him. The workshop included a presentation on wildlife photography in general, Sudhir’s journey as a hobby to professional wildlife photographer/teacher, and tips and tricks of wildlife photography on August 29, 2017. This was followed by a short field outing the next day, where the trainees got a hands-on experience of shooting outdoors.

Sudhir with trainees

It was as much an honour for Sudhir to address such an accomplished group of youngsters as it was enjoyable for them to learn from their favourite photographer. By the looks of it, he will be pulled up every now and then by these taxmen.

Everyone shooting in the field outing

CONTENT

5 REASONS WHY YOU SHOULD ATTEND SUDHIR SHIVARAM'S PHOTOGRAPHY LEARNING TOURS

Guest post by Camilla Malvestiti
www.tigersinthewild.org

A few years ago, the tiger changed my life. The call of the jungle, the sheer thrill of tracking the most elusive of cats and an innate stubbornness made me realize that it was time to leave my routine as a vegan chef in Paris and move to India. 

Sudhir Shivaram Photography
Junabai Cub at Tadoba Andhari Tiger Reserve

It all started with a personal project on writing and photography : Tigers in the Wild.

In January 2017 I saw my first wild tiger in Ranthambhore and got hopelessly hooked on both stripes and long tele lenses. 

Very soon, I was in one of Sudhir Shivaram’s photography learning tours in Tadoba Andhari Tiger Reserve. Little did I know that it would only be the starting point of a great learning experience with one of India’s most talented wildlife photographers and an amazing teacher. 

So why should you attend one of Sudhir’s workshops ? 

  • 1. Let out your passion for wildlife photography and get carried away
Sudhir Shivaram Photography

Sudhir started his professional journey after deciding to quit his corporate job to follow his passion for wildlife photography. 

Not only this passion shows, it’s also contagious. 

By signing up for one of his workshops you’ll surely end up with all the technical information on how to become a confident photographer, as well as getting inspired to follow your dreams. 

  • 2. Visit some of the country’s best wildlife destinations with experienced drivers and guides while making new friends
Sudhir Shivaram Photography Bandhavgarh Tiger Reserve
Sudhir with Gudda (Naresh Singh), one of the best drivers / naturalist at Bandhavgarh Tiger Reserve

Sudhir organizes intense learning workshops which require a lot of work but are also great fun. 

Believe me, you won’t mind the 4:30 am wake up call to be first in line in front of Bandhavgarh’s hottest gate for tiger spotting. Nor you’ll be able to withdraw from passionate evening discussions after having enjoyed amazing food. 

Sudhir Shivaram Photography Bandhavgarh
Always leave early to be the first in the line for the safari

While driving in the park, you’ll experience the skills of some of India’s most experienced drivers and guides. In their hands, the game of tiger tracking is as smooth as it gets. Let the magic of the forest unfold under your eyes and concentrate on making images.

Sudhir Shivaram Photography Kanha
Tigress MB3 with her cub at Kanha Tiger Reserve. Photo by Camilla
  • 3 – Learn how it works, but most of all start finding your style

One of Sudhir’s most famous catchphrases is “Move away from taking images to making images”.

Learn all about technical principles, the paradigm of photography theory, master the rules. Then break them. Experiment. Rules are there to be smashed. Just saying.

  • 4 – Step out of your comfort zone, in a safe environment

Learn how to critique an image and give valuable feedback. Sudhir organizes a healthy photo competition during each workshop. While finding time to review the images taken during the day might be a daunting task for those who tend to overindulge on the blasting of their shutterspeed, an honest peer-to-peer evaluation will give you invaluable insights on your photography.

Sudhir Shivaram Photography
A healthy competition is organised among participants of the workshop.
  • 5 – Be part of an active, benevolent online community

Let’s keep in touch. How many times have you heard or told this phrase but haven’t really followed up ? Life kicks in and with it all the time-consuming daily activities. Sudhir’s team devotes quite a huge part of their working hours to the animation and maintain of his online community. They encourage WhatsApp and Facebook groups, theme competitions and an overall active dialogue to clear all your doubts and help you continue learning even after the workshop has ended.

Voilà, these are reasons which have made me a big fan of Sudhir Shivaram’s photography learning tours!

https://www.sudhirshivaramphotography.com/photography-courses/photo-tour/

Guest Post By Camilla Malvestiti
www.tigersinthewild.org

CONTENT

The Definitive Guide To Post-Processing

There are many guides to learn about post-processing in photography.

Also there are many ways to post-process the images.

But when you know how to use the knowledge of them tactically, you can make a difference.

That is what you are going to get in my definitive guide of post processing in photography using ACR (Adobe Camera RAW) and Photoshop.

You are going to learn:

  • The very basics of post processing (both RAW processing and JPG processing).
  • Why post-processing is important
  • Dos and Don’ts
  • Which step in post processing affects what
  • How to do post-processing the right way

You are also going to find out whether post-processing is image manipulation or image correction.

Before we dive into the guide, go through my post-processing tutorial using Adobe Camera RAW.

Let’s start with knowing what post-processing actually is…

What is post-processing in photography?

Tiger

Post-Processing refers to image editing in photography. It is an integral part of digital photography. And understanding the basic workflow will help you get the best out of your captured images.

Why do we have to post-process an image?

Personally, for me, post-processing is not image manipulation but image correction. The digital cameras have limitations with the dynamic range and the colors/tonality/contrast it can capture. Our human eye is much more capable of viewing the objects.

So when we click images, the chances of getting images as they are for the human eye are less.

Hence post-processing is needed to match the image to what you saw in the field.

DON’Ts in post-processing

don'ts in post processing

I follow basic post-processing. But I do not digitally alter or manipulate my images. For me Post-Processing is – show what you saw in the field, nothing more and nothing less. Of course, you can enhance the image a bit. It is like doing makeup and going to an event or party, but do not get a plastic surgery done. Of course, if someone wants to manipulate the image to make it look more beautiful, it’s an individual choice and nothing wrong in that.

Things I avoid in post processing:

  • Images, where the subject has been cut out and placed in a different background,
  • Morphed images
  • Combining two images of the same subject into one
  • Adding elements that were not originally preset while shooting.
  • Removing elements from the image which originally existed.

Remember, I do not want to show what I did not see in the first place. I just work on showing others what I see with my eyes. This opens door to what we have to do in post-processing.

DOs in post-processing

Depending on the photographer expertise and experience, it may always not be possible to get everything right the first time in the camera. We may commit some minor mistakes while photographing. We need to correct them in post-processing. Basic post-processing which I follow would generally include the following:

  • Crop and Straighten
  • Colour Correction
  • White Balance
  • Exposure Correction
  • Contrast and Clarity
  • Sharpening
  • Levels adjustment

Let’s get into knowing where we use the above steps individually..

#1 Crop & Straighten

straightening the image in post processing

Even though we take great care while capturing an image, there are chances of not getting image as we want, especially the composition aspect.

This may result in getting unwanted pieces of information at the edges and the image may get titled a bit.
In that case, we crop and straighten the image to clean up and correct any issues with composition.

#2 Colour Correction

color correction

Sometimes we may not get the colour of the image as we want. In that case we need to make corrections though it needs some expertise.
In that case, we can correct any colour casts and ensure the image colour is as accurate as possible.

#3 White Balance

white balance

White balance is the colour temperature of that image and is one of the parameters responsible to get you good colours in your image. Generally a lot of photographers keep this setting in auto white balance and hope to correct it during post processing. It is not a good practice as I always advice to get it right the first time out of the camera.

But when the things don’t fall into the place as we want, we can always correct that while post-processing an image.

#4 Exposure Correction

Exposure Correction

In some cases, underexposed and overexposed images are not desirable. When the image is either underexposed or overexposed we make exposure correction while post-processing. We perform this step to bring the optimal variant of the image.

Exposure correction improves the overall tonality and dynamic range of the image.

#5 Contrast

contrast adjustment

While taking photos, sometimes we need to get sharp images. In that case, to get sharp images we increase contrast. This can be performed using various algorithms in photoshop editor.

To sum up the points we perform this step to bring back any missing punch and bring out emphasis and detail.

#6 Sharpening

sharpening the image

Sharpening the images gives them the professional finish. Because, we can display images at their best by sharpening. It more clearly reveals the details of an image.

So we sharpen the images where necessary to bring out any key details.

In photoshop editor, we make use of all the above things to show the image at its best. Now I will take you through the process that I follow to edit photos in ACR and photoshop. It is not necessary to apply all the changes suggested. You decide what makes sense for your image and make the corrections accordingly.

RAW processing using Adobe Camera RAW: How to edit photos professionally using Adobe Camera RAW

In this section, I will take you through the step by step process for RAW image processing. We are going to touch the image in all aspects(stated above) one at a time to bring its best version out.

Here are the steps to follow if you are using Adobe Photoshop CC. (there may be slight variation in the version you use)

Setting the White Balance:

First and foremost thing to consider is white balance. Set the White Balance to match the actual scene.

In Adobe Camera RAW you can use the drop down to choose one of the presets (Daylight, cloudy etc).


The best way is to use the temperature slider to choose the value to get the correct lighting / colours in your image.

In case there is a slight colour shift even after setting the correct WB, you can use the Tint slider to adjust it. It is present just below the temperature slider.


The other basic settings used to correct the image in Adobe Camera RAW:

The below image has the other basic settings that we need to adjust. It has sliders to set the desired value for getting an optimal image.(perfect image)


Exposure:

I talked about exposure in my article on histograms. This will give you a clear idea about underexposed and overexposed images.

Use the exposure slider in case you want to overexpose or underexpose your image.
When you are making changes using the slider, you need to keep a watch on the histogram which is displayed on top of the tools and ensure the graph stays within the extremes.

Contrast:

Use the contrast slider to give a better punch in the image. This slider increases the colour depth in your image.

Highlights:

If the Whites in your image are overexposed, you may use highlights slider to get back some details in the whites.

Shadows:

Shadows slider is the opposite of highlights. You can get back the details in the shadow or dark areas of your images by using this slider.

Whites:

Whites slider increases the brightness of only the whites in your image.

Blacks:

Blacks slider is also responsible for increasing the bit depth. This slider is very useful for landscape images which have a lot of haze.

Clarity:

Clarity slider brings out more details in your image. If your original image is pretty sharp, then avoid using this tool. Play around with it to get a feel.

Vibrance:

Vibrance slider increases the saturation of only the vibrant colours in your image and not everything. I always use this compared to Saturation.

Saturation:

I avoid using saturation slider. This increases the saturation of all the colours in your image. We don’t want to do that.
DO NOT overdo any of the above settings. Use them minimally to improve upon a good image.

Converting and saving in Adobe Camera Raw

In Adobe Camera RAW, you need to put the below settings before saving the image. Click on the link which is shown at the bottom of the ACR tool:

Converting and saving
In Adobe Camera RAW, you need to put the below settings before saving the image. Click on the link which is shown at the bottom of the ACR tool:


The key settings to keep before saving in ACR are:

  • Under the Color Space, Keep the space like ProPhoto RGB or Adobe RGB
  • The Depth can be set to
    • 8 bits/channel for any web-based posting (FB, Instagram, Flickr, etc).
    • 16 bits/Channel, if you are planning for print.
  • Under Image Sizing, keep Resize to fit as default (box unchecked)
  • You will have to set the image resolution based on your end requirement.
    • For web-based posting (Facebook, Flickr, Instagram, etc) keep the Resolution as 72 pixels/inch (honestly it does not matter for web).
    • For prints, you need to keep the Resolution at around 300 pixels/inch and keep the image dimension as per the print requirement.
  • Rest all the settings, keep to the default shown.

Note: All the above is using Adobe Camera RAW. Similar settings will be available in Canon DPP or Capture NX.

JPG Processing Using Photoshop

After doing necessary changes in Adobe Camera RAW, it is time for JPG processing in photoshop. We do the initial photo editing in ACR cause it’ll make further editing in photoshop easy. Here is the step by step process for editing image in photoshop.

Step 1: Photoshop Settings | JPG Processing Using Photoshop

Before proceeding on jpg processing using photoshop, it is important to make these one time settings in photoshop:

  1. From the menu, choose Edit->Colour Settings and enter the below values
  2. Enter these values:


I will breakdown the necessary things, you need to do here, for you. We need to customize only in the settings, working space and colour management policies.

  1. Settings: Use the drop-down menu and choose “Custom“. You can name these settings as you want to distinguish easily.
  2. Working Space:
    1. RGB: ProPhoto RGB (if you do not have that, then choose Adobe RGB (1998))
    2. CMYK: Leave it to U.S. Web Coated……
    3. Gray: Gray Gamma 2.2
    4. Spot: Dot Gain 20%
  3. Colour Management Policies:
    1. RGB: Convert to Working
    2. CMYK: Preserve Embedded Profile
    3. Gray: Preserve Embedded Profile
  4. Keep the rest of them to the default.

Color Management Policies:
RGB: Convert to Working
CMYK: Preserve Embedded Profile
Gray: Preserve Embedded Profile

Rest, keep it to the default.

Once the above values are entered, you need to save it (This is a one time setting). Click on Save, give any name you would like to save it as, then enter the description regarding this profile you are saving and that’s it.

Step 2: Cropping | JPG Processing Using Photoshop

  1. Open the image in Photoshop
  2. Go to the Crop tool.
  3. Enter the width and height to crop in pixels or inches (for web choose around 1920 pixels on the longer side for horizontal images and around 1200 pixels for vertical images). Be sure to enter as 1920px (without the px, by default it will be inches)
  4. Drag over the area to crop and hit enter.

Step 3: Level Adjustments | JPG Processing Using Photoshop

1. Go to Image->Adjustments->Levels


There are three triangles as you can see in the above image:

  • The left triangle is to adjust shadow details
  • Right triangle is to adjust highlights
  • The centre triangle is to adjust brightness/darkness

.

Drag the left triangle to adjust it with the start of the graph. That should deepen your image.

Check how good the image looks visually and adjust accordingly.

You need to hold down the key (or Option key for Mac users) and drag the left or right triangle to make adjustments.

When you use the slider, a small amount of details will start to appear and you need to stop there.
You can use the centre slider to darken or brighten up the image.

Step 4: Vibrance (or Saturation) | JPG Processing Using Photoshop

Go to Image->Adjustment->Vibrance to increase the vibrance.

In case you do not have vibrance, then use saturation.

If you have vibrance slider, keep it to 22 or below.
if you have saturation (instead of vibrance), keep the amount to below 13.

Note: DO NOT make the above correction if you have already done this as a part of your RAW processing.

Step 5: Sharpen Image | JPG Processing Using Photoshop

1. Go to Filter->Sharpen->Smart Sharpen
2. Enter the radius as 0.3 for web-based posting and 1.3 for print (processed at 300dpi)
3. Now, keep incrementing the amount based on how much sharpening you need. Typically an amount between 70-100 is fine depending on how sharp or unsharp your original image is.
4. Keep “Remove” drop-down option to Gaussian Blur.
5. Rest of the values – keep it to default.

Step 6: Saving for e-mail/Web | JPG Processing Using Photoshop

1. Once the image is ready, go to Edit->Convert to profile
2. Make the “Destination Space” profile: sRGB IEC61966-2.1
3. Keep the others to default.
4. Hit Ok.
5. Now File->Save As, give the file name, keep the Format to JPEG. Make
sure under colour, you see the ICC Profile as sRGB IEC61966-2.1, if you don’t create a convert profile, it will be your working profile, which is ProPhoto RGB or Adobe RGB.
6. Once you say ok, in the JPEG Options, change the quality to 12 depending on the Size which is displayed below.

The above are the steps which I have been following for editing images in photoshop. This is how you can edit photos professionally using Adobe Camera RAW and Photoshop.Which part of the process do you like the most? Did I miss something? Do you have any questions? Let me know by commenting below.

There are other ways to achieve the same results recommended by other photographers. Feel free to choose the steps comfortable for you.

Happy Processing!

CONTENT

Bandhavgarh Photography Tour Nov 2017

Moments from Bandhavgarh Photography Learning Tour – Nov 2017
This was the first photography learning tour for the season apart from the recently concluded parents & kids workshop. The previous workshop was a runaway success with kids and parents having a fantastic time at the workshop with loads of fun and Tiger sightings.
The expectations of this workshop were a bit high in terms of Tiger sightings as the previous group had some awesome sightings. In all our photography learning tours we hire the best driver and guides to maximize the opportunity of good photography, be it Tigers or the commoners.
The tour started off with a few participants arriving earlier as they had a long overseas travel. The couple John and Barbera had come all the way from the US and the day of the arrival was Barbara’s birthday. We made sure to make it a special day for her by arranging bush dinner and the tribal dance which we had organized for our kids group.
dinner in bandhavgarh
Day 1 of the tour was more of relaxing time for me as the participants started arriving through out the day as the parents/kids workshop participants left. Since a few of them arrived in earlier, we organized a safari in the afternoon to the buffer area. Typically our workshop starts on a Wednesday as the park is closed in the afternoon, and there is no rush to get onto the afternoon safari. But the buffer area is open for tourism and those who come in early have the option to go there.
The buffer area is quite beautiful with a number of streams.
buffer area in bandhavgarh
Later in the evening, we had the brief introduction session about the entire program and quick tips on the camera related settings for the next day. It was made clear to the participants that the workshop is going to be quite hectic. Though we cannot guarantee any Tigers, what we guarantee is great learning!
After the intro session, it was time for dinner. We always ensure to host our participants at the best of the places so that they are fully relaxed and pampered with top of the line accommodation and food. All our Bandhavgarh workshops are done at Kings Lodge from Pugdundee Safaris. It’s like a second home for me.
Kings Lodge
Kings Lodge
The fun started the next morning with wakeup call at 4:30am. The park opens at 6:15am and we try to be early to get the first glimpse of the Tiger.
Bandhavgarh safari timings are from 6:15am to 11am in the winters. This gives the participants long hours of learning on photography tips and trying out various experiments on lighting and composition. Typically the first 2 hours of the safari are spent tracking the Tiger, as that’s their most active time.
The other fun part of our safaris is the breakfast time at center point. Both Tala and Magdhi zones have center points where we take a break for our breakfast. Though we take good packed breakfast from the resort, the real breakfast we have is from the local small stall selling hot Maggi, samosa, pakodas, bread omelette, poha, coffee/tea and other quick eats.
Centre Point Breakfast
centre point breakfast
Maggi is my favorite fast food and my workshop participants know how crazy I am for Maggi. I make it a point to give more business for these local vendors as their livelihood depends on tourism and is an integral part of the larger picture of saving the forest and the Tiger.
Sudhir eating Maggie
After breakfast we continued with the safari and finally returnd by around 11:30am to the resort.
The participants got a brief rest and we assembled at the conference room for our photography learning. The session included classroom teaching where the core concepts were taught, and we stepped outside to get hands-on training of the same.
The core concepts of photography required for wildlife photography were dealt in-depth – mainly the auto focusing and the advanced concepts of focus point sensors (cross type, non-cross type, dual-cross type) and the focus points to be used for composition (single point, group AF, auto selection etc).
The field exercise gave the participants better confidence on the camera settings and how to use in real life scenario.
Post the session; we had lunch and a small power nap to get back the energy for the rest of the day. The afternoon safari timings were a bit short as it was winter, but we got ample opportunity to make our images.
Back from the safari, we took some rest and again assembled in the conference room for the evening session on photography. Though the workshops are quite hectic, we do have ample time for fun. In the evenings, we organized bush dinner and also local folk dance where the participants joined in for the dance.
local folk dance
The above exercise repeated for the next set of days. By the end of the workshop the participants had some amazing sightings. We saw at least 2 Tigers in every safari and 4 in some. Apart from the Tigers we also shot a lot of common species and landscape.
At the end of the workshop, the participants returned with great memories of the workshop and also made some new friends. Hope to see them back again.
participants of Bandhavgarh workshop
Here’s the group of the Nov 2017 photography learning tour and some moments from the workshop:
participants of Bandhavgarh workshop

CONTENT

Camera and Lens Choice for Beginners

Which is the best camera and lens choice for photography beginners? I like to photograph Nature, Landscape, People, Wildlife, Monuments, etc. I do not have a very high budget and can spend up to INR Rs 50,000.
Sudhir’s Answer: This is one of the most common questions I receive through e-mails, Facebook / Instagram messages etc.
You may want to checkout this article to understand about camera and lens buying guide:
https://www.sudhirshivaramphotography.com/beginners-guide-camera-lens-buying/
Let us consider the various genres of photography and let me help you choose a beginner camera which can cater to most of the below mentioned genres:
Here are some of the common genres of photography:
1. Wildlife
2. Birds
3. Landscape
4. Street
5. Portrait
6. Travel
7. Food / Product
8. Sports
9. Candid
10. Macro / close-up
11. Night
12. General (Beginners)
The important point to remember is – It is the lens which is mainly responsible for the image quality followed by the camera body. Of course, your understanding of the core concepts of photography is equally important, but that’s for another day.
Depending on your budget, invest 80% of your budget on lens and remaining 20% on camera body. Typically, lens is for life and you can keep upgrading or changing the body as technology of the camera improves.
Let us look at various camera and lens options available for your total budget of Rs 30,000 to Rs 50,000 INR.
Note: We recommend that you check with your local dealer or other websites of your choice to know the price of the equipment. The recommended equipment below are in the range of INR Rs 50,000

CANON CAMERA AND LENS

1. Canon EOS 1300D 18MP Digital SLR Camera (Black) with 18-55 and 55-250mm IS II Lens
[Click here to buy the above camera / lens from Amazon]

This is the entry level Canon DSLR and is best suited for your low budget. This has 18MP APS-C CMOS sensor and DIGIC 4+ with 9-point AF with 1 center cross-type AF point. Standard ISO: 100 to 6400, expandable to 12800. This is quite capable of giving you good results depending on the lens you use and your skills. The features provided by this camera are good enough for the various genres I have listed above.
Let us look at the various key features and see how it fares for your photography:
i. Camera Resolution
Approx. 18.0 megapixels – This is decent enough for all the genres of photography. Do not expect to do a lot of crop with this resolution.
ii. Frames per second
Max. approx. 3.0 shots/sec – Do not expect to shoot any kind of action with this camera. Since the internal buffer is also limited, you will not be able to get 3 fps all the time.
iii. Focusing Points
9-point (Cross-type AF sensitive to f/5.6 with center AF point) – Though you have 9 AF points only the centre one has cross type AF point which means all the other 8 are non cross types and hence your auto focusing is going to be quite slow especially in low light conditions.
iv. ISO Performance
Standard ISO 100 – 6400 (expandable to 12800) – You cannot expect good quality images at high ISO from this entry level camera. You need to experiment and arrive at the “shootable” ISO for your camera and remember that in low light photography.

2. Canon EOS 700D 18MP Digital SLR Camera (Black) with 18-55mm IS II and 55-250mm IS II Lens
[Click here to buy the above camera / lens from Amazon]

The Canon 700D is just above the Canon 1300D and is preferred over the 1300D based on your budget. The EOS 700D offers a full and solid basic performance that is clearly one of the best in any entry level DSLR with its high image quality, various functions of Live View AF and movie shooting. The Vari-angle Clear View LCD II with capacitive touch screen capabilities as well as the new 360 degrees rotatable Mode Dial design and Creative Filters will definitely also expand inspiration and creative expression.
The 18-55 and the 55-250 lens which comes with this camera are good enough for all the genres of photography listed above.
Let us looks at the key features of this camera compared to the above Canon 1300D.
i. Camera Resolution
Approx. 18.00 megapixels – This is the same as the Canon 1300D and sufficient for any beginner. Image cropping is not recommended. Of course a bit of cropping in terms of 15-20% crop and retaining 80% of frame is reasonable.
ii. Frames per second
Max. approx. 5.0 shots/second – Much better than the Canon 1300D. If you want to try action photography, this is definitely a notch better than the Canon 1300D. 5 fps is still a limitation for good action photography.
iii. Focusing Points
Nine cross-type AF points (Cross-type AF sensitive to f/2.8 with center AF point) – This is a big plus point over the Canon 1300D. Canon 700D has 9 AF points and all of them are the cross type sensors, meaning your auto focusing is going to be much faster and better than the 1300D, especially for low light situation.
iv. ISO Performance
ISO 100 – ISO 12800 and ISO expansion to “H” (equivalent to ISO 25600) – The ISO range and the performance is much better than the Canon 1300D and helps in case of low light photography.
Additional features of Canon 700D:
Hybrid CMOS AF
The EOS 700D offers ‘Hybrid CMOS AF’, an advanced live-view autofocus technology that enhances the focusing speed while using the LCD (live view), for both still shooting and videos. Through the LCD monitor with that features a capacitive touchscreen (similar to smartphones), you can simply touch to set autofocus on a subject and release the shutter once focus is achieved. For Continuous AF, the subject is constantly tracked and focused in-frame until the shutter button is released.
7.62cm, articulated LCD with touch function
The EOS 700D features a 7.62cm capacitive touchscreen giving you a whole new dimension of usability and control. Touch control is seamlessly integrated into the camera menu system and offers unprecedented flexibility over camera controls such as viewing images, selecting AF points, touch capture, swiping through albums and pinching to zoom in.
Using the vari-angle capabilities simply twist and tilt the monitor for any shooting situation, while the display remains crisp and clear so that the composition can be checked. Shooting remains easy to manipulate even when on a tripod, when shooting vertically or when using a battery grip.

3. Canon EOS 750D 24.2MP Digital SLR Camera + 18-55 IS STM Lens
[Click here to buy the Canon 750D + 18-55 kit lens. Do get the 55-250mm lens separately]

The EOS 750D features a 24.2-megapixel CMOS sensor, and is specifically designed for casual photographers who prize excellent image quality, a simple and user-friendly interface. It offers creative freedom through its new features – 19-point all cross-type AF and creative filters and the new Hybrid CMOS AF III.
The EOS 750D features a stunning combination of the 24.2-megapixel resolution—the highest level ever in the history of EOS entry-level models—and the DIGIC 6 image processor which creates high image quality images that go beyond EOS entry-level model cameras.
If you have that extra budget, then this is highly recommended over the Canon 700D. Though it’s your skills which really matters in making good images, Camera technology does aid in making good images where the missed opportunities are reduced due to the camera technology and capabilities.
Let us look at the key features in this camera.
i. Camera Resolution
Approx. 24.2 megapixels – Better than the Canon 700D and gives you better flexibility when it comes to cropping.
ii. Frames per second
Max. approx. 5.0 shots/sec.
iii. Focusing Points
19 points (cross-type AF point: max. 19 points)
The Canon 700D has 9 AF points and all of them being cross type. The Canon 750D has 19 cross type AF points. This is a major advantage for action photography. With more number of focusing points you also get better flexibility in terms of composition, especially for moving subjects.
iv. ISO
100 – ISO 6400 and ISO expansion to “H” (equivalent to ISO 25600)
Additional Feature of Canon 750D
Hybrid CMOS AF III and Touchscreen LCD
Hybrid CMOS AF III features rapid autofocusing in live view while shooting stills or tracking subjects during movie shooting even when subject is off center of the frame. In combination with touchscreen LCD panel, advance movie recording is made accessible even for entry users.

NIKON CAMERA AND LENS

1. Nikon D3300 24.2MP Digital SLR + AF-P DX NIKKOR 18-55mm f/3.5-5.6G VR Lens + AF-P DX NIKKOR 70-300mm f/4.5-6.3G ED VR Lens
[Click here to get the above product from Amazon]

The Nikon D3300 will surprise you with stunning images that inspire creativity at the next level. Featuring the latest EXPEED 4 image-processing engine, 24.2 effective megapixels, Picture Control and 13 special effects modes in a lightweight, compact body that goes everywhere you do – the D3300 gives you the freedom to explore like never before.
Let us look at the key specifications of this camera:

i. Resolution
24.2 effective megapixels
Compared to the Canon entry level camera, this has a higher resolution and good enough for beginners. Yes, a bit of cropping can be done and yet retaining the quality of the image with this high resolution.
ii. Frames per second
Up to 5 fps – This is decent enough for any kind of action photography, though not great. The internal camera buffer rate will also matter on how long you will be able to shoot at 5fps.
iii. Focusing Points
Can be selected from 11 focus points. This is decent enough for most genres of photography, especially the still photography compared to action shots.
iv. AF-area mode
Single-point AF, dynamic-area AF, auto-area AF, 3D-tracking (11 points)
These are the basic AF modes available. Though not impressive, will do for most of the genres mentioned above, but will be a limitation for wildlife and sports / action photography.
v. ISO
ISO 100-12800 in steps of 1 EV. Can also be set to approx. 1 EV (ISO 25600 equivalent) above ISO 12800; auto ISO sensitivity control available. It is important to experiment on the ISO noise performance

2. Nikon D3400 Digital Camera Kit + Lens AF-P DX Nikkor 18-55mm f/3.5-5.6G VR + AF-P DX Nikkor 70-300mm f/4.5-6.3G ED VR
[Click here to get the above product from Amazon]

Take your first step into the world of DSLR photography with the new Nikon D3400 with SnapBridge*1 — the latest feature that automatically connects your pictures with the world. The D3400 captures every memory in stunning detail with ISO 100-25600, 24.2 megapixels, an 11-point autofocus system and features the ability to shoot Full HD 1080/60p videos. No matter the situation, whatever the occasion, the compact and lightweight D3400 is always ready to immortalise your most precious moments.
I would recommend the Nikon D3400 over the D3300 as it’s always good to go with the latest release of a camera model.
Let us look at the key features of this camera.

i. Resolution
24.2 megapixels – Similar to the D3300
ii. Frames per second
Up to 5 fps – Inline with the Nikon D3300
iii. Focusing Points
Can be selected from 11 focus points
iv. AF Area Mode
Single-point AF, dynamic-area AF, auto-area AF, 3D-tracking (11 points)
v. ISO
ISO 100 to 25600 in steps of 1 EV Auto ISO sensitivity control available.

3. Nikon D5300 24.2MP Digital SLR Camera(Black) with AF-P 18-55 and AF-P DX NIKKOR 70-300mm f/4.5-6.3G VR Kit
[Click here to get the above product from Amazon]

Image quality, connectivity and creative control come together in this lightweight, full-featured DX-format DSLR. The new EXPEED 4 is our fastest image processor to date and complements the 24.2-megapixel CMOS. With its 39-point autofocus, improved white balance and wide sensitivity range, the D5300 lets you shoot stunning photos and Full HD movies. It’s our first DSLR to feature a built-in Wi-Fi®, so you can instantly transfer your photos*. Its GPS function saves location information to your images. A crystal-clear 3.2-inch LCD vari-angle monitor lets you shoot at any angle. With so many innovative features, the D5300 adds new dimensions to photography.
The D5300 is quite impressive and I would highly recommend the D53** series over the entry level model if you can stretch your budget a bit.
Let us look at the key features of this camera.

i. Resolution
24.2-megapixel
ii. Frames per second
Up to 5 fps (JPEG and 12-bit NEF/RAW) or 4 fps (14-bit NEF/RAW)
iii. Focusing Points
39 focus points (including 9 cross-type sensor)
iv. AF Area Mode
Single-point AF, 9-, 21-, or 39- point dynamic-area AF, 3D-tracking, auto-area AF
v. ISO
ISO 100-12800 in steps of 1/3 EV. Can also be set to approx. 0.3, 0.7, or 1 EV (ISO 25600 equivalent) above ISO 12800; auto ISO sensitivity control available

4. Nikon D5500 DX-format Digital SLR + AF-P 18-55mm VR + AF-S 55-200mm VRII Kit Lenses
[Click here to explore Amazon website to buy this product]

The D5500 is thoughtfully designed with an intelligent eye sensor, vast improvements in image review, and a versatile touch screen vari-angle monitor to make it even easier for you to chase your creative pursuits. Its 24.2-megapixel image sensor without an optical low-pass filter (OLPF), is complemented with a powerful EXPEED 4 image-processing engine, all packed in a compact, lightweight body that offers a stronger, more secure grip. Built-in Wi-Fi® allows you to upload your impressive images seamlessly, so you can share your passion for photography with other like-minded enthusiasts.
The D5500 is quite impressive and this is my camera of choice for beginners. It is packed with a lot of useful features and it’s learning curve is a bit steep.
Let us look at the key features of this camera.

i. Resolution
24.2-megapixel
ii. Frames per second
Up to 5 fps (JPEG and 12-bit NEF/RAW) or 4 fps (14-bit NEF/RAW)
iii. Focusing Points
39, Can be selected from 39 or 11 focus points
iv. AF Area Mode
Single-point AF, 9-, 21-, or 39- point dynamic-area AF, 3D-tracking, auto-area AF
v. ISO
ISO100–, 25600, in steps of1/3EV, Auto ISO sensitivity control available

What combination is good?

You can choose the combination of lens + camera from the above list based on your budget. Typically the overall cost will be less when you buy them together as a part of kit lens. Any of the above combination will give you good results. Remember, more than the equipment it is the skills that matter and your understanding of the core concepts of photography – like exposure triangle, metering modes, focusing modes and points etc. The art of composition also comes into picture making. Finally, a good hold on post processing gives you the finishing touches for your image.
Please do subscribe to our online photography tutorials to learn all the core fundamentals of photography and also be part of the community (advanced plan) to participate in various discussions, ask queries related to photography, post your images for review and critique and interact with Sudhir and his team.

online photography tutorials
Best camera and lens choice for beginners

The product finder link on Canon India website is a good place to choose your Canon equipment:
Camera:
http://www.canon.co.in/personal/productfinder?productfinder=personal-eos&languageCode=EN
Lens:
http://www.canon.co.in/personal/products/interchangeable-lens-camera/lenses?languageCode=EN
To explore the Nikon Cameras, please see the Nikon website link below:
http://www.nikon.co.in/en_IN/products/categories/dslr?
To explore the Nikon lens, please visit the below link:
http://www.nikon.co.in/en_IN/products/categories/nikkor?

Newsletter

The All New Community based Photography Learning App

Install the #1 Photography Learning App on your Android and iOS phones.

right-trans

Free Photography Courses

right-trans

Easy Access to all Courses and Progress Tracking

right-trans

Course Completion Certificate

right-trans

New Android & iOS App in real-time sync with Web

right-trans

Genre-Specific Groups to Post images, invite and offer critique

right-trans

& lots more

Get our mobile app

Top Posts

Categories

Events News Photo Photo Tour Photography Tips Product Product Reviews Uncategorized