CONTENT

The Importance Of Light In Photography

What Happens When The Light Strikes Right ?

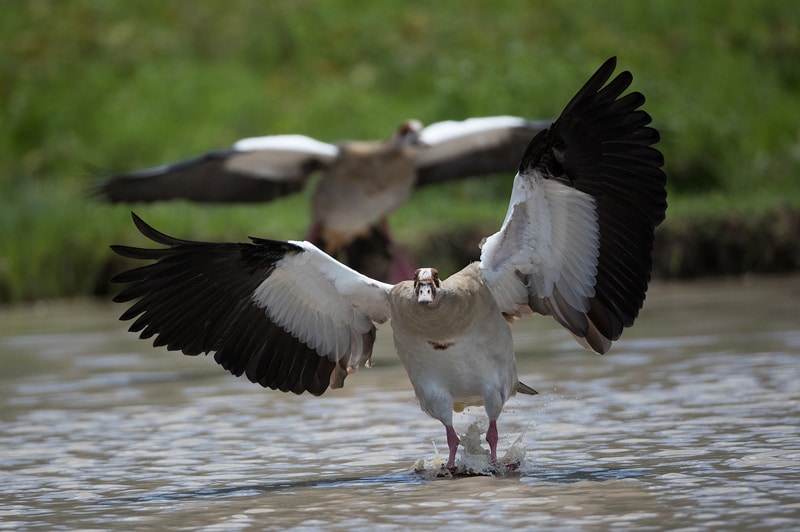
One of the most radical upgrades in the progression of human artistic expression, photography is the art of capturing light using a camera. Over the years, the marvellous evolution of the photographic medium has come a long way. Along with the composition and timing of the shot, the surrounding lighting is an inevitable factor while capturing photographs. From positioning to shaping and manipulating, lighting adjustments determine the color, luminosity, vibrancy and texture of the subjects captured. The best shots largely depend on the lighting setting in which they were captured.

Let’s have a look at how lighting plays such an important role in photography !

spotted deer in backlight

The source of light for photography can either be natural or man-made. Different moods and atmospheres can be created for capturing shots as per the photographer’s imagination. These are the four main categories of light:

Natural Lighting

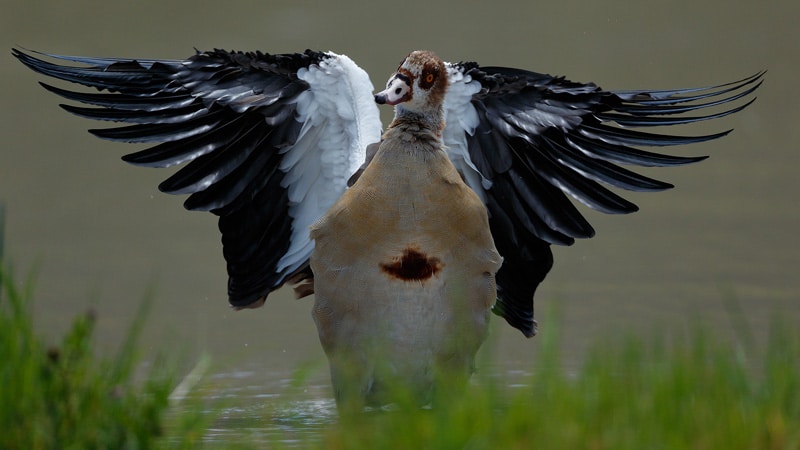
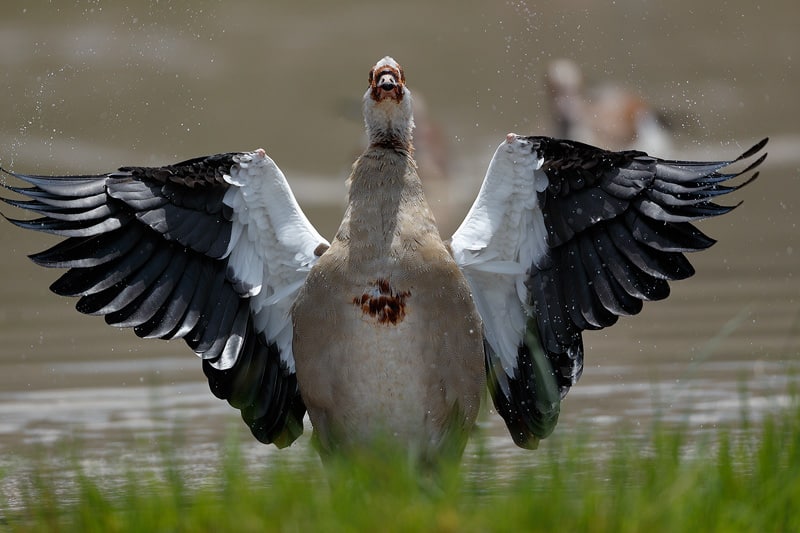
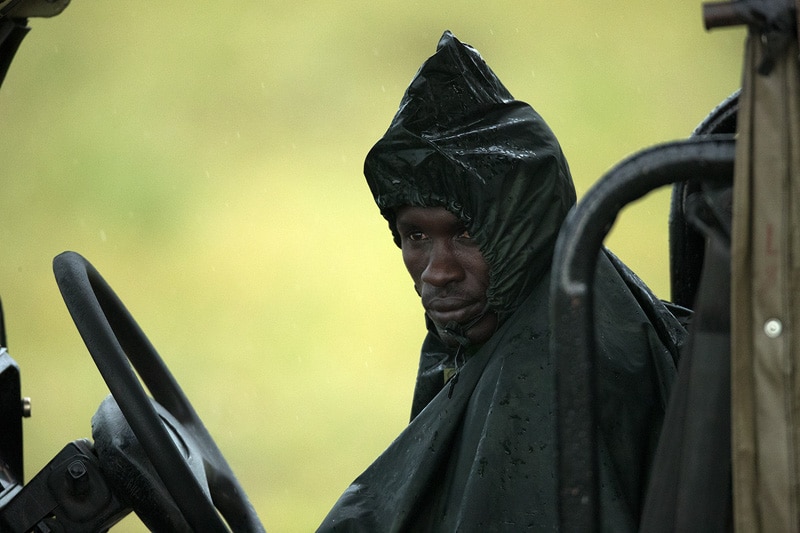
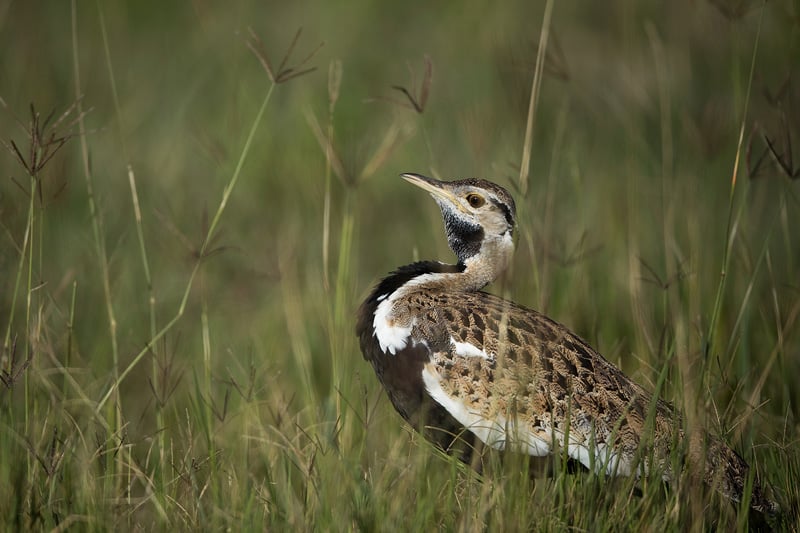
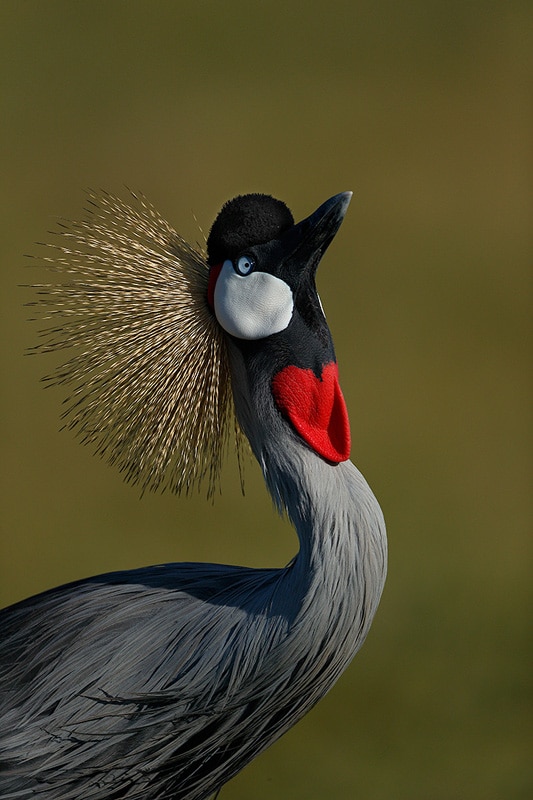
If you wish to capture a shot in natural light, you must have a clear understanding of the angle of the Sun and its prospective effects on the picture composition. Since natural lighting is softer than artificial lighting, try shooting in hours closest to sunrise and sunset. During these hours of the day, the brightness of the Sun is less extreme and it’s positioned off to a slight angle instead of being directly above your subject.

Front Lighting (or Flat Lighting)

If you place the light source directly in front of your subject and not at an angle, the result can be a limited amount of shadows. This lighting technique can be used to click amazing portraits because the light spreads evenly across the photograph. None of the sections is less or more exposed as compared to the others. If you’re planning to explore symmetry photography, the lack of shadows in front-lit shots will make both sides of your subject appear more symmetrical.
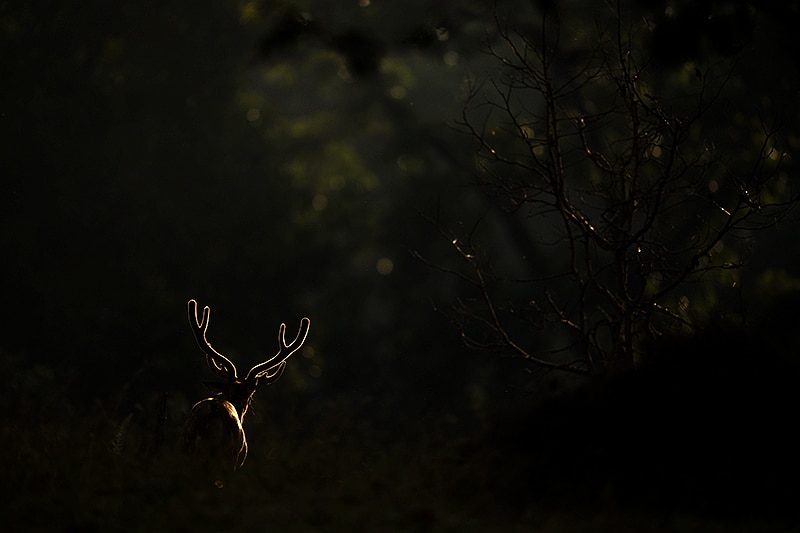
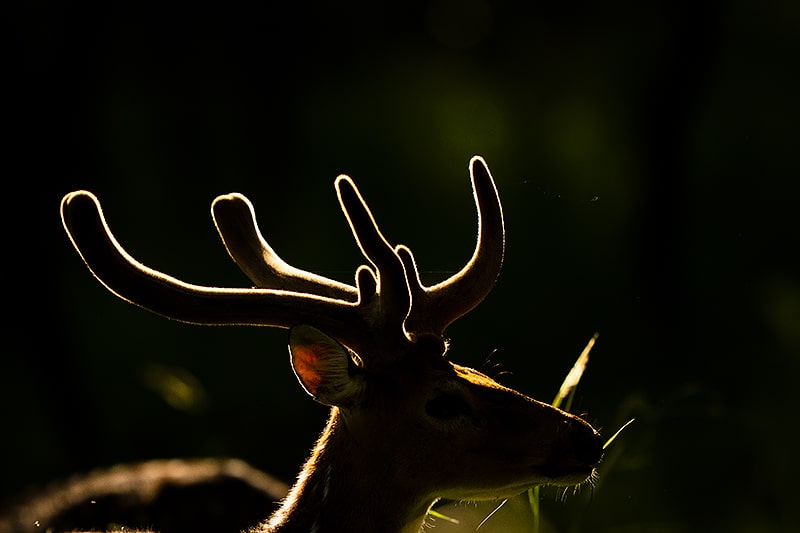
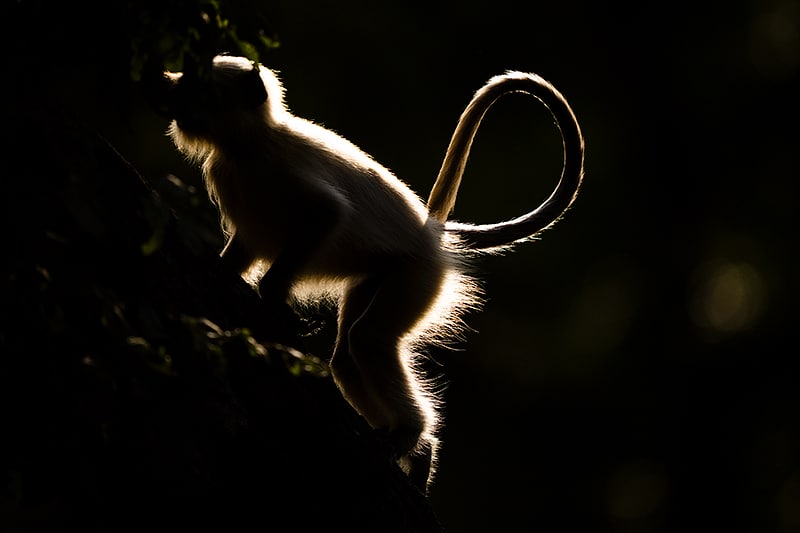
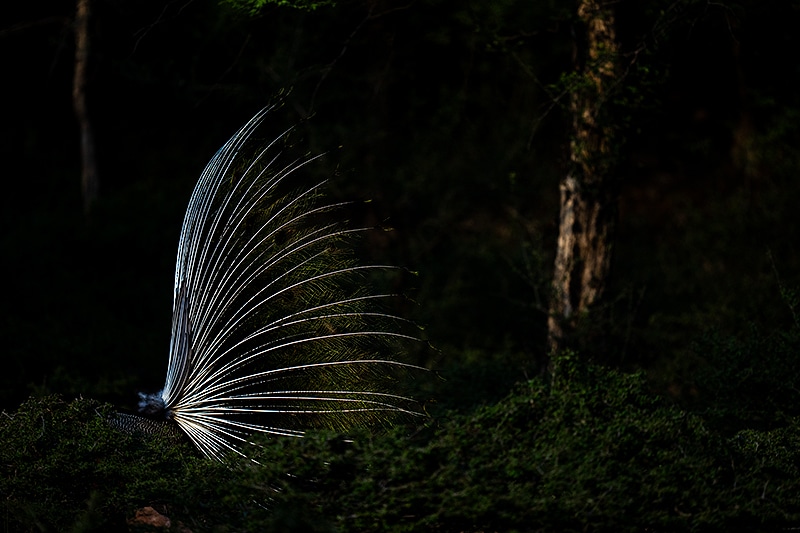
Royal Bengal tiger in the crisp front light

Backlighting

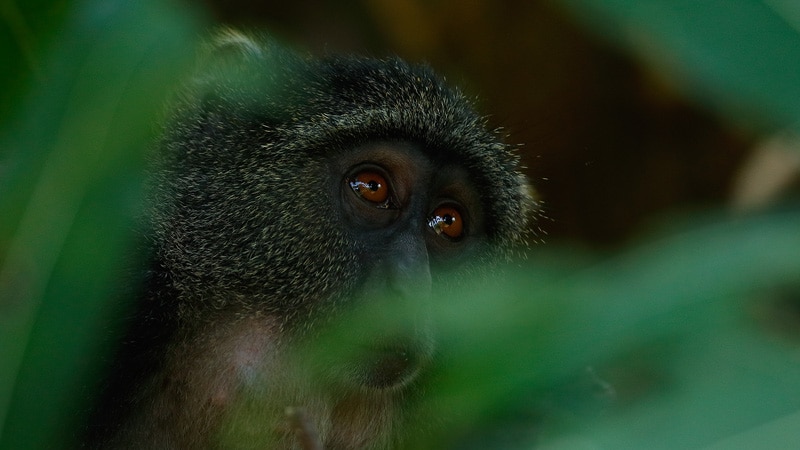
When the light source is placed behind the subject, you have ample room to play with the long shadows and silhouette in your shot. If you wish to see more details in your subject, pull your light diffuser for reflecting some light to the front of the subject from the background.

Backlight on Spotted Deer

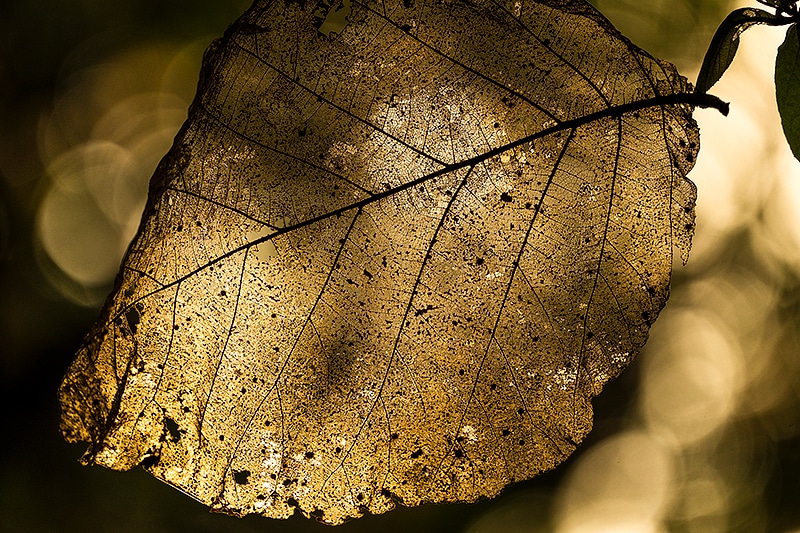
Transmitted Lighting

Using transmitted light and white background is a great technique to bring out as many colors as possible. Translucent subjects such as leaves, flowers, and feathers are best shot with this lighting technique. Enhancing the dramatic mode of the subject, transmitted light photography produces a soft unearthly glow from the visible interior lighting.

This bestows the photographer with a visual perception of extended field depth. For capturing unusual and radiant images with this technique, the photographer and light source must face each other with the subject in between. For achieving optimum results, the backlight source and arrangement are critical factors.

Teak Wood leaf with transmitted light

Reflected Lighting

Unlike the transmitted light, reflected light penetrates just a small distance into the sub-surface of the subject. The directional difference of reflected light from the transmitted light in penetration depth is the reason behind the effects produced in both these techniques. Since the light is reflected off the surface of the subject, the shot is affected by the surface that the light bounces off from.

The reflection of light from the subject can either be specular or diffused. When light hits a surface and is reflected in multiple directions, it is referred to as diffused reflection. In specular reflection, light hits a smooth surface and gets reflected back at the same angle.

Northern Plain Langur under the reflected light

Hard Lighting

If you wish to capture shots in hard light, set up a single point of light that provides a high-contrast look to your photograph by casting distinct shadows. The sharp gradations between the light source and shadow add dimension, complexity, and depth to your subjects. A gritty and edgy look to the shot creates a sense of drama that renders a raw, hard-edged result.

Indian Peafowl shot in hard light

Soft Lighting

This kind of lighting arrangement needs to be created. For creating soft light, set up a light source in such a manner that light bounces off a reflector. You can even capture a soft light shot through a diffusion panel. Soft lighting is more natural-looking than hard light. This lighting arrangement makes your subject appear welcoming, warm, and moiré friendly. Capture portraits, fashion, food, and travel using soft light.

 Indian leopard

Loop Lighting

This lighting technique is especially suitable for portraits. It got its name because of the loop of shadow from the nose that forms on the cheeks. Universally flattering, this photography technique creates an intense yet less dramatic portrait.

Split Lighting

In this type of arrangement, the light source hits your subject straight at an angle of 90°. As a result, one side of your subject gets completely lit while the other side remains in complete shadow. If you intend to create dramatic portraits with a hard light as opposed to soft, split lighting photography is your go-to technique.

Elephant under the split light

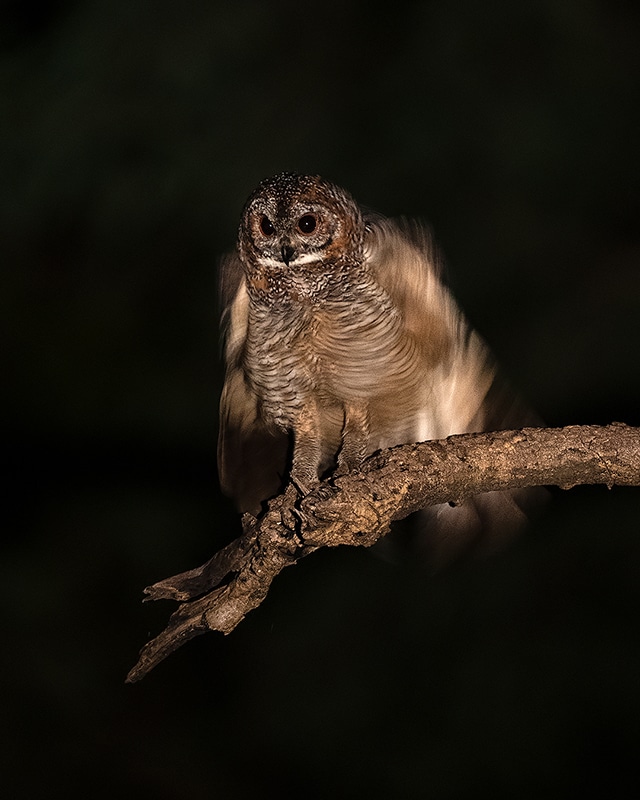
Low Lighting Without Flash

When shooting in low light, you might come across challenging situations like large shadowy areas or bad weather conditions. For capturing desired shots in low light, keep the following in mind:

  • Set a high ISO in your camera. It is indicative of the sensor being very sensitive to the light and hence can be used when you have access to limited light.
  • Shoot in manual mode. This allows you to take control of your camera and manually set the ISO, aperture, and shutter speed. A slow shutter speed will cause less shaking in the camera; which will result in clearer photographs.
  • In low lighting, your camera might have trouble focusing on the subject. If you find it difficult to get a sharp focus owing to the low light conditions, look for areas where there is a little more contrast. An enhanced contrast makes it easier for the camera to focus on the subject.
Mottled wood owl

When it comes to capturing some mesmerizing shots, there isn’t a universal lighting technique. Different scenarios need to be lit differently in order to generate amazing results. The quality and positioning of the light source have a direct effect on the tone, emotion, and clarity of the final shot. Follow these tips while taking your best shots for adjusting the curves and angles in a way that your subject is illuminated and darkened as per your choice.

Want to master the art of lighting in photography? Enroll in our online photography courses TODAY!

Field Tips for Wildlife Photography

Path to Professional Photography

CONTENT

Canon 1DX Mark II

I had the opportunity to test the newly launched Canon 1DX Mark II. Thanks to Canon India for lending me the sample unit. Now, we’ll be doing a hands on review of Canon 1DX Mark II.

Disclaimer: All images have been shot on the Test Sample unit of EOS Canon 1DX Mark II and thus image quality may not be representative of final product. The review is mainly focused on some of the key technology aspects of Canon 1DX Mark II and how it aids in Wildlife photography.

Impressive Technical Specs

Let us look at some of the very important key features in 1DX II, which makes it a great machine for Wildlife. I will be reviewing the camera mainly with respect to these aspects.

  • 20.2 megapixel 5472x3648px, 35mm Full Frame Canon CMOS sensor.
  • Extremely fast 14fps continuous shooting for up to 170 RAW frames, 16 fps in Live View.
  • 4K 60P and Full HD 120P video with Movie Servo AP via Dual Pixel CMOs Sensor
  • 4K Frame Grab For 8.8 mp still JPEG images from 60 fps capture
  • Improved 61-point High-Density Reticular AF II with expanded coverage
  • Up to 61 AF-points supported at f/8 max aperture
  • AF working range down to EV-3
  • Continuous red illumination of up-to all AF points within the camera’s intelligent viewfinder II
  • Improved AI Servo III+ predictive AF algorithim
  • Dual DIGIC 6+ Image Processors
  • ISO 100-51200 with expansion down to 50 and up to 409600
  • 360,000 pixel RGB+IR metering sensor with enhanced precision and performance
  • Flicker Mode adjusts shutter release timing to avoid flickering light issues
  • 3.2 (8.11) Clear View LCD II, approx 1.629 dots with limited touch-screen LCD
  • Customizable Quick Control Screen
  • Large, bright pentaprism viewfinder with approx 100% coverage and 0.7x magnification
  • Dual-Axis Electronic Level with optional dedicated viewfinder display
  • Built-in GPS
  • Magnesium alloy body with Canon’s most dust and weather resistant DSLR design
  • shutter durability rated upto 40.000 cycles
  • Distortion correction and Digital Lens Optimizer added to available for in-camera aberration correction
  • Dual memory card slots supporting one CF (UDMA Mode 7) and CF ast (2.0) memory card
  • Super Speed USB 3.0 for high-speed tethering and image/movie transfer, Gigabit Ethernet support
  • New Wireless file transmitter WFT-E8
  • New LP-E19 Batter Pack with LP-E4N compatibility.

Camera Shooting Speed

The camera can shoot at 14fps and 16fps (live view mode). This is much needed to capture all the action in wildlife. It features a new mirror mechanism designed for highly precise operation with reduced vibration even at incredibly fast speed.Shutter has lightweight carbon fiber blades and can maintain upto 16fps performance without any compromise.


To achieve the high frame rates EOS-1D X Mark II is capable of, and to deliver fast accurate AF, it is vital that there is virtually zero mirror bounce and the mirrors return to their positions as quickly and as precisely as possible. To achieve this, EOS-1D X Mark II features a two-motor system with separate high-torque motors to drive the mirror and shutter cocking. This allows high speed but also isolates the two different stages from affecting each other. The mirror drive motor and shutter cocking motor have a floating support made of an elastic material. This reduces operating noise and ensures there is minimal vibration when shooting.

The low bounce and vibration of the mirror is quite helpful in slow shutter speed photography where we have to shoot in the range of 1/10 to 1/15 of a second. In wildlife we get opportunities very late in the evening where the subject is quite still. With proper support system we tend to use low ISO and shoot a low shutter speed in the range of 1/100 or even 1/25 depending on the situation. 

The low bounce and vibration helps here with minimal or virtually no vibration induced into the images. Canon EOS 1DX Mark II is the first EOS still camera to feature CFast 2.0 card slot in addition to CF card. The unique contacts of the CFast card makes it robust and less likely to suffer bent pins. These cards have a write speed of up to 600MB/s and can allow continuous RAW shooting of 170 full resolution images and unlimited JPG files (limitation is the CFast card size). In case of standard CF cards we get 59 RAW images and 73 RAW images from the UDMA 7 CF cards.

Continuous shooting helps us to capture all the action we need.

20.2 MP Full Frame CMOS Sensor

The heart of the camera, a 20.2 MP full frame CMPS sensor. The CMOS sensor includes gapless micro lenses for enhanced low-light performance. This helps in noise reduction in dark portion of the image even at high ISO.

I have tested the camera in various low light conditions and the ISO performance is quite reasonable till 12,000 and can be easily pushed till 25,600. You can push it further and will need some work to be done in post processing to make it usable.

Low Light Performance 

ISO 8000 Image
ISO 20,000
ISO 8000
ISO 5000 Image
ISO 10,000 Image
ISO 16,000 Image
ISO 25,600 Image
ISO 32,000 image


When you are shooting at very high ISO, you need to keep in mind that any noise appearing in the out of focus area can be easily handled (removed), but watch out for the noise on the subject itself. The contrast and the colours are well retained even at high ISO and can give you pleasing results.

Reliability and Durability

The 1D series is well know for it’s rugged magnesium alloy construction and can be used in harsh conditions with confidence. I have been using the 1D series for a longtime and have never hesitated to shoot in moderate or heavy rains. I love to shoot in monsoons as it gives me nice contrast and vibrant colours.

During my recent visit to Kabini in Nagarhole Tiger Reserve, it started raining heavily (first showers of the monsoon) and without any hesitation I kept the Canon 1DX Mark II and the Canon EF 800mm f/5.6 L IS lens out in the rain. Since it had returned from the dusty Bandhavgarh Tiger Reserve, I gave it a nice shower bath and continued to use it rain. This confidence I have in Canon.


(Photographed this Elephant herd in rain at Waynad Wildlife Sanctuary recently with the complete equipment sticking out of the vehicle in rain).

360K RGB+IR Metering Sensor

The face detection abilities of the 360,000 pixel RGB+IR sensor along with its colour tracking information are passed onto the EOS iTR AF system. On the EOS-1D X Mark II, EOS iTR AF includes the improved algorithms found on the EOS 7D Mark II that greatly enhance the overall subject tracking performance.

In addition to face priority mode, a subject-tracking mode has been added for moments when a face is not always visible, and when the main subject is not a person.

Spot metering now calculates the amount of light reflected from an area of just 1.2 % of the focusing point compared to the 2% in the previous models. This gives you better accuracy for metering and better control over exposure.

For Wildlife I mainly use the evaluative metering and with the combination of the exposure compensation, I get pretty accurate exposure. The contrast and the vibrance of the images out of the box are simply awesome. I process all my images from the Canon 1DX Mark II using Canon DPP and I get much better contrast and colours compared to processing with 3rd party tools where I will have to do extra work to get the same colours, tonality and contrast. Here are some examples to show the colours, tonality, dynamic range and vibrance of the images from Canon 1DX Mark II.

Focusing Points and Focusing Speed

This is the heart of the focusing system in Canon 1DX Mark II. Some of the highlights of focusing aspect of the camera are:
– 61-point High Density Reticular AF II system with 41 cross-type points.
– AF point coverage is expanded in the vertical dimension.
– AI Servo AF now accommodates sudden change in subject speed, better than before.
– AF systems low-intensity limit has been improved to EV-3 and all 61AF points are compatible down to f/8 for excellent low-light performance.

  • The top to bottom measurement of the AF points has increased 24% in the left and right-most AF point groups and 8% in the central group.
  • DIGIC 6+ image processors and Dual Pixel CMOS AF.

Increasing the area covered by the AF points is a much requested feature by photographers, be they professional or amateur. In the EOS-1D X Mark II, the AF points have been placed over a wider area – an 8 percent more vertical expansion in the central area, and 24 percent more vertical expansion in the peripheral area – giving greater freedom in where subjects can be placed when composing.

41 cross-type and 5 dual cross-type AF points further extend the reach of the EOS-1D X Mark II’s focus capabilities. Cross type AF points provide greater autofocus precision over a wider area of the frame ensuring correct focus, important for fast moving subjects. All 61 AF and 41 cross-type AF points are individually selectable.

The number of focusing points, cross-type focusing points, and dual cross-type AF points vary depending on the lens used.
Canon has for the first time released the grouping of all their lenses released as of Jan 2016 which is very helpful for advanced users.
They have created groups based on the number of focusing points which will be available for use based on the charactersitics of the lens.

The list of all the lens released by Canon till Jan 2016 have been provided the grouping information which is very useful for advanced users to know which focusing point will be active and usable when a certain lens is used. It also gives us the information which all cross type, non cross type is available for focusing and use it appropriately. This is a new thing released by Canon in their user guide and is quite useful for advanced users.

EOS Intelligent Tracking and Recognition (EOS iTR) System

The camera has an RGB+IR metering sensor with 360,000 effective pixels (736 x 496 near WVGA resolution). Evaluative metering and evaluative flash metering are based on the information detected by the sensor. The sensor includes IR pixels that detect infrared (IR) light, which helps the EOS Scene Detection System analyse scenes and improve AF precision. The IR pixels, together with the RGB pixels are also used to detect brightness, colour and faces in a scene. In addition to taking distance information into account, the algorithm recognises a subject based on face detection and colour information.
The metering sensor is supported by a dedicated DIGIC 6 processor, which processes all the colour information and face detection data to recognise shooting subjects with outstanding accuracy.
The face detection abilities of the 360,000 pixel RGB+IR sensor along with its colour tracking information are passed onto the EOS iTR AF system. On the EOS-1D X Mark II, EOS iTR AF includes the improved algorithms found on the EOS 7D Mark II that greatly enhance the overall subject tracking performance.
In addition to face priority mode, a subject tracking mode has been added for moments when a face is not always visible, and when the main subject is not a person.
Canon’s AI Servo AF III+ features an AF algorithm that, along with the EOS iTR system, improves the tracking sensitivity in scene where subject movements may occur focusing even in situation where focusing is difficult.

The EOS 1DX Mark II features  AF case study settings to help you choose the most appropriate option for your subject. These case studies provide different setups for the three different AF preference settings of Tracking Sensitivity, Acceleration/Deceleration tracking and AF point Auto Switching. These parameters can be further customised based on personal preferences.
All the above set of features is what makes Canon 1DX Mark II a great machine for fast AF focus capturing every bit of action as it happens without compromising on image quality.
Here are some examples where action happened suddenly and the camera was ready to capture it.

AF Point Selection

Similar to the Canon EOS 1DX, the 1DX Mark II has different options to select the focusing points.

  1. Spot AF
  2. 1 pf AF
  3. Expand AF area
  4. Expand AF area: Surround
  5. Zone AF
  6. Large Zone AF
  7. Auto Selection AF

The Spot AF is extremely helpful in situations when your subject is behind some distractions and you have a very small area through which you can see the subject. The below examples show the capability of this focusing mode to get instant focus on the subject through a small opening or through distractions.

61 Point Expanded Autofocus Area


The increase in the AF area for both vertical and horizontal gives us the flexibility to compose in a  better way and take the focusing point to areas in the frame which could not be reached before.

This is quite helpful in cases of subjects walking head-on. For a vertical composition, we now can choose the lowest or the top most focusing point and continue to have the subject in focus.

61 AF Points, with 21 Cross-type AF Points at f/8

This is yet another great achievement by Canon where we can now use all the 61 AF points with 21 cross-type AF points when we use a 1.4x teleconverter on a 800mm or use a 2x TC with 500mm where the aperture reaches f8. Previously we could use only the centre AF point and could not even move it around for composition. We now have the flexibility to use any of the focusing points and also I have noticed the focusing speed is quite faster compared to 1DX with a converter on the 800mm f5.6 lens.
The contrast, sharpness and colours are still amazing in spite of using a teleconverter on the 800mm.


CONTENT

Field Tips for Wildlife Photography

Traditionally identified as an unconventional profession, photography has found novel glory and fame with the advent of web 2.0 and social media. They serve as a global platform to learn, explore and get your skills polished & certified. Online photography courses by experts have the ability to elevate amataur skills born out of a hobby into professional finesse. 

Whether you want to find your footing in the realm of wildlife photography or want to find tips & tricks to polish your existing skills, these expert tips are sure to add a lot of value to your craft.

Tiger/ Ranthambore
Tiger From Ranthambore National Park

Experiment with the ISO 

The native ISO of professional cameras can range from 100 to 6400. And, in some it can go as low as 25. Do not be afraid to play around with the different ISO settings under different lighting conditions for breathtaking results. A good rule of thumb for wildlife photography is to set your ISO around 400 to 800. This range allows for the perfect shutter speed to capture swiftly sprinting animals in the wild. Be wary of the fact that higher ISO tends to introduce more noise into your shot, giving it a more pixelated appearance. This noise can be removed in post-production.

Reddy Shelduck
Ruddy Shelduck shot at ISO 400

Depth of Field

Balancing your depth of field between f2.8 and f4 can render noise free photographs. Some of the most striking wildlife portrait shots have been captured with the depth of field ranging from f2.8 to f5.6. This range gives a shallower depth of field creating the coveted blurry background. The shorter the camera-subject distance, the shallower the depth of field. 

Manipulating your angles to create more distance between the subject and the background can also create a beautifully blurred effect. For example, clicking your subject from a lower angle close to the ground extends the background behind the subject. While clicking them from a top angle the ground becomes the background, thereby, reducing the distance. Resultantly, it fails to bring in the blurred out effect.  

Spotted Deer
Spotted Deer shot using 400mm at f 2.8

Increasing the focal length of your lens can is also a tried and tested method of creating a blurry background with a shallow depth of field. On the other hand, to shoot in landscape, go for a deeper DOF ranging from f8-16.0.

Adjusting the light settings

While shooting with the high key technique, make sure the midtones and shadows are not dominant in the scene. Depending upon how much of your image you’re trying to capture in the high-key mode, control the overexposure accordingly. Keep the ISO of your camera at 100 or below. 

High-key photography, although a technique best used in controlled environments, creates stunning photographs in the wildlife. An overcast day is perfect for trying out high-key photography in the wild. With maximum pixels concentrated in the shadow area, opt for an appropriate spot or partial metering mode. Choose your subject carefully for this technique. Animals with darker tones and patterns make for great subjects. 

High key image of Indian Peafowl
High Key Image of Indian Peafowl

Camouflaging during wildlife photography

A lot of times, in order to get closer to your subject, your profession will need you to blend in with the environment that you’re shooting. Invest in camouflaging gears like:

A lot of times, in order to get closer to your subject, your profession will need you to blend in with the environment that you’re shooting. Invest in camouflaging gears like:

  • Bag Hide
  • Lens Coat
  • Travel Hoods
  • Fingerglass Gloves
  • Camera Body Skins
  • Tripod Leg Protectors
  • Camera Rest Bean-bag
  • Camo Patterned tent
  • Classic Khaki Photographer’s Vest

A photo blind also allows you to camouflage and photograph wildlife in its natural habitat. Locate your blinds in places like holes, dens and food sources.

Lenses to opt for:

While choosing lenses for wildlife photography, go for the ones with a focal length of 300 mm or above. In case you’re shooting with a DSLR, lenses with a focal length ranging from 70-300 mm would also serve you the purpose. Mirror-less camera lenses provide advantages of autofocusing with moving subjects. With no need for lens calibrations, these lenses have a silent shooting mode while maintaining fast frame rates. With an in-body stabilization (IBIS) feature, mirror less camera lenses track the camera’s lateral motion and shift the sensor according to the motion.

Composition

You’ll not want to scare your subject away by going too close, isn’t it? Choose a lens which has a higher degree of magnification, so you can shoot from a distance without disturbing the animals. Lenses also help you to isolate the landscape details, alongside providing image stabilization.

For capturing a shot that has an impact, use the rule of thirds. Focus on the elements that you want to keep in the composition and the ones you want to be left out. Avoid tight photography composition to refrain from making the subject appear suffocated.

Composition/ Indian Peafowl
Indian Peafowl

To enhance your knowledge about everything, from wildlife photography gears to techniques that help you capture best shots, enrol for courses at Sudhir Shivaram Photography. 

About SSP

5 REASONS WHY YOU SHOULD ATTEND SUDHIR SHIVARAM’S PHOTOGRAPHY LEARNING TOURS

https://www.facebook.com/sudhirshivaramphotography/
https://www.facebook.com/sudhirshivaram
https://www.instagram.com/sudhirshivaram/
https://twitter.com/sudhirshivaram
https://www.youtube.com/sudhirshivaramphotography
https://www.linkedin.com/in/sudhir-shivaram/

Newsletter

The All New Community based Photography Learning App

Install the #1 Photography Learning App on your Android and iOS phones.

right-trans

Free Photography Courses

right-trans

Easy Access to all Courses and Progress Tracking

right-trans

Course Completion Certificate

right-trans

New Android & iOS App in real-time sync with Web

right-trans

Genre-Specific Groups to Post images, invite and offer critique

right-trans

& lots more

Get our mobile app

Top Posts

Categories

Events News Photo Photo Tour Photography Tips Product Product Reviews Uncategorized