CONTENT

Basics of Photography – The Ultimate Tips for Beginners

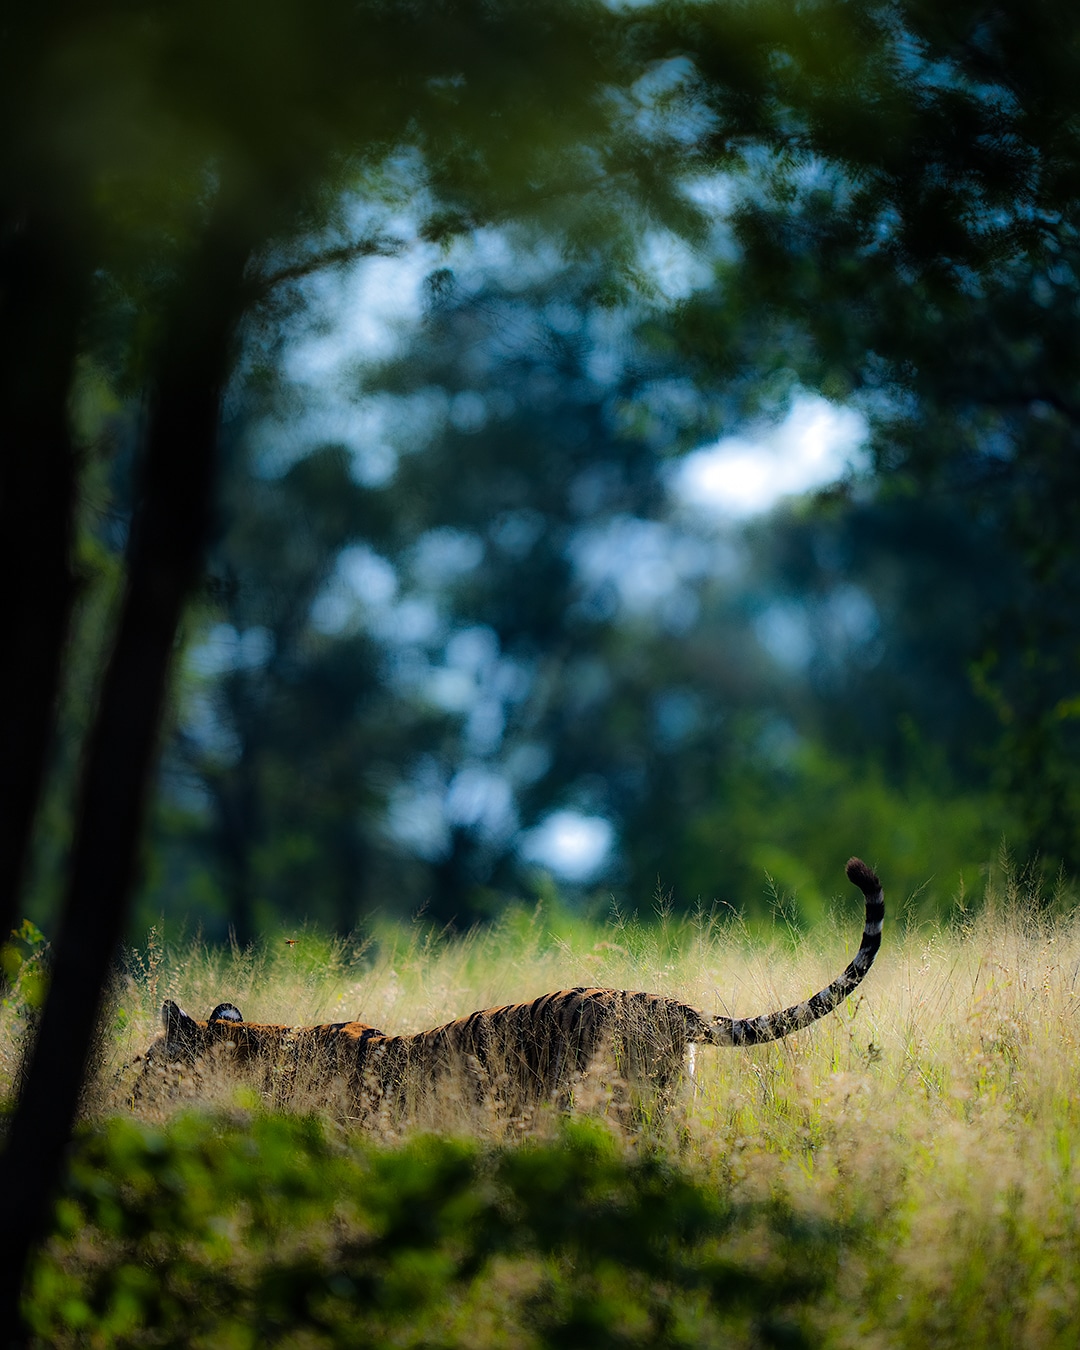
Basic photography is not about what camera or lens to buy. It’s all about you as a photographer to understand the basics of photography and become a better photographer.
Photography is not rocket science. Anyone who has an intention to learn can start clicking great photos with knowledge of some basics. Let’s look at some of the basics of photography you need to know to get started. This is going to be your 101 photography guide for beginners
Consider this image:
Photography basics - Sparrow
This is the kind of image we all shoot as beginners in photography.
Not a great image.
Yes, this has been photographed by me.
But still not a great image.
This is one of my earlier images when I got started.
As you can see, even I used to click shaky, blur images.
In case you want to improve your photography, then you need to get the basics right. The basics of exposure triangle parameters which consists of aperture, ISO and shutter speed is what you need to understand. Let’s understand what it is.
Almost every photographer speaks about the same photography techniques.

Shutter Speed:

Shutter speed explanation by bubble
Shutter speed in simple terms is the duration of time the shutter is open for the light to enter and hit the sensor. It is expressed in seconds such as 1/15, 1/30 or 1/500 etc. This is one of the parameters which controls how much light should enter the camera.
Shutter speed is responsible for freezing the action or creating motion blur in the image. A faster shutter speed like 1/1000 or higher will freeze the action. It depends on how fast the action is happening. Whereas, a slower shutter speed like 1/15 will create motion blur. It is even responsible for the shaky image of hand when we shoot handheld. Snapshot team created a post on the wonders you can create with low shutter speed. This will definitely blow your mind off if you are not aware of the magic the shutter speed can do.
To know about the basics of exposure look at these 2 examples which shows what shutter speed can do to an image.
The below pic has been shot at a shutter speed of 1/500.
water fall image with fast shutter speed
If you observe the above image, it has frozen the water flow. Let’s consider another possibility of the same image when shot with lower shutter speed.
The below pic has been photographed for 20 seconds.
water fall image with slow shutter speed
This image has created the nice silky flow of water. As a photographer, you will have to decide what shutter speed you want to use.

Aperture:

Aperture
Aperture is the size of the lens opening. It is the circular opening in the lens which is responsible for how much volume of light should enter the camera. It is expressed as f/4, f/5.6 or f/8 etc. F stands for the focal length of the lens.
Aperture is one of the parameters which is responsible for the depth of field. The depth of field is that area of a photograph which is in sharp focus. The other 2 parameters responsible for the depth of field are focal length and camera to subject distance.
See the below image and let’s try to understand the role of the aperture.
duck shot with aperture priority
By using an aperture of f5.6, we have created a very shallow depth of field and the background has gone completely out of focus. This was photographed with an 800mm f5.6 lens.
You do not need a very high-end camera/lens to achieve this.
Consider the below image which has been shot with a basic Canon 1200D and 55-250 kit lens.
Butter fly shot with more aperture value
You can observe that we achieved great out of focus background.
How did we achieve such great out of focus background?
Simple:

  1. Lens: 55-250 kit lens. Zoom out completely to 250 mm. This results in longer focal length and shallow depth of field.
  2. Subject distance: Move as close as possible to subject which gives a shallow depth of field.
  3. Small aperture: Used the smallest possible aperture on the lens which is f5.6

From the above images, It’s clear that the images we get don’t depend on the photography equipment you use. They depend on the understanding and use of the basics.

ISO:

ISO example image
In simple terms,
ISO is the sensitivity of the sensor. During film days, it used to contain chemicals which would react to light. That is where the sensitivity of the film comes into the picture. In the case of digital photography, it’s the sensor which reacts to light. Slower ISO takes more time to reach and higher ISO takes less time to react to light.
The drawback of using high ISO is that it creates a lot of noise in the image and hence the image quality goes down. The level of acceptable noise in an image is purely dependent on the camera model. Some of the professional bodies can give you good quality image even at a high ISO of 5000.
As a photographer, you should have to get a good hold on these basic concepts of photography to take your learning forward.
Get the basics of photography right from this post and click awesome images. Which part do you like the most in the whole post? Did I miss something? Let me know through your comments.
You can learn More about all these concepts by subscribing to our online photography tutorials.

Newsletter

The All New Community based Photography Learning App

Install the #1 Photography Learning App on your Android and iOS phones.

right-trans

Free Photography Courses

right-trans

Easy Access to all Courses and Progress Tracking

right-trans

Course Completion Certificate

right-trans

New Android & iOS App in real-time sync with Web

right-trans

Genre-Specific Groups to Post images, invite and offer critique

right-trans

& lots more

Get our mobile app

Top Posts

Categories

Events News Photo Photo Tour Photography Tips Product Product Reviews Uncategorized